How To: Unroot & Relock Your Modded Nexus 5 Back to Factory Condition
Okay, so you're rooted and need to return your Nexus 5 to its stock firmware. Whether it's because you need to send your phone in to the manufacturer to fix a defect or you just want to use the device's over-the-air updating feature, unrooting and returning your Nexus 5 back to its fresh-out-of-the-box state is a fairly simple process with the right tools. Please enable JavaScript to watch this video.
Step 1: Connect Your Nexus 5 to a PCPlug your Nexus 5 into your Windows PC using any USB cable. Make sure the cable you're using has no visible damage to either connector and that it plugs in firmly to your phone, as an accidental disconnect during this procedure could lead to a bricked device.
Step 2: Enable USB DebuggingIn order to get access to this setting, we'll need to unlock the Developer Options menu. To do that, head to Settings, then About Phone. Scroll down to the bottom of this list and tap Build Number 7 times in rapid succession. Note: Take this opportunity to jot down your Build Number, it will come in handy later.From here, back out to the main Settings page and tap Developer Options. Tick the box next to USB Debugging, then select OK from the dialog that appears next.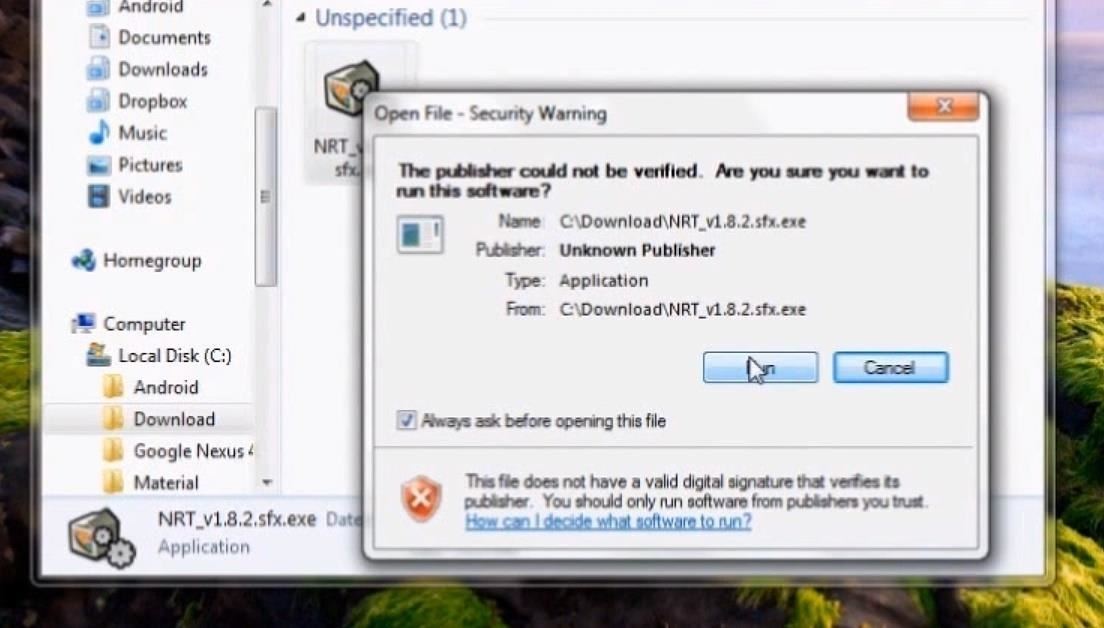
Step 3: Install Nexus Root Toolkit on Your PCFrom your Windows PC, click on this link to download the install file for the Wugs Nexus Root Toolkit app. This is version 1.8.2, but you can always get the latest version on the WugFresh website.Once the download has finished, install by double-clicking the file in your browser's download folder. Click Run on the following window. Follow the prompts for installation, allowing the toolkit to download additional files when it asks.
Step 4: Allow USB DebuggingAs the installation process finishes on your PC, a dialog will appear on your Nexus 5 asking you to allow USB debugging access from the computer you're connected to. Tick the box next to Always allow from this computer and press OK.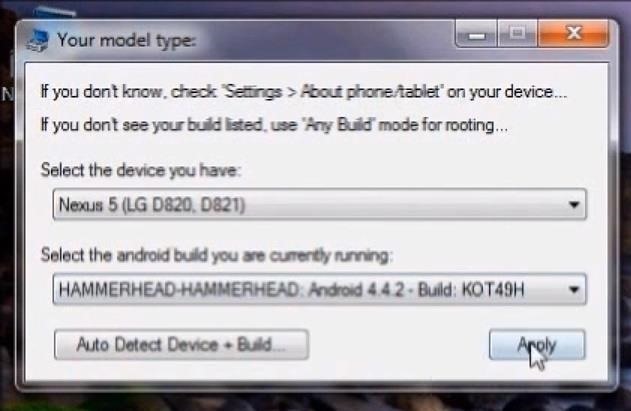
Step 5: Set Up the Root ToolkitWhen the installation is complete on your PC, you will be prompted to enter your phone's Model and Android Build. Enter Nexus 5 as the model, and refer to the build number you jotted down in Step 2 for the Android Build. Next, click the button labeled Full Driver Installation Guide - Automatic + Manual near the top-right of the toolkit's main screen. Follow the instructions provided by the toolkit to install the proper device drivers. On the "Step 3" tab in the dialog box that appears, take note of the Recommended Solution it provides and install the corresponding set of drivers.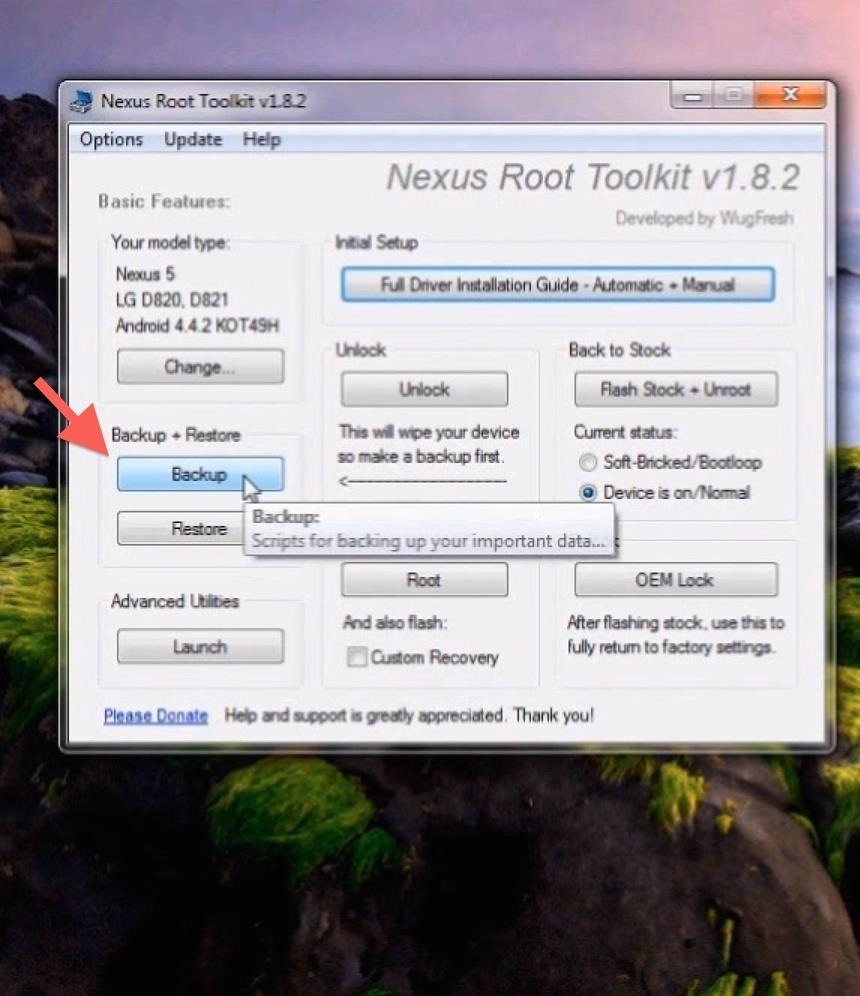
Step 6: Back Up Your Data and Apps (Optional)As you probably remember, the process of unlocking your Nexus 5 deletes all of your phone's apps and data. The same applies when re-locking and returning to stock.There are several methods available to back up your data, but most won't be able to restore anything without root or a custom recovery. The best option to back up your music, photos, videos, and other data is to copy them to your PC temporarily using Windows Explorer. When you have returned to stock, you can then copy these files back to your phone.For backing up apps, however, there is an automated option provided by the Nexus Root Toolkit. Simply click Backup from the toolkit's main menu, then select Create Android Backup File on the following screen. Follow the toolkit's instructions through the backup process. Be sure to note the save location of the backup file so that you can find it when it comes time to restore.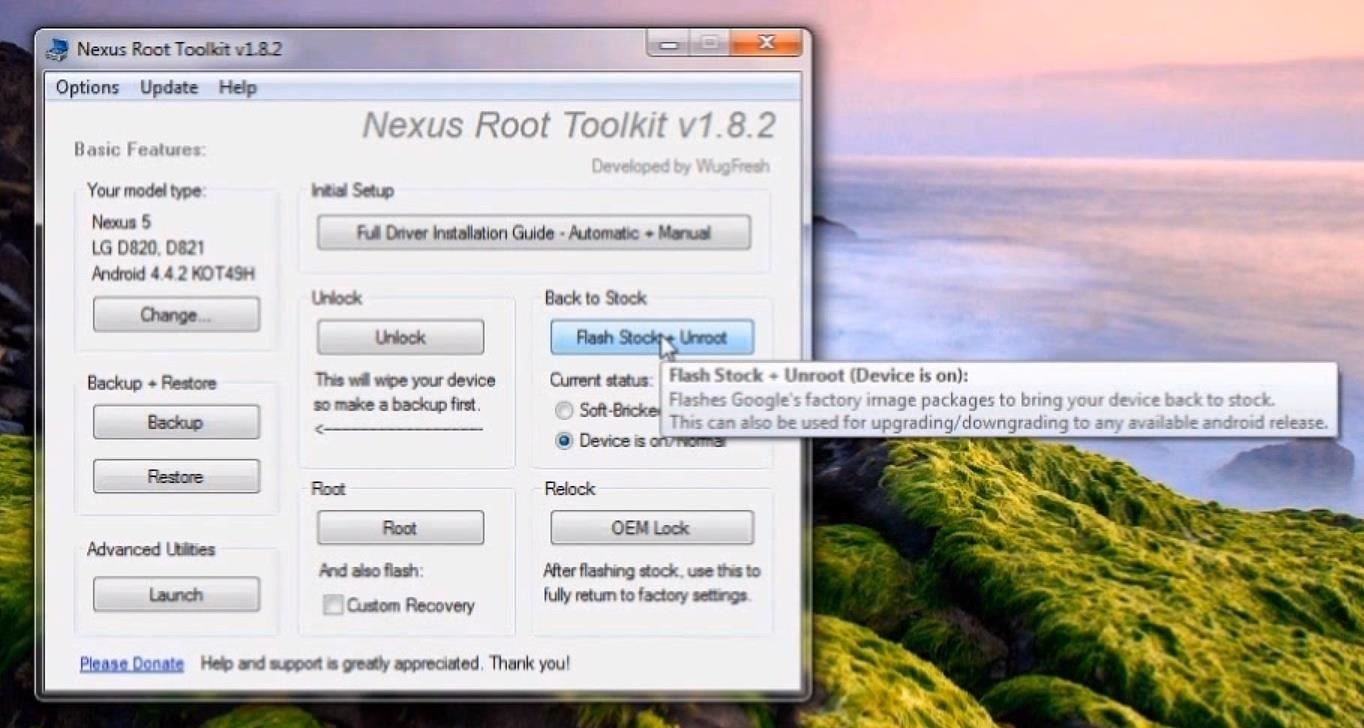
Step 7: Flash the Stock FirmwareBefore proceeding, remember that THIS PROCEDURE WILL DELETE ALL APPS AND DATA FROM YOUR PHONE.From the main menu of the toolkit, select Flash Stock + Unroot. Press OK to continue, and on the following screen, make sure Automatically download + extract the factory image selected above for me is selected. Click OK, then follow the instructions to flash the factory images. DO NOT DISCONNECT THE USB CABLE DURING THIS PROCESS.
Step 8: Enable USB Debugging AgainNow that you've flashed the stock firmware, all of your previous settings have been reset. This includes the USB Debugging option we enabled earlier, so refer back to Step 2 of this guide to enable it once again.The dialog on your Nexus 5 asking to allow your computer to connect should appear right away this time. Tick Always allow from this computer and select OK again.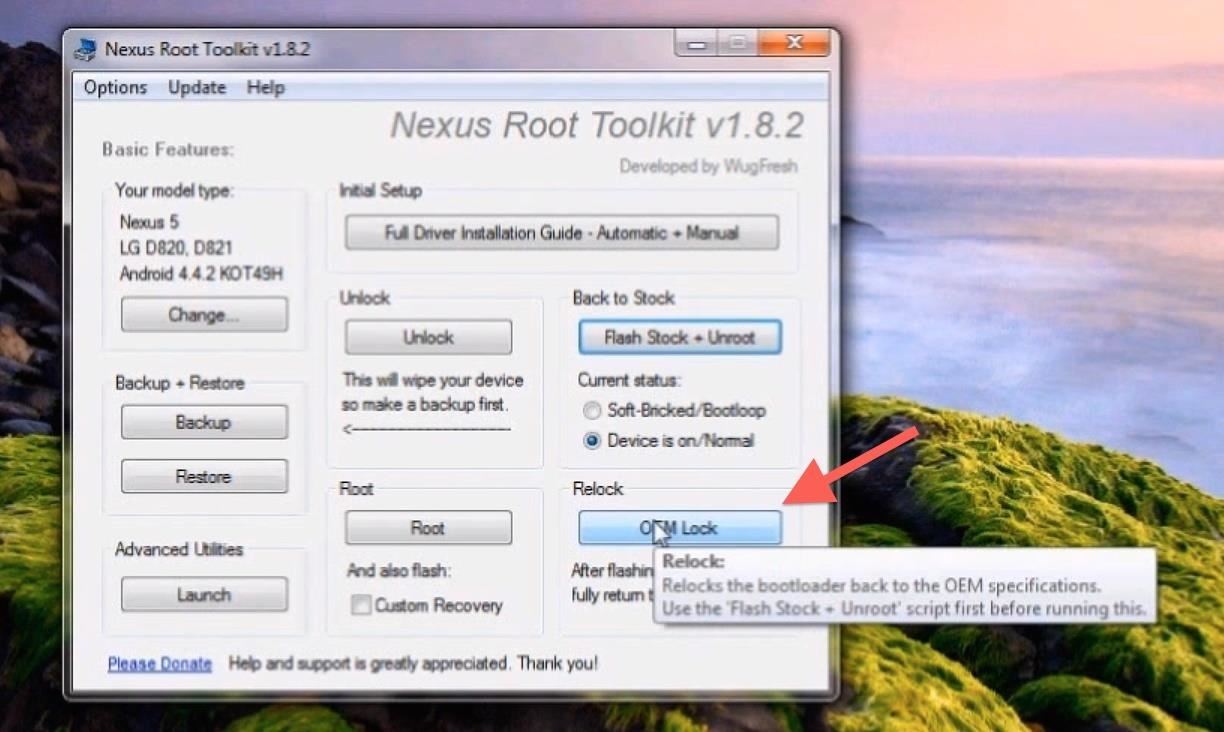
Step 9: Lock the Bootloader & Reset the Tamper FlagNot only will this part of the process put the bootloader back into its original state, but it will also destroy any evidence of the phone having been modified in the first place. This is important if you are returning your phone to the manufacturer or your wireless carrier for warranty purposes.From the main menu of the toolkit, select OEM Lock, then OK from the following prompt. This process will automatically reboot your phone several times, so be patient.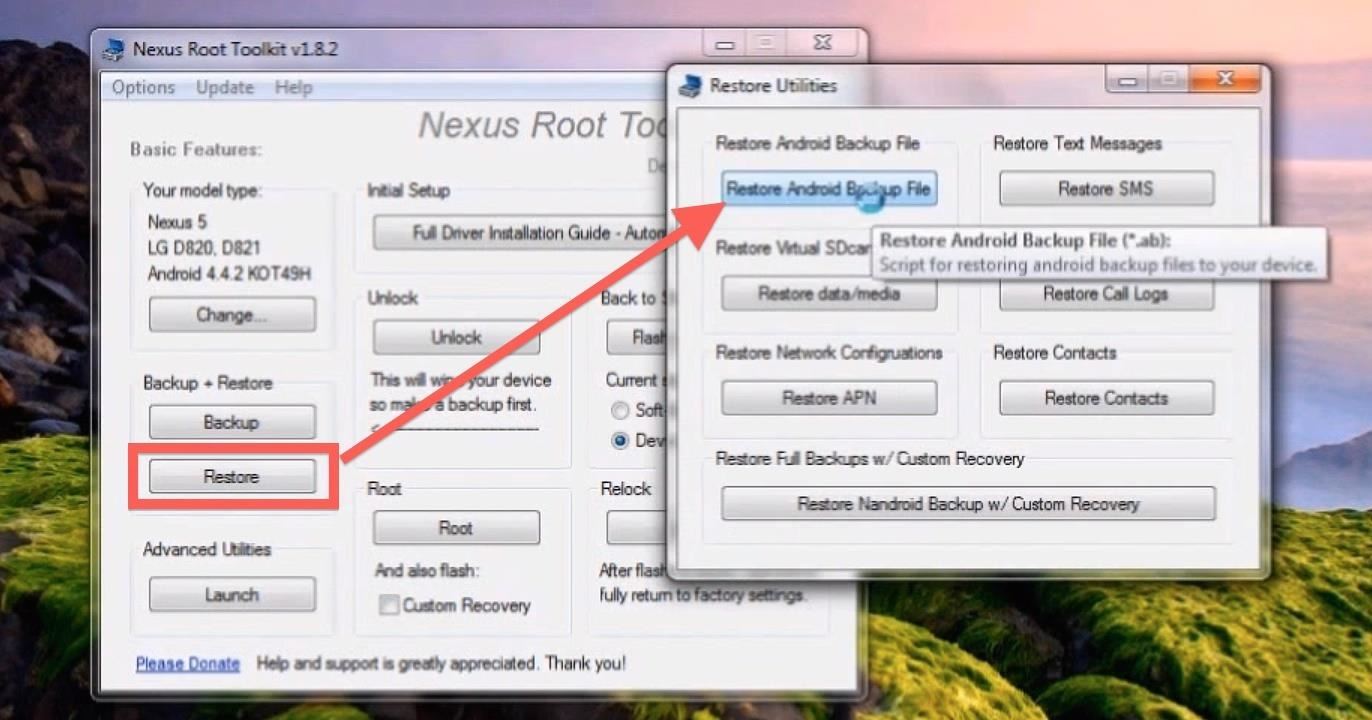
Step 10: Restore Your Backups (Optional)At this point, it's safe to go ahead and restore any backups you've made. If you copied any data to your PC, you can now copy that back to your Nexus 5.To restore any apps you backed up with the toolkit, click Restore from the main menu, then Restore Android Backup file from the next screen. Follow the toolkit's instruction to complete the process.
Savor the Stock FlavorYou should now be holding a completely stock Nexus 5. Your phone is now ready to be sent back to the manufacturer or carrier if need be. Otherwise, enjoy your fresh-out-of-the-box device.New Nexus 5 image via Phandroid
Learn which white hat techniques can have the greatest impact on your website and how you can double, triple, or even 10X your traffic.
How to Increase Website Traffic Using White Hat SEO
News: All the Cool Kids Are Going to Instagram, Hanging Snapchat Out to Dry News: WhatsApp Stops Trying to Be Like Everyone Else & Brings Back Its Text-Based Status Option News: Snapchat Sees Major Update with Temporary Chat Messages & Live Video Chatting News: Snapchat's Lens Explorer Guides You Through a Land of Augmented Reality Creations
Snapchat 101: Never Lose a Snapstreak with These 3 Tips
How To: TapDeck Is a Beautiful Live Wallpaper That Adapts to Your Taste in Photography Warning: These 5 Psychedelic Wallpapers for Your Nexus 7 Will Trip You Out How To: Change Your Wallpaper Automatically by Time, Day, Location & More
Live Wallpaper « Wonder How To
Also, since Split-Screen Creator works as a third-party widget and isn't baked into Android like App Pair is on the Note 8, you can only add your app pairings to your home screen and not
Galaxy Note 8: Enable Split Screen Multi-Window Mode
Forget Skype. Google's in the market for online phones, and their answer lies within Gmail. It's call Google Voice and Video Chat, and it allows you to make free domestic phone calls from within North America (United States & Canada).
How to Make Free Phone Calls Using Gmail - Gadget Hacks
But Google have said that they will be rolling out the OTA (Over-The-Air) update in the "coming weeks" to the Nexus 5, Nexus 4, Nexus 10 and both Nexus 7's as well as the Google Play Edition devices. But if you can't wait till then, I will show how to get Android Lollipop on your Nexus 5 or 2013 Nexus 7 today. Requirements
How to Install Android Lollipop 5.0 TODAY on NEXUS 5 - YouTube
I'm looking into creating a python script that will kill some of the common processes within Windows such as some anti-virus processes, and cmd.exe (including explorer.exe to check if it works).
Writing Python Script « Null Byte :: WonderHowTo
Launcher. First thing, we need to install the right launcher. Currently there are many launcher in play store, which gives windows phone look. We can even install a theme for Go Launcher Ex to look like windows phone 8. However, it won't give you much of the windows 8 features.
Launcher 10 brings a dash of Windows Phone to Android
Samsung's Amazing Music-Making Tool Soundcamp Is Coming to
With Kinect, use your voice to explore your favorite sites with ease on the biggest screen in the house. You can even use Xbox SmartGlass on your phone or tablet to type and control your experience. Discover the entertainment you love. Learn how to set up, use, and troubleshoot the Internet Explorer app on your Xbox 360 console.
how to get internet browser on your xbox 360 - YouTube
Search query Search Twitter. Saved searches. Remove; In this conversation. Verified account Protected Tweets @ Suggested users
How to Bold, Italicize, & Underline Text in Gmail for Android
0 comments:
Post a Comment