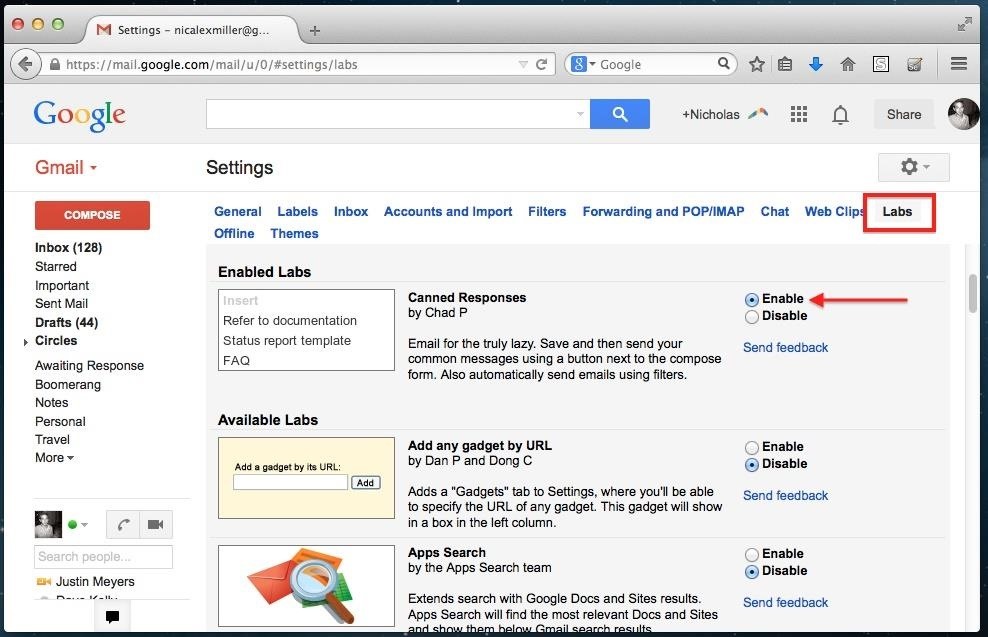
How To: The Ultimate Guide to Customizing Your iPhone

Cases and stickers are always great, but they aren't the only way to customize an iPhone. The software on your device is full of customization options, from a better-looking home screen and cooler lock screen wallpapers to app icon changes and a system-wide dark mode. There's literally over 100 ways to make iOS on your iPhone genuinely unique, some of which are hiding in plain sight.While there are plenty of tweaks available for iPhone without jailbreaking, you won't find as many options as you would on Android. Instead, you need to get a little more creative on iOS, exploiting clever tactics to get around Apple's rigid ecosystem. Want to place your home screen icons wherever you want? How about changing those icons entirely? That's what we're here for.Don't Miss: 100+ Coolest, New iOS 12 Features You Didn't Know About Many of the system tweaks and personalization features listed below are new to iOS 12, so if you're using an iPhone 5S or newer, you'll be able to take advantage of most of our tips. If you're rocking something a bit older, don't worry — there are plenty of compatible options here for you to try as well. Interested in something specific? Click a link below to jump right to its specific section.Jump to a section: Wallpaper | Lock Screen | Authentication | Notifications | Ringtones & Text Tones | Home Screen | Overall Appearance | Accessibility | Siri | Apps | Phone | Messages | Keyboard | Photos & Camera | Safari
WallpaperWhat's the first thing you see when you wake up your iPhone? Your wallpaper, of course. Wallpapers are more than a simple decoration for your iPhone — they allow you to express your style and offer a refreshing view each time you pick up your device. Here's a quick list of all the fun ways you can customize your iPhone's background to make your iOS device feel like your own.
1. Hide the Notch on Newer Face ID ModelsAlthough initially controversial when first revealed, the notch on modern iPhones seems pretty standard, especially now that almost all flagship smartphones carry an iteration of the design. That said, many Android devices allow you to hide the notch by adding a black strip across the top of the display, something that iOS does not let you do.While Apple is a stickler for their Face ID cutout, there are ways around this issue. While you won't be able to turn off the notch in apps, you can use your wallpaper to disguise it cleverly. With the right image, your iPhone X can become "notch-less."However, this mainly applies to OLED models, since black pixels are not lit up when they are "on the screen. It may help a little on the iPhone XR, which has an LCD, but black pixels are lit up and stick out, so the notch is a little more noticeable.Full Guide: How to Hide the Notch on Your iPhone X, XS & XS Max Before and after the notch.
2. Use Apps to Find Cool, New WallpapersApple's stock wallpapers are usually varied enough to offer users plenty of options to suit their styles. Of course, sometimes you need to branch out from stock iOS wallpapers to find a background that fits your aesthetic.While you can always use the photos taken on your iPhone or scour the internet for some high-res solutions, one of the best ways to quickly find new wallpapers is to download an app to find them for you.Full Guide: Free Wallpaper Apps for iOS with Tons of Options
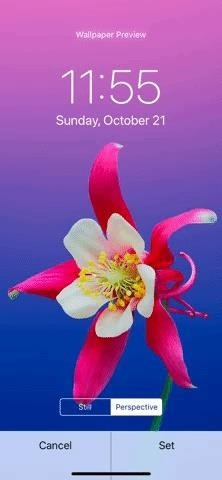
3. Disable the Parallax EffectApple wants your wallpaper to contain a "parallax" effect. That's what enables the wallpaper in the background to move differently than other objects on-screen, creating an illusion of depth. If you don't want this effect on your iPhone, however, there's an easy way to fix it.When setting up your wallpaper, make sure to choose "Still" rather than "Perspective," as is the default for all but Live Photos. Otherwise, you'll keep the motion as seen below. However, you'll notice that even with "Still" selected, your home screen icons move ever so slightly when you move your iPhone. To completely remove this feature, you'll have to dig a bit deeper into some hidden settings to keep the motion gone for good.Full Guide: How to Disable the Parallax Effect for No Motion

4. Bring Back Old Favorites, Like the FishWhile Apple adds new wallpapers with every iOS release, it inexplicably removes old ones as well. With a little googling, you can find every wallpaper Apple ever shipped on iOS, including those exclusive to specific iPhone and iPad models.One of the most notable — and devastating — removals was the suite of live fish wallpapers. These options were initially included with the iPhone 6S and 6S Plus to show off 3D Touch. However, Apple removed the wallpapers just two years later with the introduction of iOS 11. However, with a little elbow grease, you can turn the animations into Live Photos and use them as live wallpapers on 3D Touch devices only.Full Guide: How to Get Apple's Live Fish Wallpapers Back Images by Justin Meyers/Gadget Hacks
Lock ScreenThe lock screen — the barrier between the world and everything inside your iPhone. You probably spend more time on the lock screen than you think, browsing interesting notifications, as well as fending off unnecessary ones. If you need some help keeping your lock screen orderly, we've got you covered.
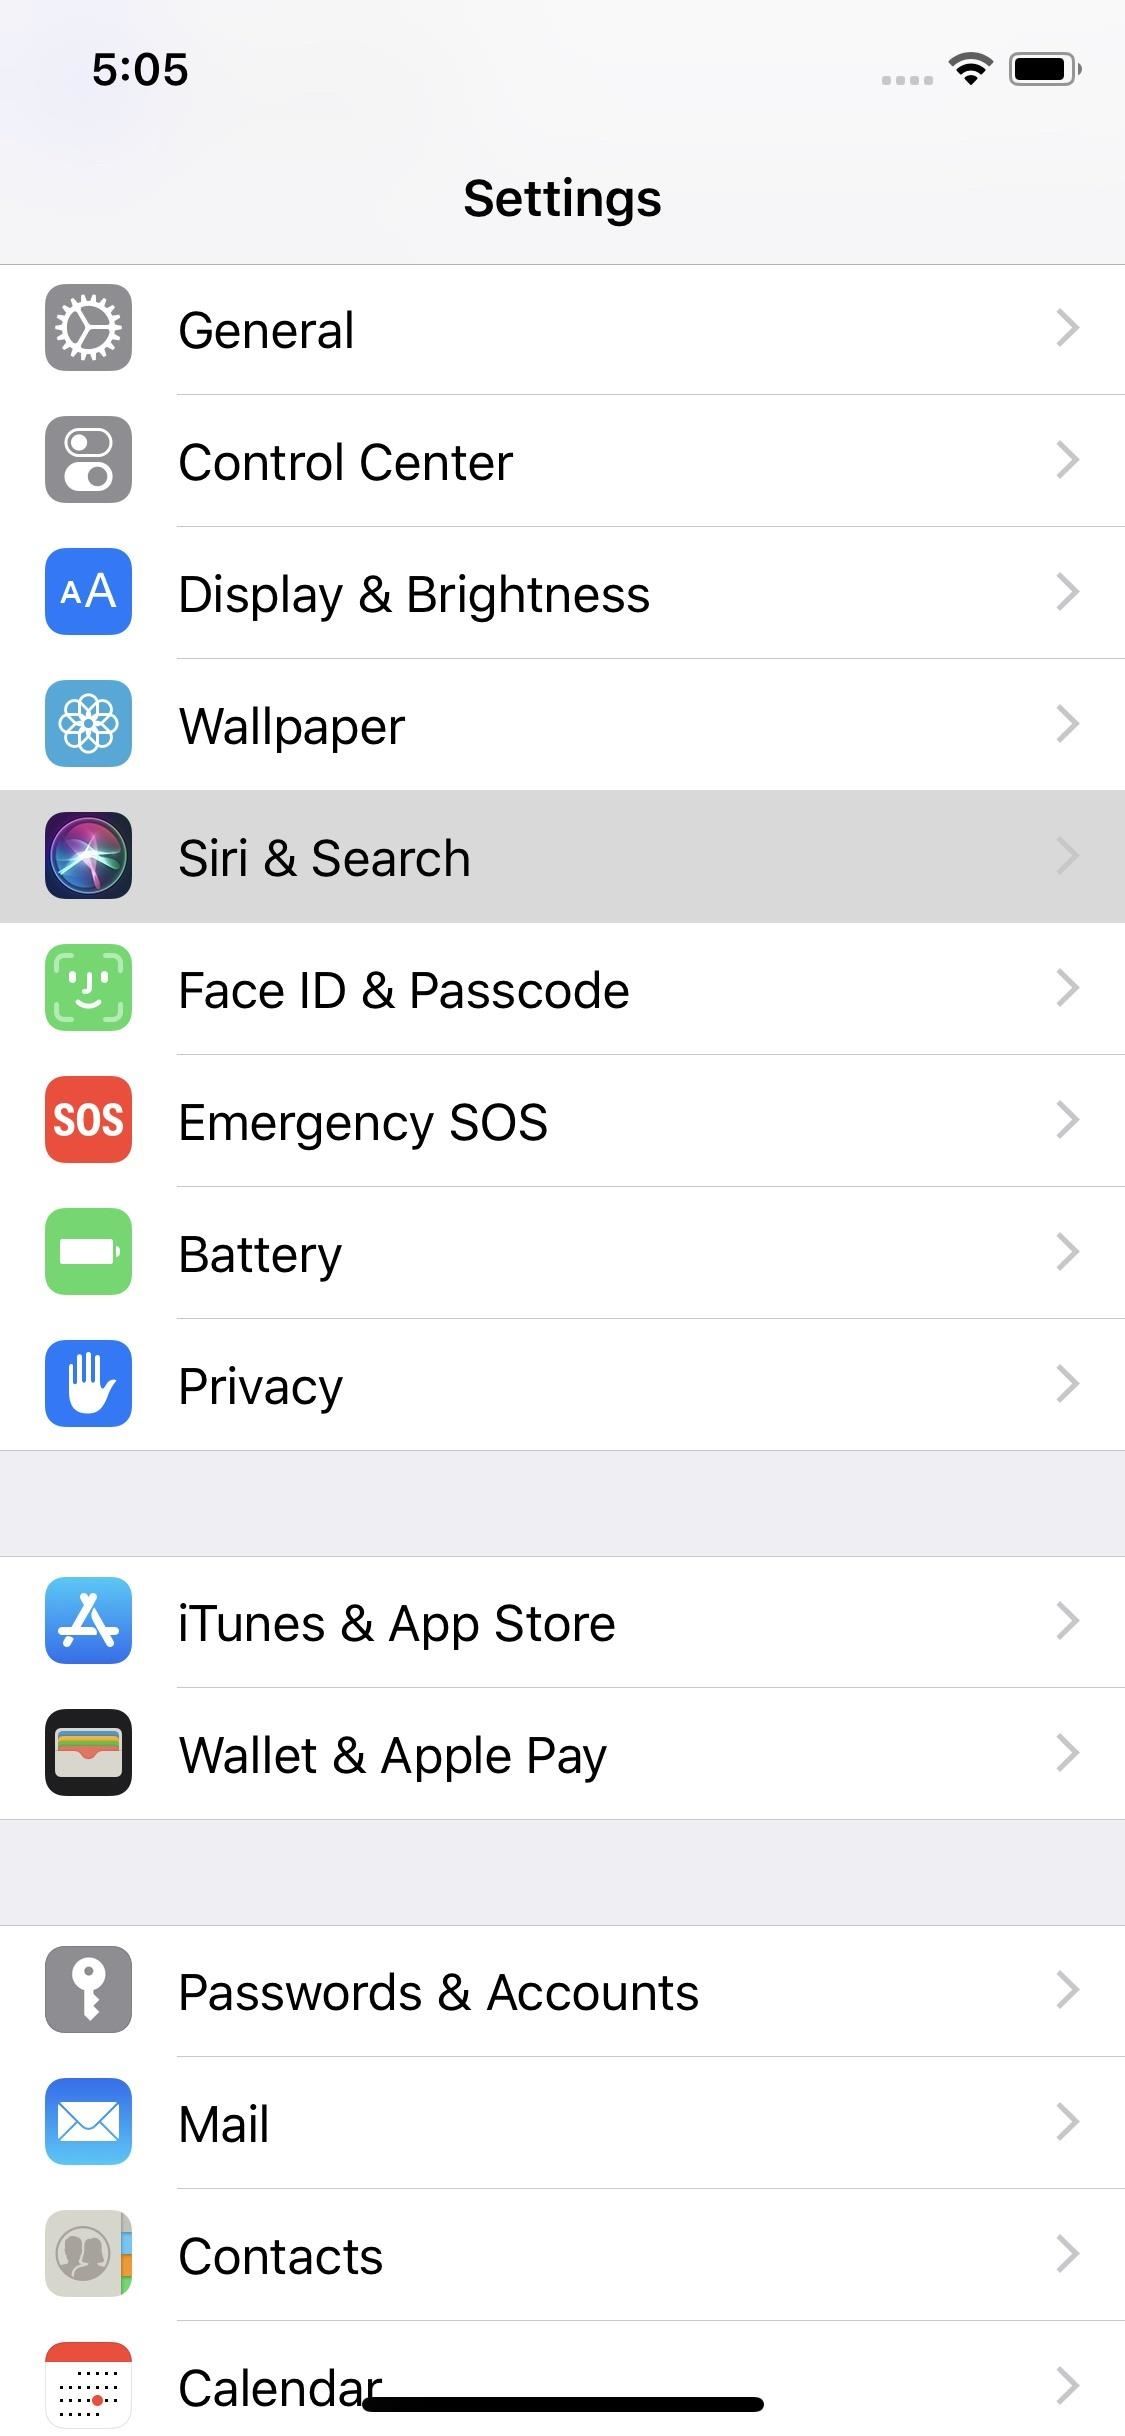
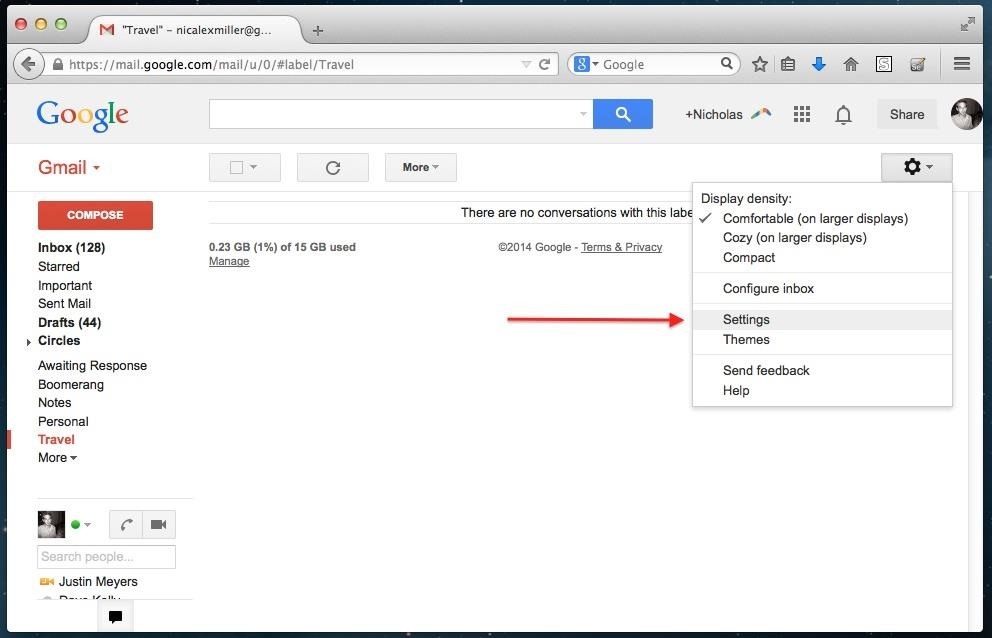
1. Choose Which Apps Can Display Siri Suggested ShortcutsSiri Suggestions try to guess the actions you'd want or need to take on your iPhone. These can be helpful, especially on the lock screen, but it's not perfect. For one reason or another, you might want to control which apps you see Siri offer Suggestions for on the lock screen.Customizing Suggestions is simple. Head over to "Siri & Search" in the Settings app. Disable the toggle next to "Suggestions on Lock Screen" to turn off Siri Suggestions on the lock screen for all apps. To choose which apps to show Suggestions for on the lock screen, leave this enabled. Tap each app from the list below, then either enable or disable the toggle next to "Allow on Lock Screen."
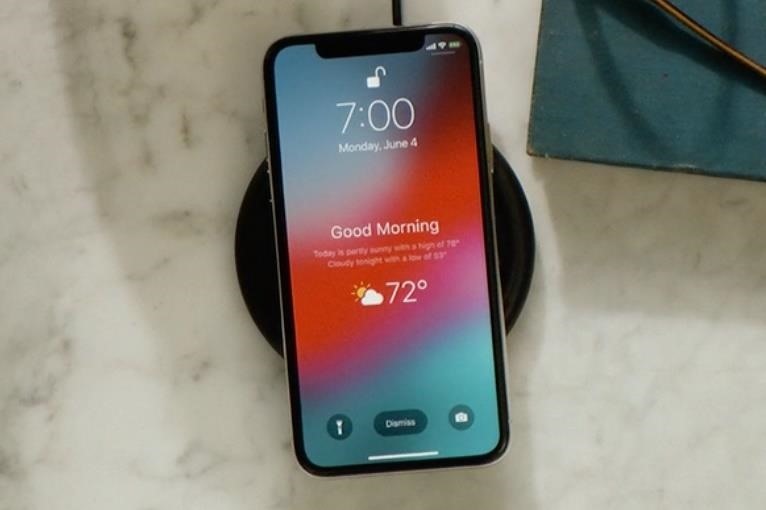
2. See Weather Right When You Wake UpApple has never been one to embrace widgets in the same way as Android, opting instead to place them all in a list in the "Today View." However, the company dipped their toes into "on-screen" widgets with iOS 12, offering you a look at their local weather right when you wake up.Unfortunately, once you unlock your iPhone, tap the widget, or let your iPhone go back to sleep, the widget goes away for the rest of the day. We hope to see more widget integration like this in future versions of iOS. Right now, however, this is a pretty neat feature.Full Guide: How to Unlock Hidden Weather Lock Screen Widget in iOS 12 Image via Apple
3. Disable USB Accessories LockWith iOS 11.4.1, Apple introduced a new security feature for iPhones, a lock for USB accessories. One hour after you lock your iPhone, the feature kicks in, blocking all USB accessories from connecting to your device. To use the accessory, you must enter your passcode, thus thwarting any intruders who don't know the code.Of course, this might get a bit annoying if you frequently use USB accessories. If you find yourself continually unlocking your iPhone to get your stuff done or want to avoid that mess altogether, you can disable this security feature for good.Full Guide: How to Disable the 'Unlock iPhone to Use Accessories' Feature

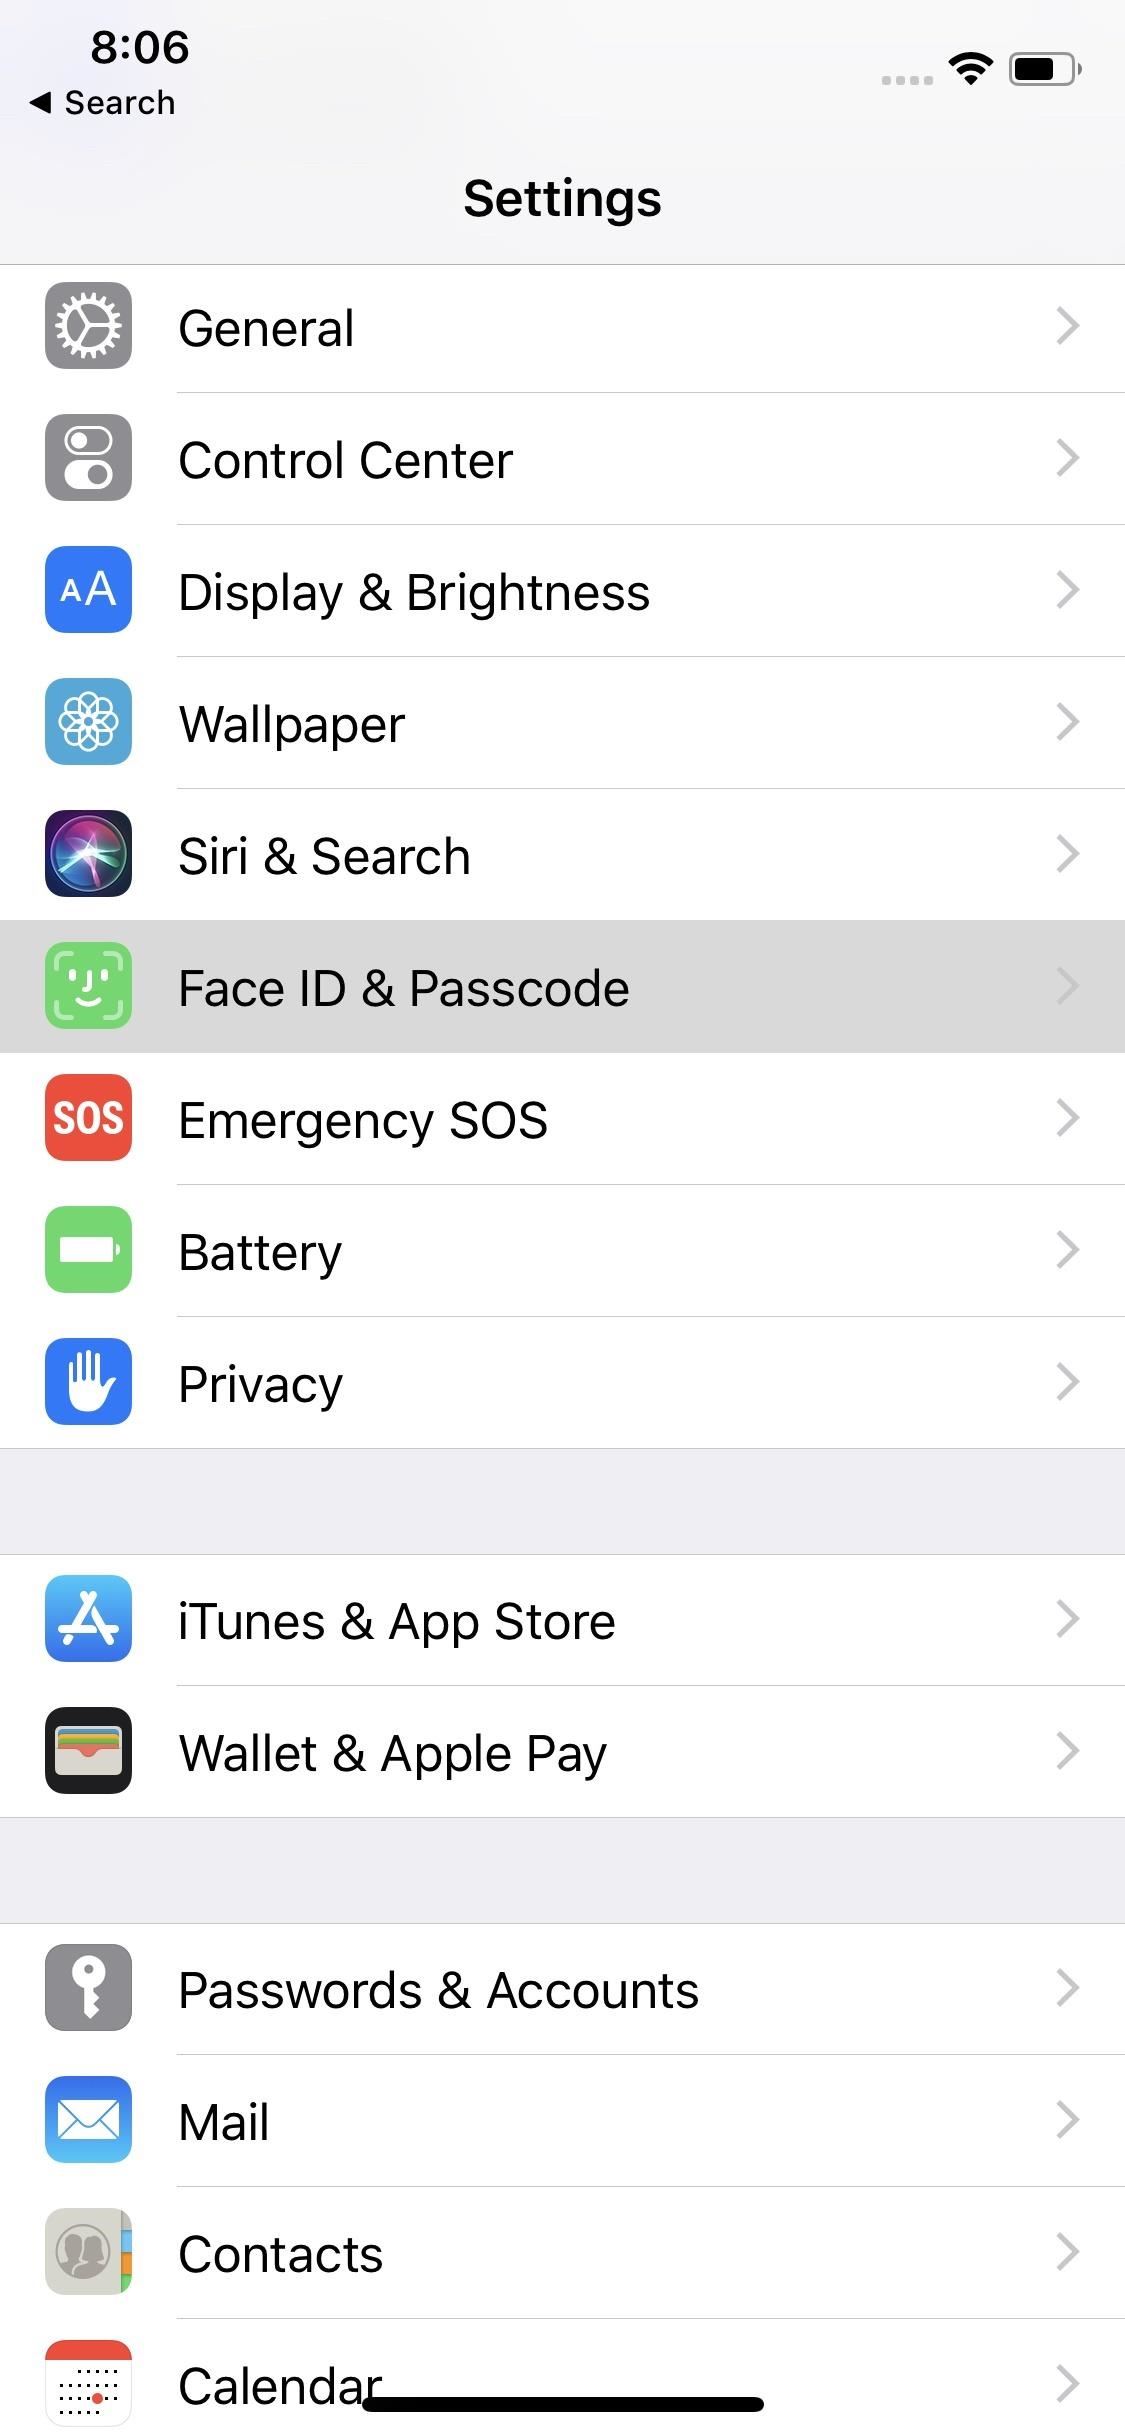
4. Disable Certain Features Access to the Lock ScreenIn addition to USB accessories lock, there's a treasure trove of features that iOS allows you to disable on the lock screen. You'll find the following in "Touch ID & Passcode" or "Face ID & Passcode" settings. You decide whether to allow access to any or all of these features while your iPhone is locked. If you disable a feature, that means you'll need to unlock your iPhone using Face ID, Touch ID, or your passcode before using it.

5. Only Show Notification Previews with Face ID or Touch IDIf your iPhone is running iOS 12, it's equipped with either Touch ID or Face ID. Those security features offer you extra protection with your notifications on the lock screen — not only can you hide notification previews from prying eyes, but by authenticating yourself via Touch ID or Face ID, you can view those previews without unlocking your iPhone.Owners of the iPhone X, XS, XS Max, and XR have this feature enable by default. However, regardless of your iPhone model, you'll need to give up hiding notification previews while your iPhone is unlocked. That means any text you receive while showing someone your high score on Candy Crush will, unfortunately, be visible for all to see.Full Guide: How to Keep Messages on Your Lock Screen for Your Eyes Only Images by Justin Meyers/Gadget Hacks
6. Make Your Own Live Photo WallpapersFor iPhones with 3D Touch (sorry, iPhone XR owners), live wallpapers are part of the package. However, you don't need to rely on Apple's offerings to see live activity on your lock screen — you can set your Live Photos as wallpapers, so you can relive your favorite moments every time you wake up your iPhone.While you can set any Live Photo in your Photos app to the lock screen, in general, Live Photos are very shaky, since you inevitably move the camera while shooting your picture. If you plan on taking a Live Photo for your wallpaper, you should try to use a stable surface, like a window or even a tripod. That way, when viewing your wallpaper, it won't distort as a typical Live Photo typically would.
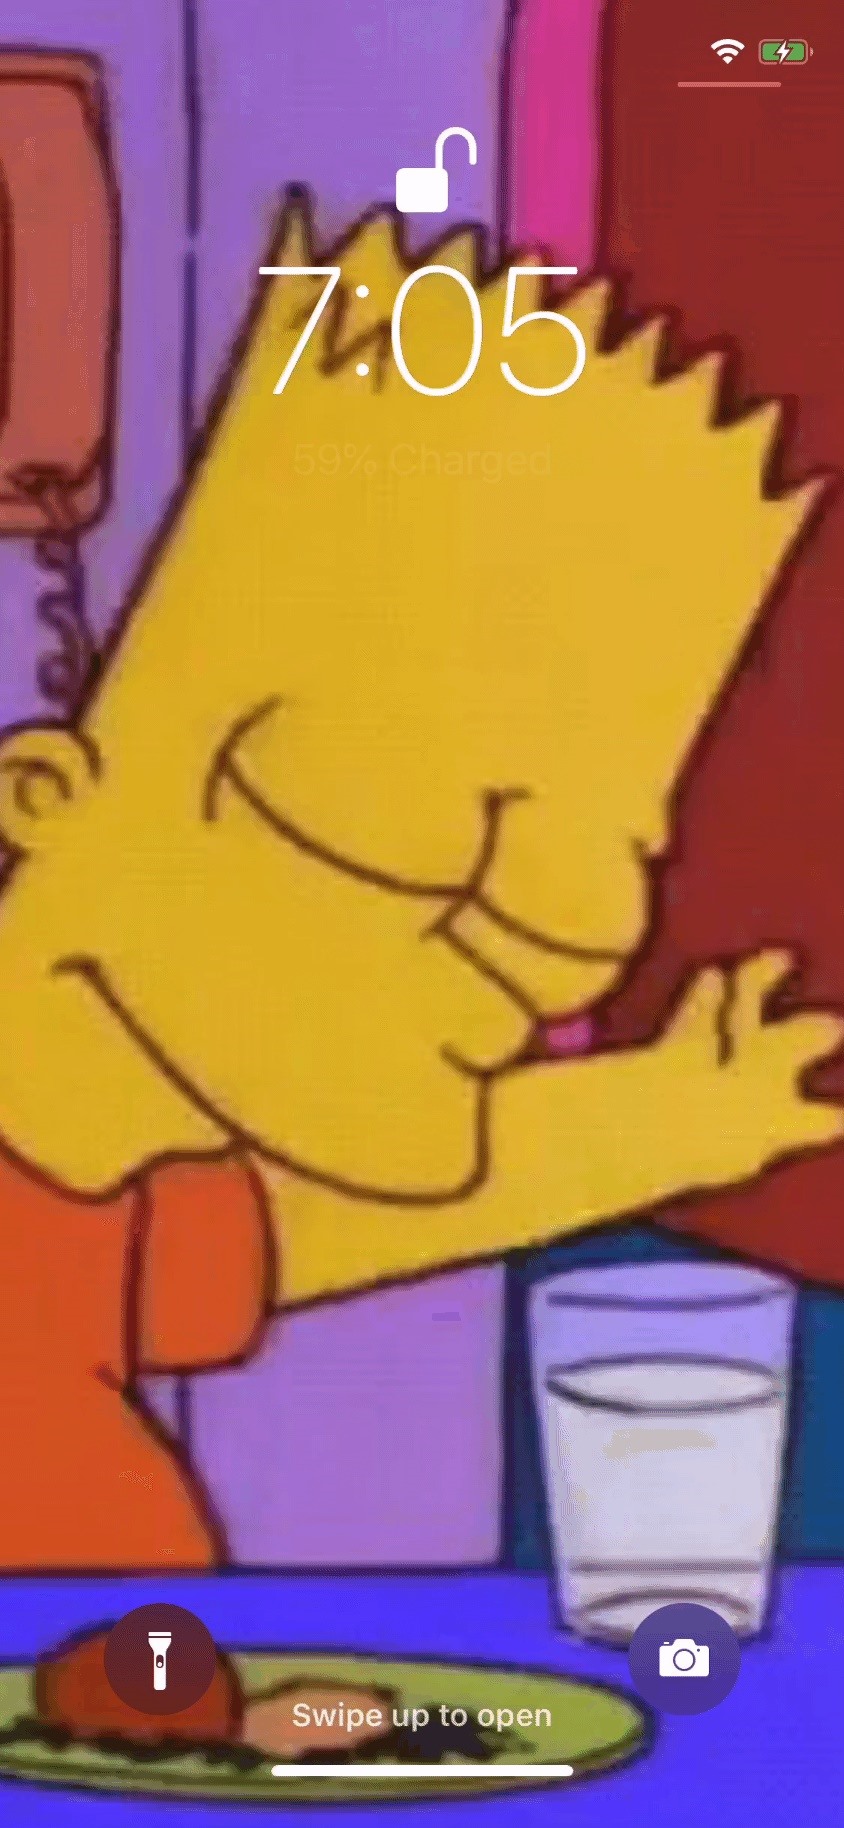
7. Set a GIF as Your Lock Screen's WallpaperMaybe Live Photos just aren't cutting it for you. If you want to expand your wallpaper horizons, look towards GIFs — you can turn any GIF you wish into a live wallpaper for your iPhone with 3D Touch (not Haptic Touch). With no shortage of content on the internet, your wallpaper options just got a lot bigger.While the Photos app supports GIFs, iOS won't let you select any to be your wallpaper. You'll have to take a few additional steps to ensure your GIF ends up running on your lock screen.Full Guide: How to Set a GIF as a Live Wallpaper for Your Lock Screen Images by Justin Meyers/Gadget Hacks
AuthenticationTouch ID, Face ID, passcodes, oh my! When to comes to authentication, Apple's got you covered. Whether your iPhone reads your face or fingerprint, your security is paramount and is well-protected by Apple's cutting-edge tech. But what about authentication can you really customize? Well, take a look:
1. Choose Whether to Require Attention for Face IDIs your iPhone unlocking itself without you? You might want to check "Require Attention for Face ID." The setting works exactly how it sounds.Face ID won't unlock your iPhone unless it's sure you're actively looking at your iPhone. If the TrueDepth camera senses that your attention is elsewhere, it won't budge. While this adds a level of security to your iPhone, the tech isn't perfect — you might deal with false negatives here, requiring multiple attempts to unlock your iPhone.Disabling the setting is simple, at least — in Settings, select "Face ID & Passcode," then enter your passcode. Finally, disable the toggle next to "Require Attention for Face ID." Now it won't rely on your eyes to unlock, but you may have more accidental opens afterward.
2. Add a Second Appearance to Face IDIf disabling "Require Attention for Face ID" doesn't solve your inconsistent unlocking, there are plenty of tips to take advantage of to get your iPhone back on track. One of the best, however, might be adding a second appearance — or face — to Face ID.Introduced with iOS 12, this feature allows you to do an additional scan of your face that iOS will take in concert with your original. If you have a stark second appearance such as glasses or an on-and-off-again beard, make sure each scan represents a different look. Even if you keep your style consistent, you might want to try a second face scan. The more information your iPhone has, the better Face ID will work.Full Guide: How to Register a Second Face Scan for Face ID

3. Bypass Touch ID's Five-Fingerprint LimitIf you're rocking an iPhone with that iconic Home button, you'll know you can only save up to five fingerprints to use with Touch ID. However, did you know there's a trick around this to ensure all ten of your prints can be saved?Ready for this? Try saving two fingerprints with each scan, i.e., your right-thumb and right-index one scan, your left-middle and left-ring on another, and so on; This really works, and well — you shouldn't notice a dip in accuracy, just an uptick in usability.The trick is to alternate between the two fingers with each scan. Scan your thumb once, then scan your index finger. Back to the thumb, back to the index finger, until the scan is complete.
4. Use Nose Unlock with Touch IDIf you want to freak people out when you're unlocking your iPhone with Touch ID, try using another body part with a noticeable skin pattern. For instance, the nose makes a pretty good finger replacement with Touch ID, and it might be the only way you can keep your iPhone's unlock secret from thieves and law enforcement that will try and make you use your finger to unlock.Full Guide: How to Unlock Your iPhone with Just Your Nose
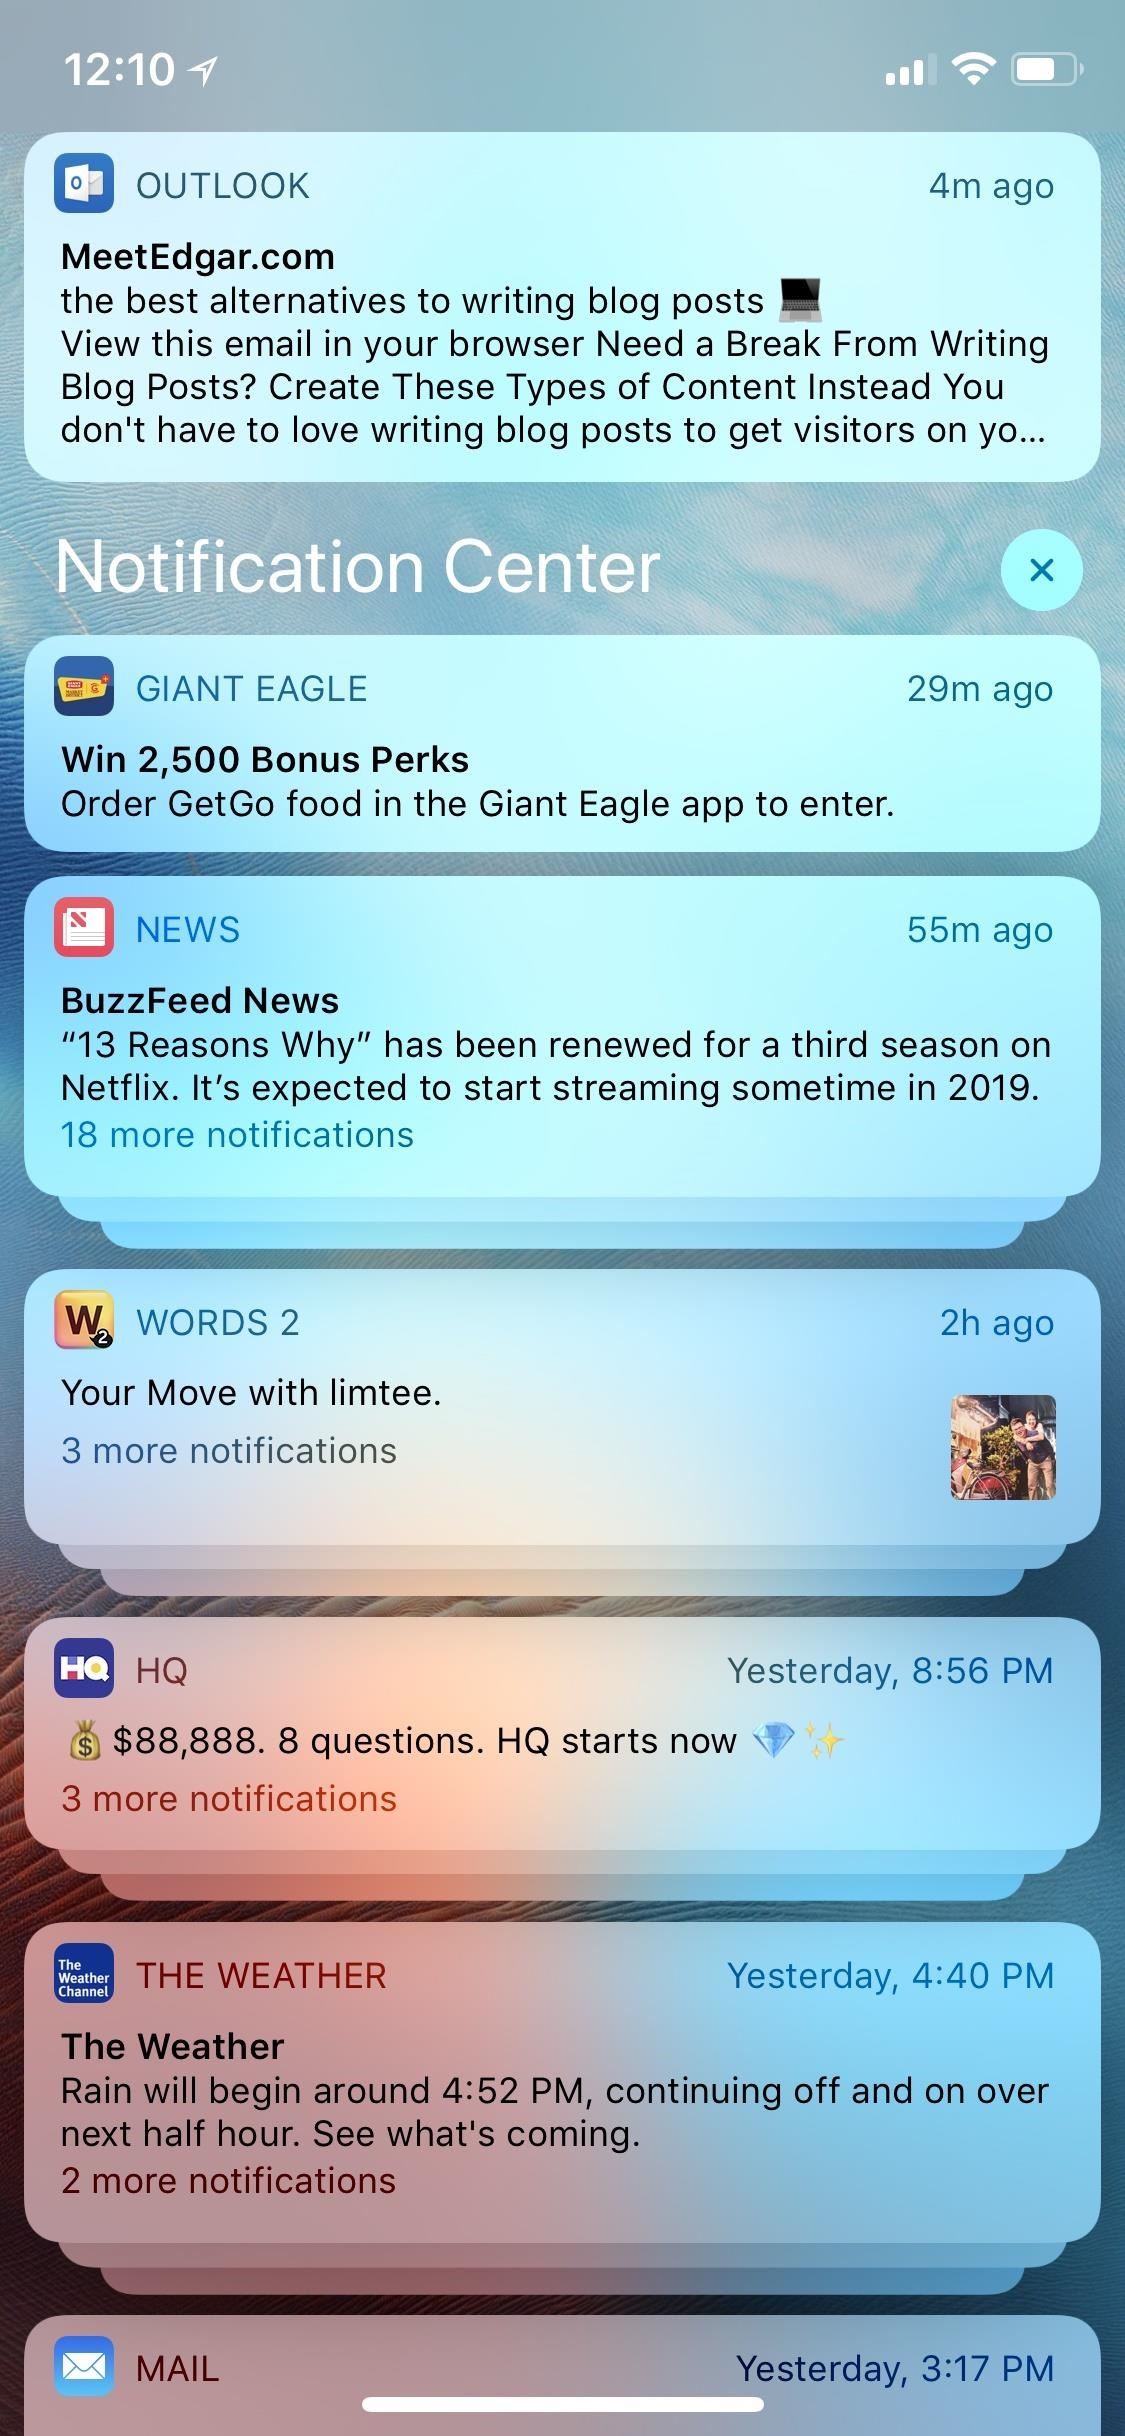
NotificationsWho doesn't have a love/hate relationship with notifications? They can be great to keep us up to date with our favorite apps and people, but can also be, well, annoying. Luckily, your iPhone has a few tricks up its sleeve to control how you experience notifications.
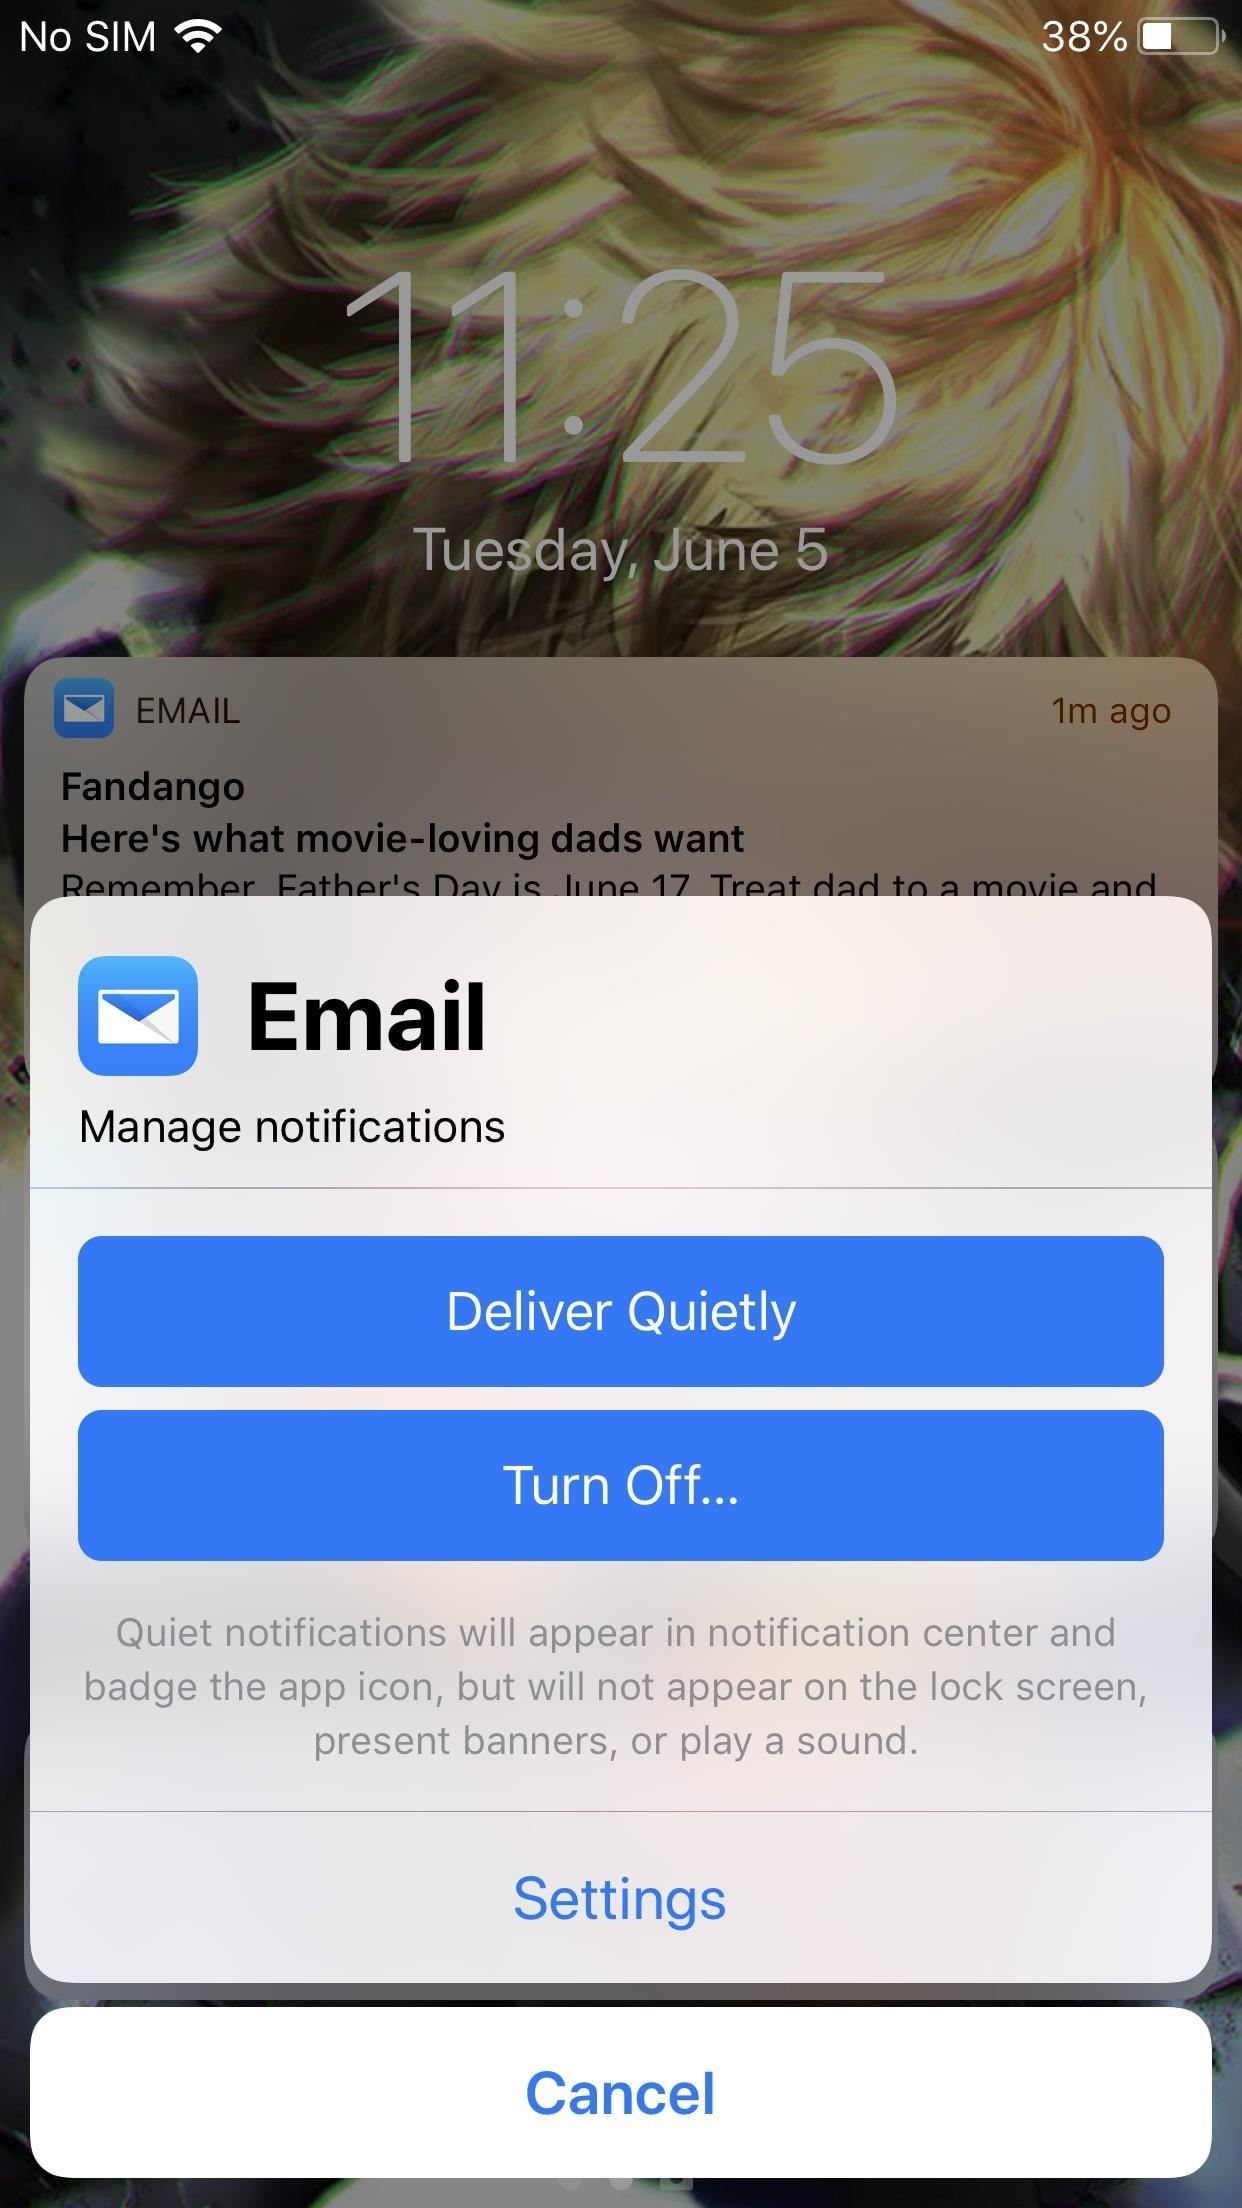
1. Choose How You Receive Notifications, App by AppApple is no longer trailing behind Android when it comes to notification game. With iOS 12, the company introduced "Instant Tuning," a way for users to change notifications settings for apps directly from the notification itself.Not only can you choose to disable notification for specific apps, but you can also select a new feature, "Deliver Quietly." This option won't buzz or alert you when there's a new notification. Instead, you'll find it in Notification Center, minding its own business. It's probably not a good option for apps with urgent notifications, but you might find it a godsend for others.Full Guide: How to Use Instant Tuning to Change Notifications Settings Images by Dallas Thomas/Gadget Hacks
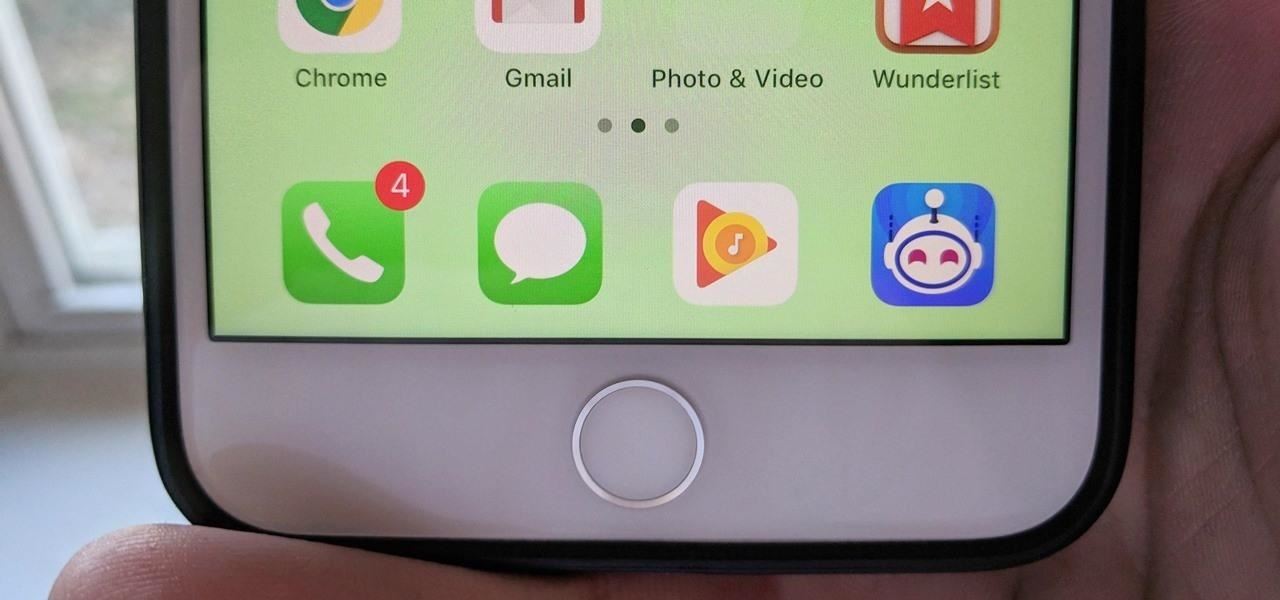
2. Have the Flash Go Off When Receiving NotificationsYour iPhone might not have notification dots that appear on the display like many Android devices, but you can set up the next best thing — a flash that goes off when you receive notifications. It's a neat feature but unfortunately comes with zero customization. It would be great to choose specific apps for the flash to go off for, as well as control the intensity of the light.Full Guide: How to Set Up LED Flash Alerts for Notifications Image by Justin Meyers/Gadget Hacks
3. Schedule Do Not DisturbThe last thing you want when drifting off to sleep is for some dumb game on your iPhone to remind you to play it. You won't always remember to tap that Do Not Disturb icon in Control Center, however, so any night you forget, you risk such a disturbance. What are you to do?Easy — just schedule DND ahead of time. You can quickly control what period you want to enable DND for automatically, so you know you'll get the time you need to relax, iPhone-free.Full Guide: How to Schedule Do Not Disturb on Your iPhone
4. Set Persistent AlertsHave you ever received a notification, only for it to disappear before you have a chance to interact with it? That's because the app that sent that notification is set to "Temporary" banner alerts. These alerts go away after a few seconds of inactivity, which is a nice feature for some notifications, but not for others you need more time for.Luckily, with essentially the flip of a switch, you can change this setting to "Persistent." Once adjusted, all future notifications will remain on screen until you interact with them, whether that's by opening the notification, dismissing it, switching apps, or going home.Full Guide: How to Set Persistent Notifications for Apps So They Don't Disappear
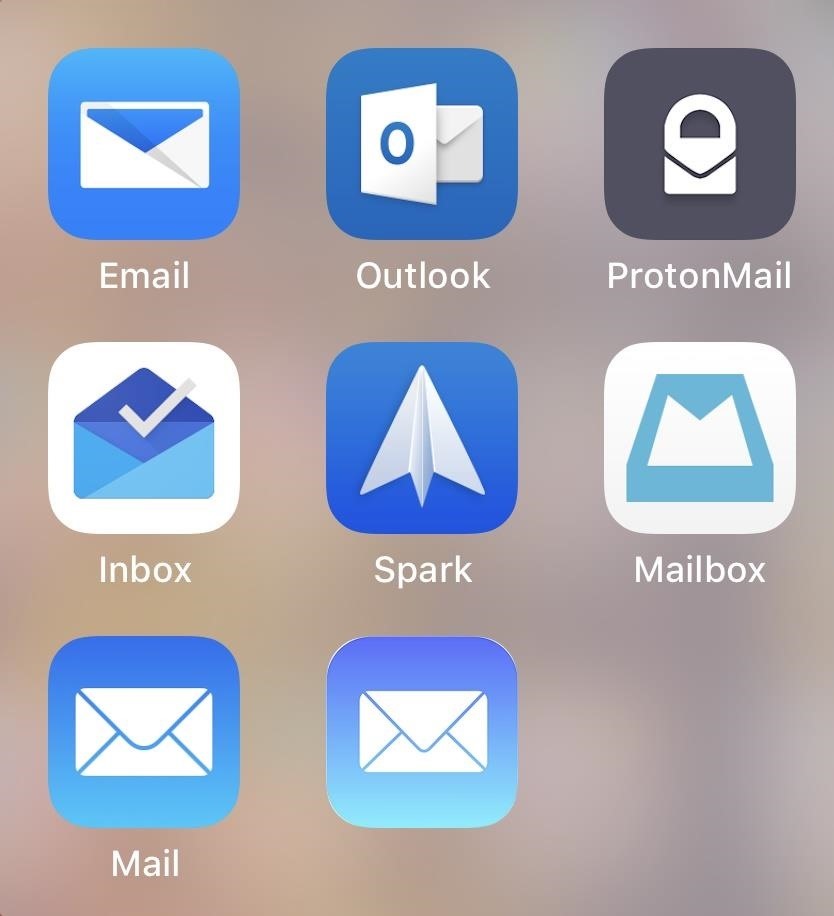
5. Group Notifications by AppAnother excellent option introduced in iOS 12, notification grouping wrangles together notifications from the same app into one stack, to keep the lock screen or Notification Center neat and organized. By default, iOS will group notifications "intelligently," meaning you can have multiple stacks from the same app if the system thinks it appropriate.If you'd rather combine an app's notifications all in one stack, however, you're in luck — iOS lets you change grouping settings from "Automatic" to "By App." Now, for example, all your Mail notifications come together under one roof, even if sent from multiple contacts.Full Guide: How to Group Notifications by Apps Instead of Smart Stacks Images by Justin Meyers/Gadget Hacks
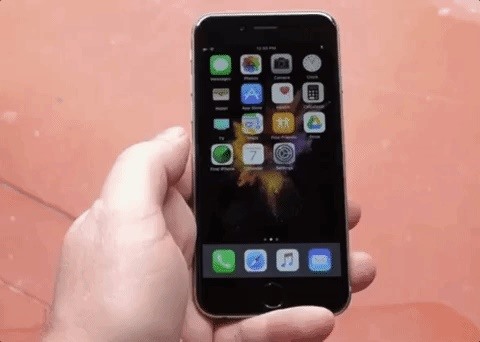
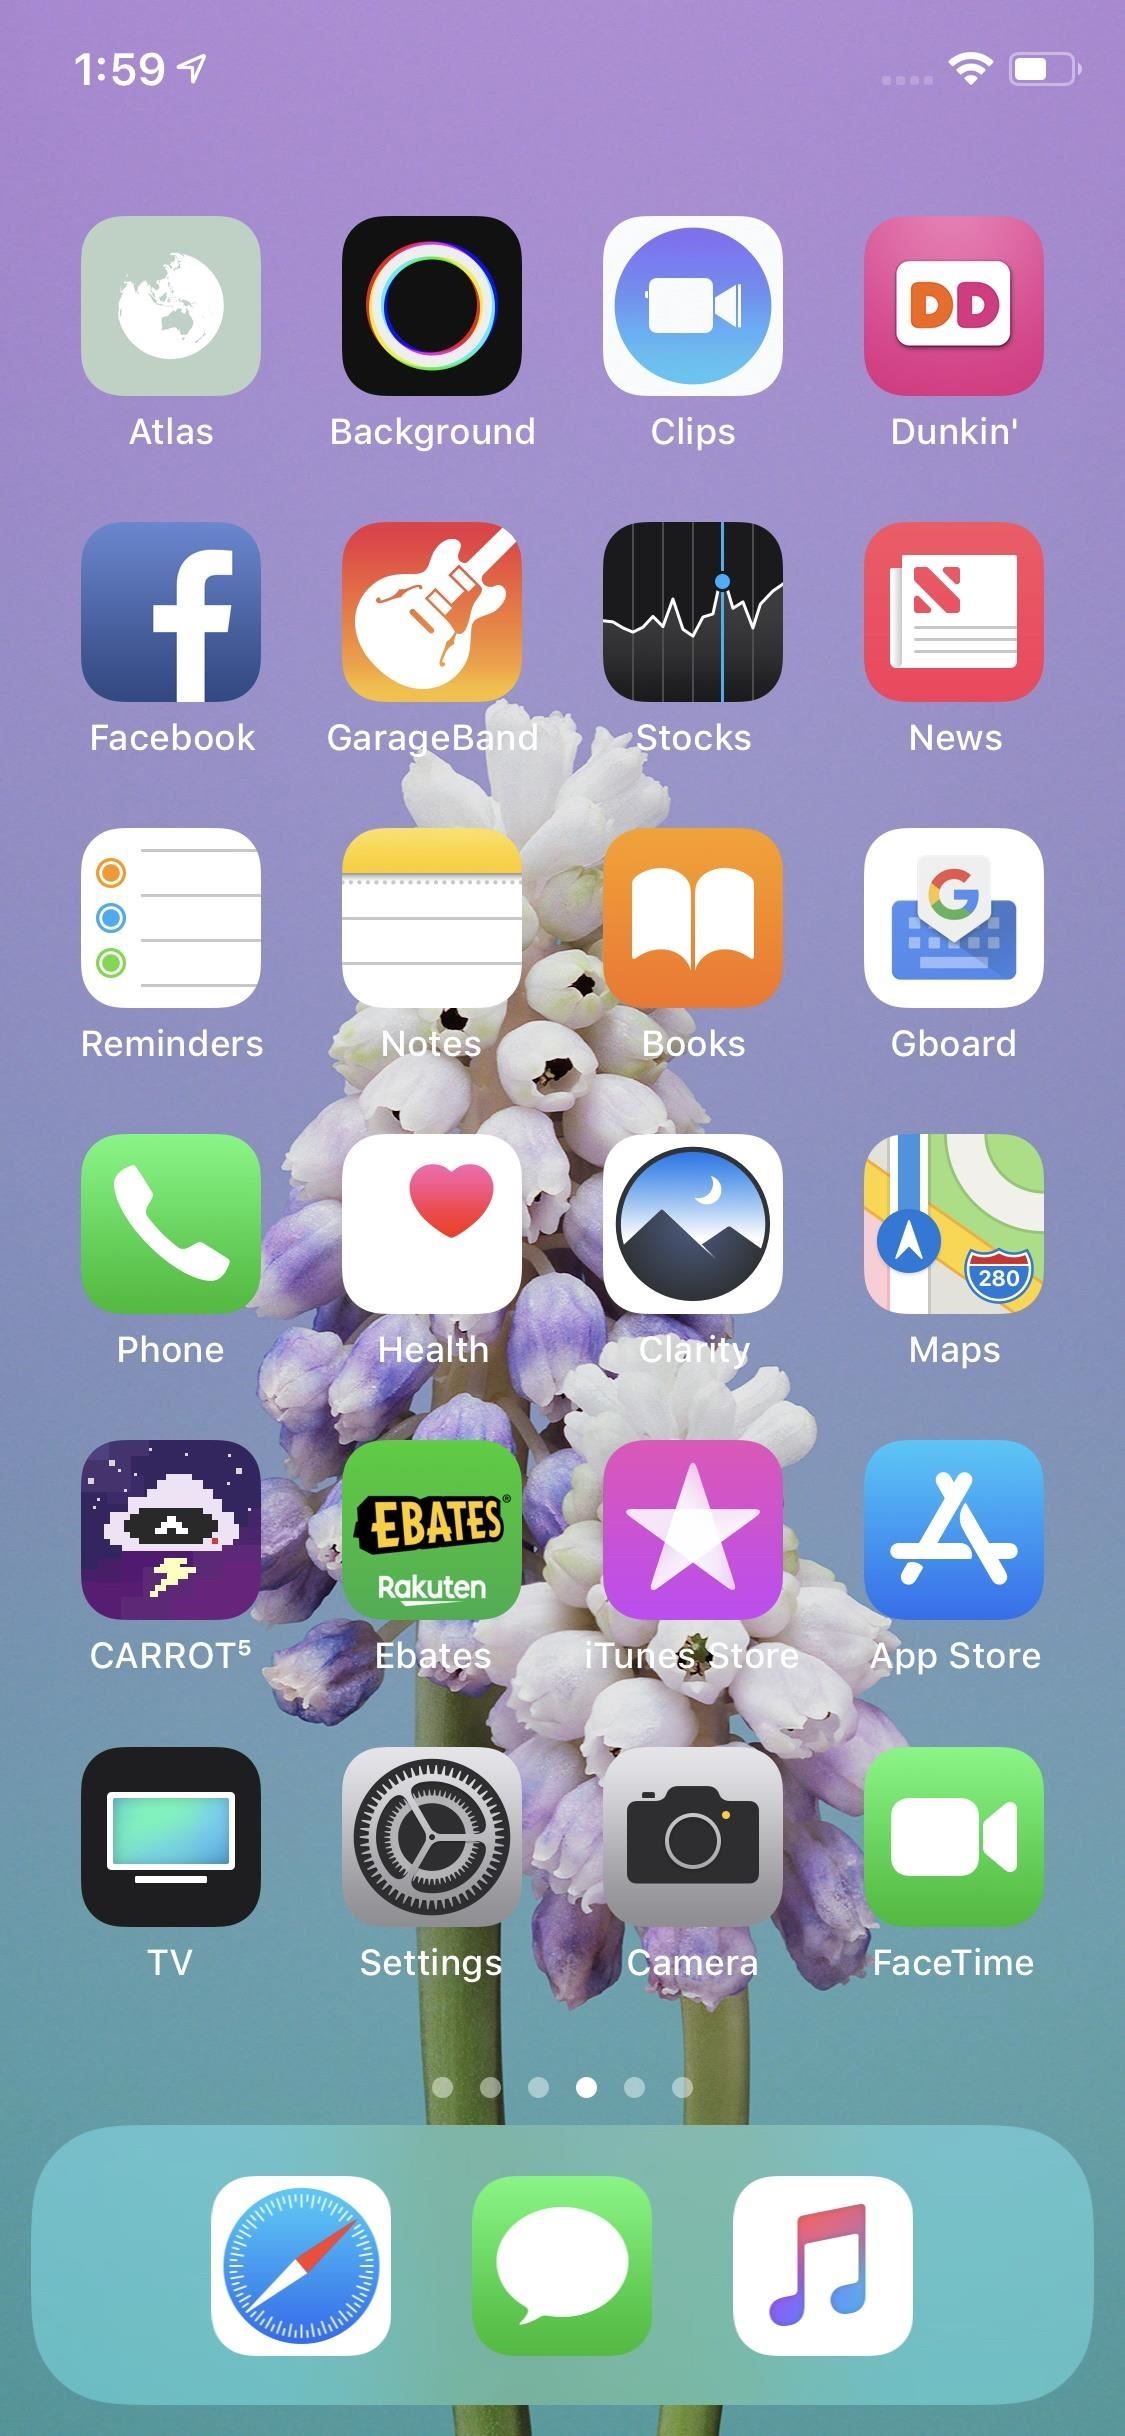
Home ScreenOnce your iPhone is unlocked, you're greeted by the home screen. At first glance, not much has changed since the first iPhone — your apps rest on the same, fixed grid. That said, there are quite a few unique and creative tricks you can pull off to customize your home screen to your liking.
1. Swap Your App IconsOne creative advantage Android has over iOS is the ability to customize your app icons. While you won't find as much freedom to customize in your iPhone's settings, you can change your app icons. Some apps even offer native support to do so.The list of apps that support this kind of thing is quite small as of now. However, it's likely you have an app that is compatible. App developers can now offer custom app icons for their users to choose from. Some only add one or two options, while others provide suites of icons.We've compiled every iOS app we know of that offers this customizability into a list. If you know of an app that we're missing, make sure to let us know in the comments!Full List: Apps that Let You Change Their Home Screen Icons
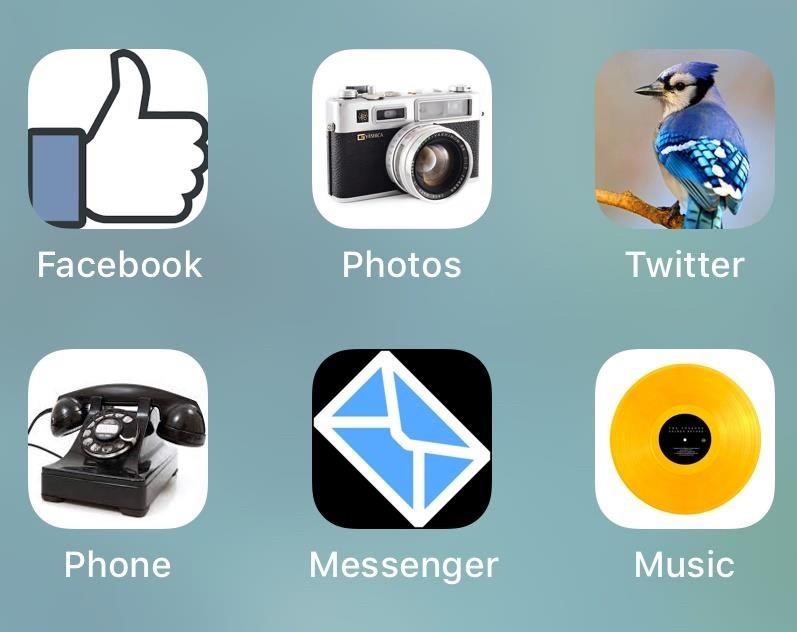
2. Create Your Own Icons Using 'Bookmarks'If your favorite apps don't offer native support for changing their icons, take matters into your own hands. With a little effort, you can make your app icons anything you want, by using something called bookmarks.Bookmarks look just like apps. At first glance, you wouldn't think anything of them. Instead, they redirect you to a linked application. While you might not be able to change the icon for a particular app, you can make the bookmark's icon whatever comes to mind.It's not a perfect system — your apps will open with a slight delay since the bookmark needs to redirect to the app in question. You also need to know the URL scheme for the app you want to create a bookmark for. Without it, the connection won't take.If you're willing to put in the work, however, bookmarks can be a great way to make your home screen super unique. Who else is going to have app icons that look like that!Full Guide: How to Customize Your App Icons Using Bookmarks

3. Install Pre-Made Icons Using iSkinDoes creating your own bookmarks seem daunting? Then don't do it! Instead, turn to a service that has plenty of them ready to go, like iSkin. This site has an extensive collection of bookmarks for your favorite apps. Want your Facebook logo to look 8-bit? Done. Want an old-school iOS Mail icon? You got it. Just browse iSkin's vast library of app icons and choose the ones you'd like to see on your iPhone.Even more convenient, iSkin offers individual app icons as well as packs which let you download a suite of icons under the same theme, so you don't need to download them one by one. ISkin doesn't support every app on your iPhone, but it has plenty to get you started.Full Guide: How to Theme Your Home Screen Apps with iSkin

4. Use Apple Configurator to Organize Your Home ScreenOrganizing your home screen can be a real pain, especially if you have hundreds of apps to deal with. Luckily, you don't need to rely on dragging and dropping your icons in iOS. Rather, use Apple Configurator 2 on a Mac to quickly get the job done.Once you download Apple Configurator 2, plug your iPhone into your computer, and unlock it. Then, open Apple Configurator 2. You'll be greeted by a window featuring your iPhone. Go ahead a double-click on your iPhone to continue. Next, in the menu bar, click "Actions." Hover over "Modify," then click on "Home Screen Layout..." The program will load a bit, before displaying your home screen. Now, you can move icons around and reorder your home screen just as you usually would on your iPhone, this time with your mouse. You'll find using Apple Configurator 2 is much more accurate than using your finger on iOS. When finished, click "Apply," and let Apple Configurator 2 save your layout.
5. Or, Use This Quick TrickIf you don't have access to a Mac or don't want to go through the more complicated process above, iOS has gotten better at home screen reordering. Specifically, your iPhone now allows you to grab multiple app icons at once, freeing you up to move whole pages of apps wherever you'd like.This trick works across pages, so you can pick up some or all of the app icons on one page, swipe over to another page, and continue to pick up icons. Feel free to drop your icons wherever you'd like, including in folders.Full Guide: How to Move Multiple Home Screen Apps at Once Image by Dallas Thomas/Gadget Hacks
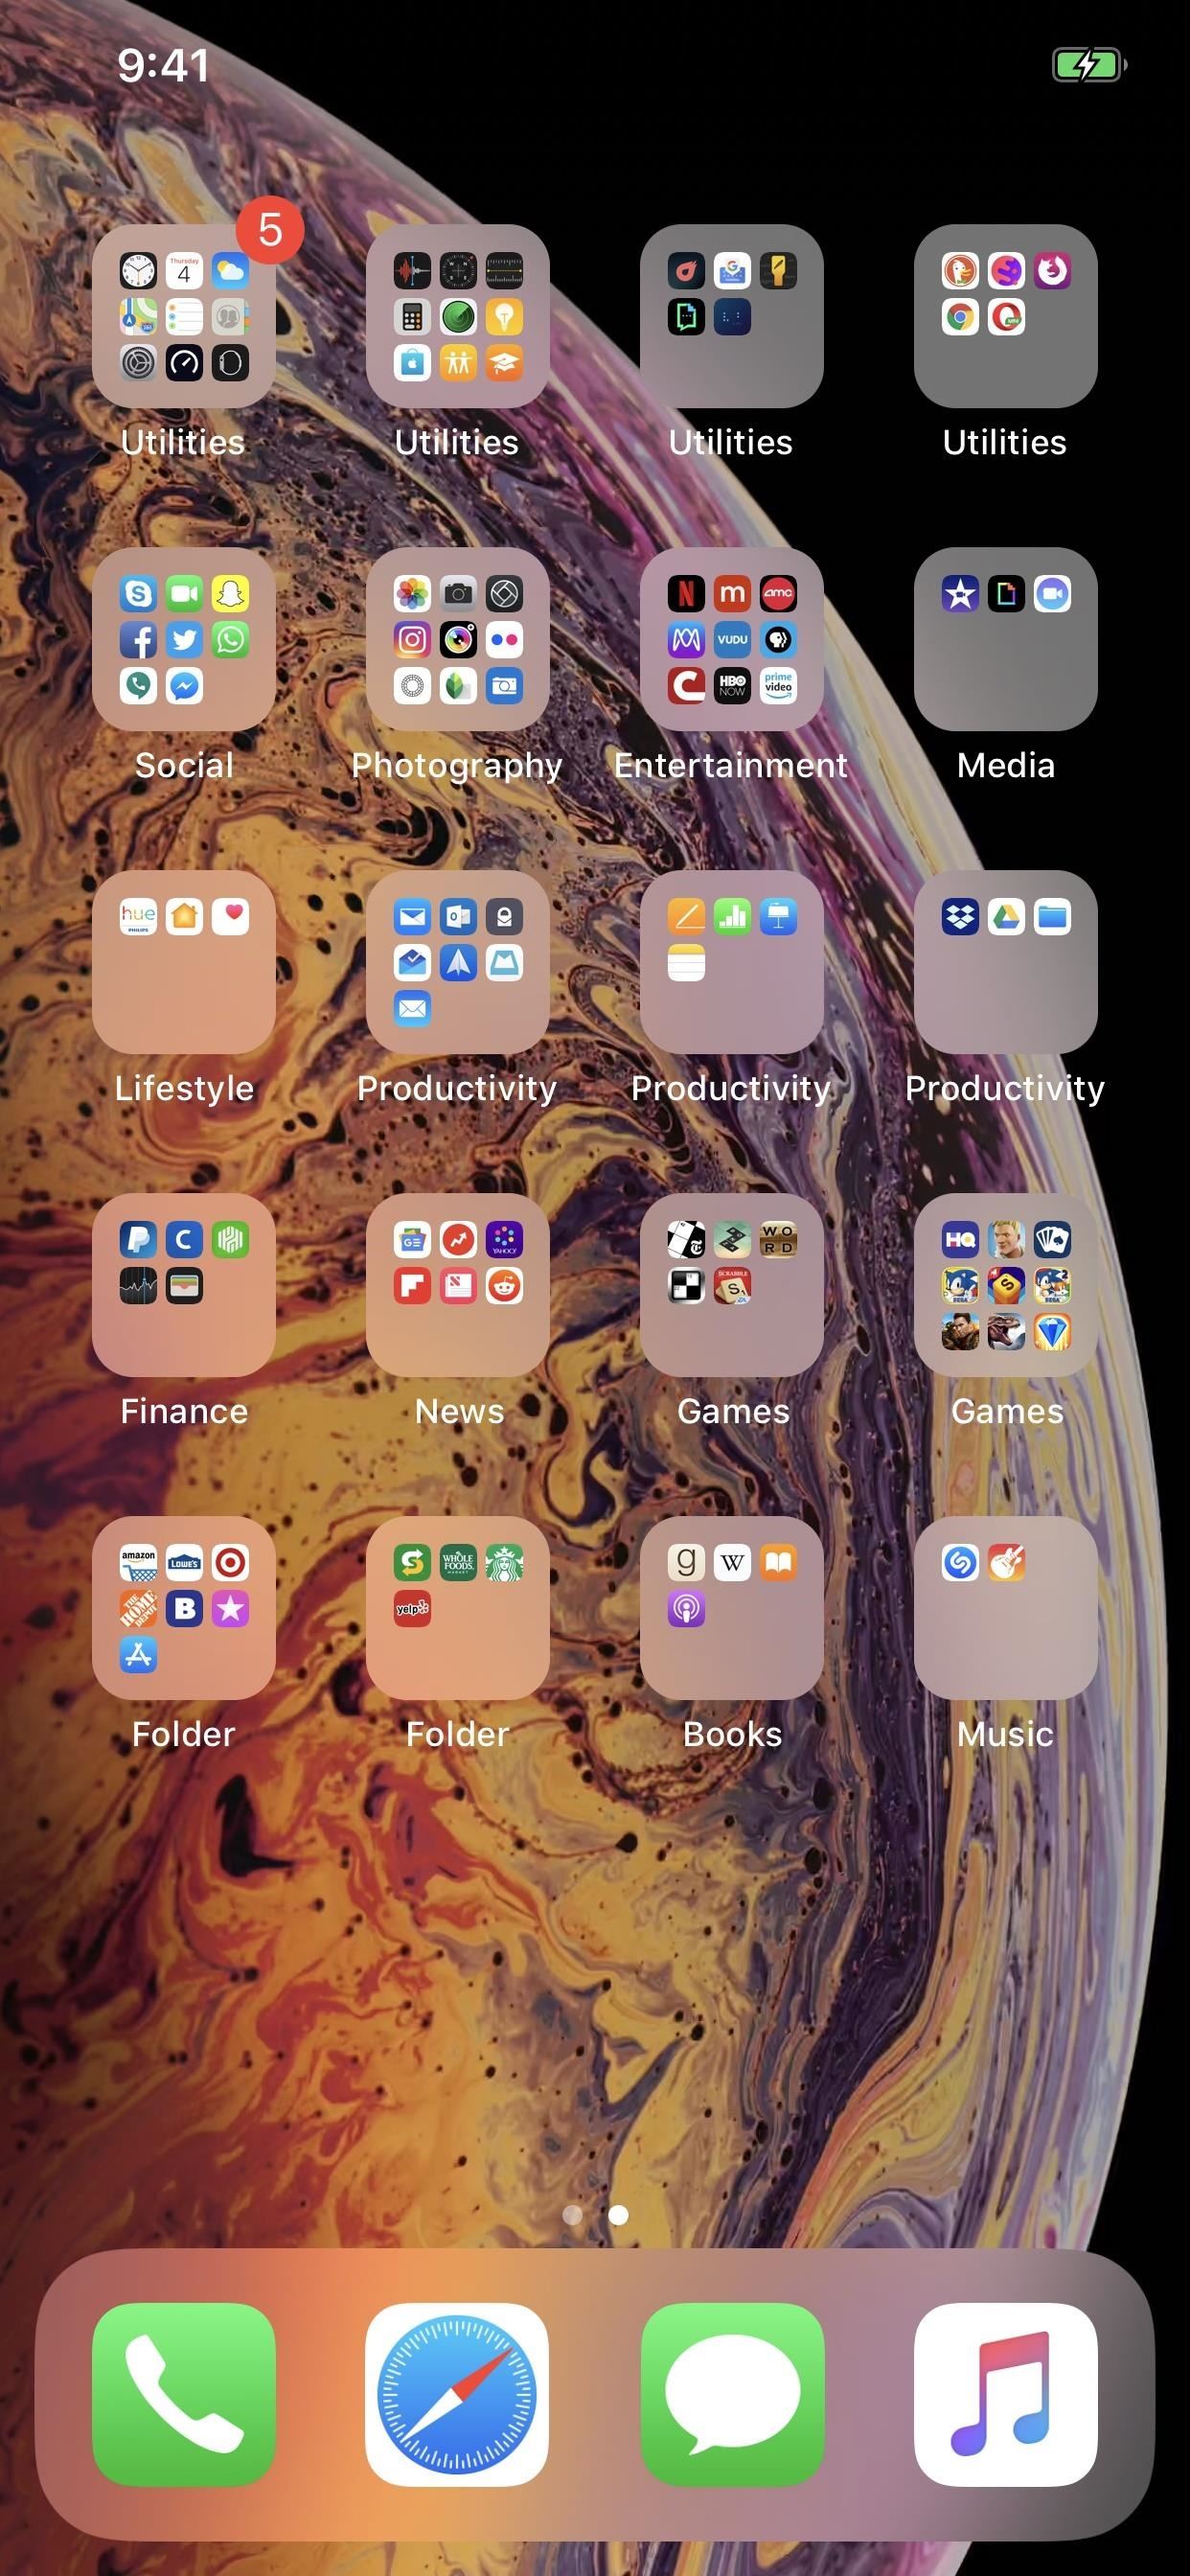
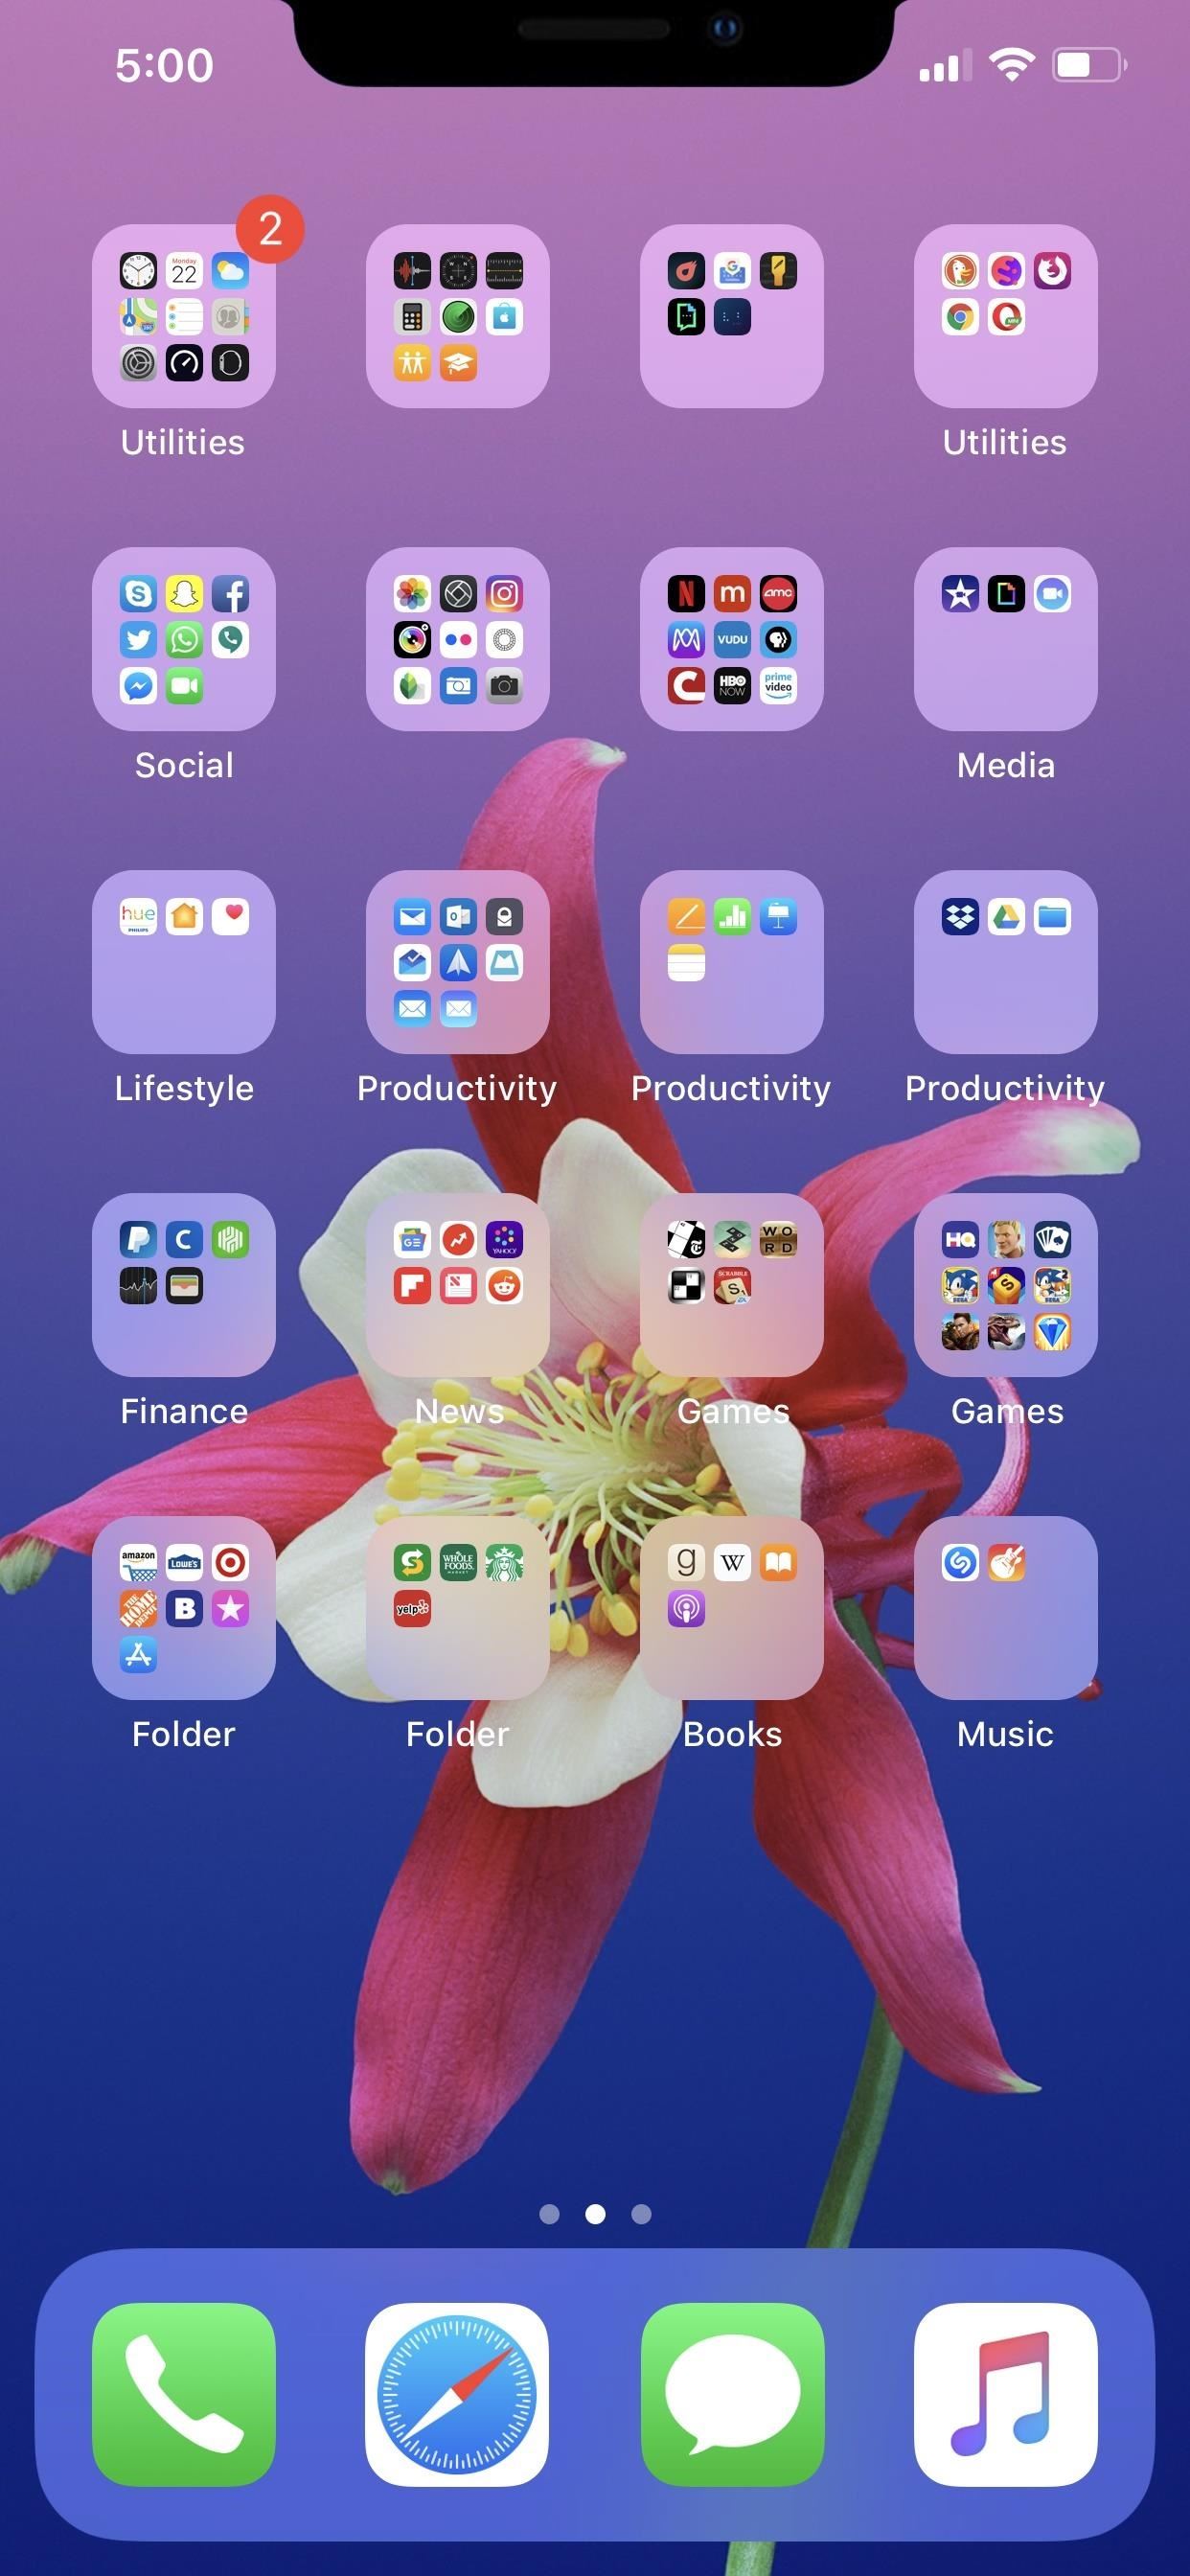
6. Hide Folder Text on the Home ScreenDepending on your wallpaper, the white text that appears below folders can look pretty jarring. Fill the whole screen with folders, and you've got yourself an unpleasant home screen. It seems impossible at first to leave a folder unnamed, so what can you do about it?Using a workaround in iOS 12, you can hide folder names on the home screen entirely. No emojis, no one-letter names, nothing. Take a look at the difference below, and you'll never want to see a folder name on your home screen ever again, so check out our guide to see just how to take advantage of this workaround.Full Guide: How to Hide Folder Names on Your Home Screen for Good Images by Justin Meyers/Gadget Hacks
7. Hide App Icon Text on the Home ScreenIn the same vein, you can get rid of app icon text as well. Just follow the same steps, but this time, you'll need to create a bookmark for your app first. Make sure to brush up on that step if you didn't check it out already.
8. Hide the DockUnlike macOS, iOS doesn't let you automatically hide and show the dock. It must remain at the bottom of your display, even if you remove all apps from it. While there is no native fix to this issue, there exists a workaround that utilizes unique wallpapers to make that pesky dock disappear.Full Guide: How to Hide the Dock on Your iPhone Image by Brian Lang/Gadget Hacks
9. Place Your Home Screen Icons Anywhere You WantWhile Apple Configurator 2 and the new multi-grab feature allow you greater control over reordering your home screen, they don't change anything when it comes to how the grid works in iOS. You still need to place icons one by one, filling up each row until a page is full, at least, if you play by the rules.With this technique, you can place your app icons anywhere on the grid, creating whatever arrangement you see fit. Place a ring of icons around the border of the display or have one single app resting somewhere in the middle.Full Guide: How to Move App Icons Anywhere on Your Home Screen
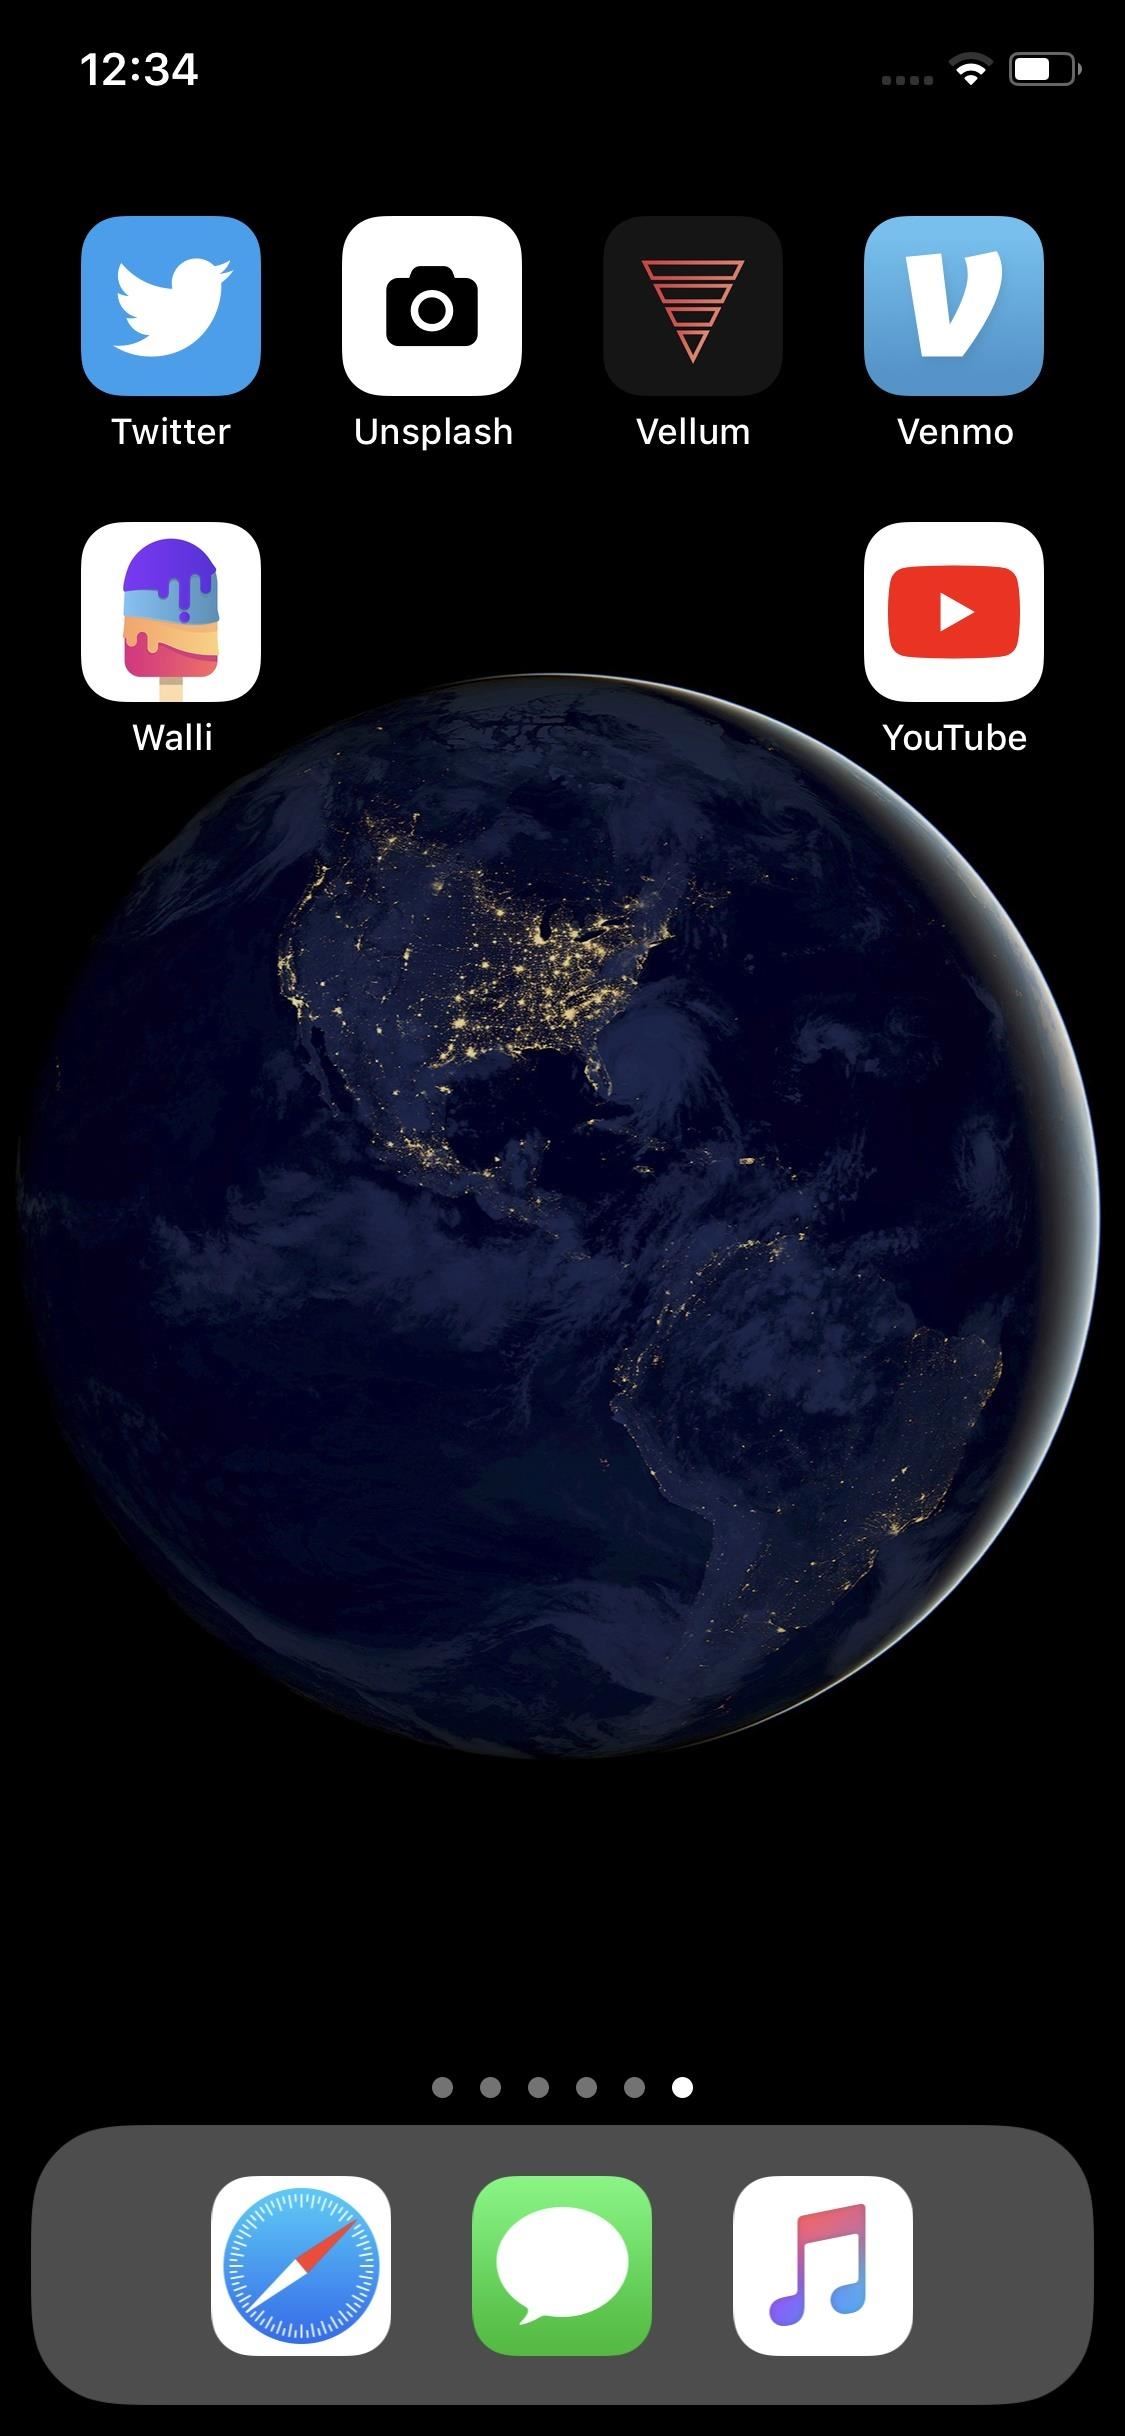
10. Hide Apps on the Home ScreenIf you're like me, you like a nice, clean desktop on your personal computer. Why shouldn't you have the same for your iPhone? The trouble is, iOS doesn't make it very clear how to keep one page free from apps so you can focus on your wallpaper of choice. That's okay, though — you need to know how it's done.Full Guide: How to Hide Home Screen Apps to Keep Focus on Your Wallpaper Clutter (left) vs. no clutter (right).
Overall AppearanceThere are a lot of tweaks you can make to iOS to give it a personal feel. Use a few or all of these tips, and nobody else's iPhone will quite feel like your phone.

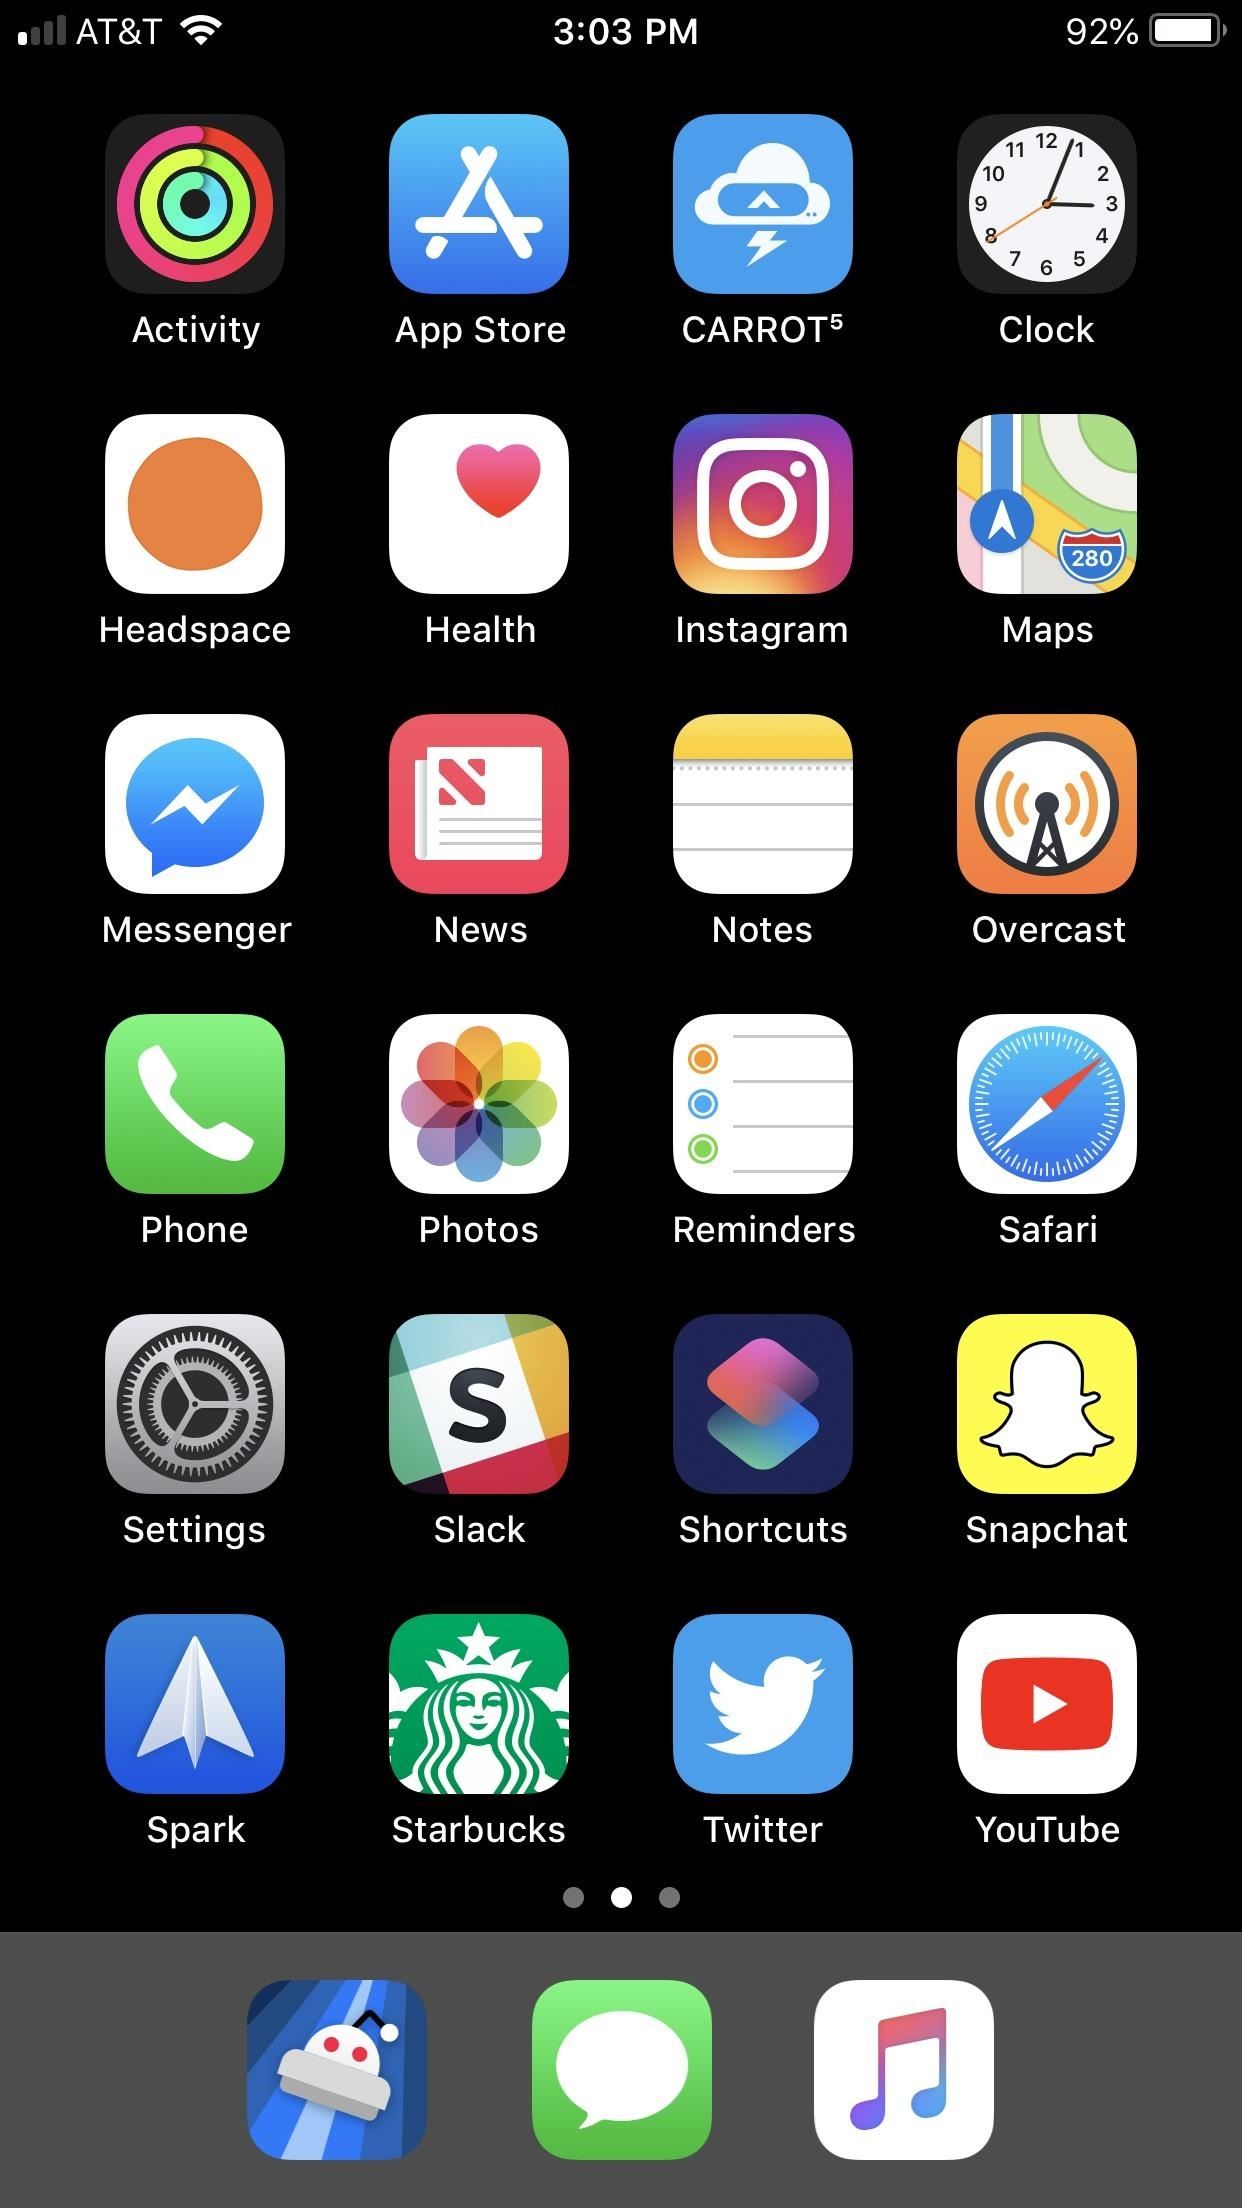
1. Enable the System-Wide Dark ModeThere's no real dark mode on iOS yet. However, there is a pretty decent workaround. "Smart Invert Colors" is a setting that tries to invert all but the essential colors on your iPhone. For example, it'll change white backgrounds to black, but try to keep photos, videos, emoji, etc. in their color scheme.As you can see below, Smart Invert Colors works much better than using Classic Invert for a dark mode. It still inverts things it shouldn't, especially when it comes to embedded video, but it's a good, temporary solution for iOS users looking to browse their iPhones at night.More Info: How to Unlock Apple's Dark Mode for Your iPhone Smart Invert (left) vs. Classic Invert (right). Images by Justin Meyers/Gadget Hacks
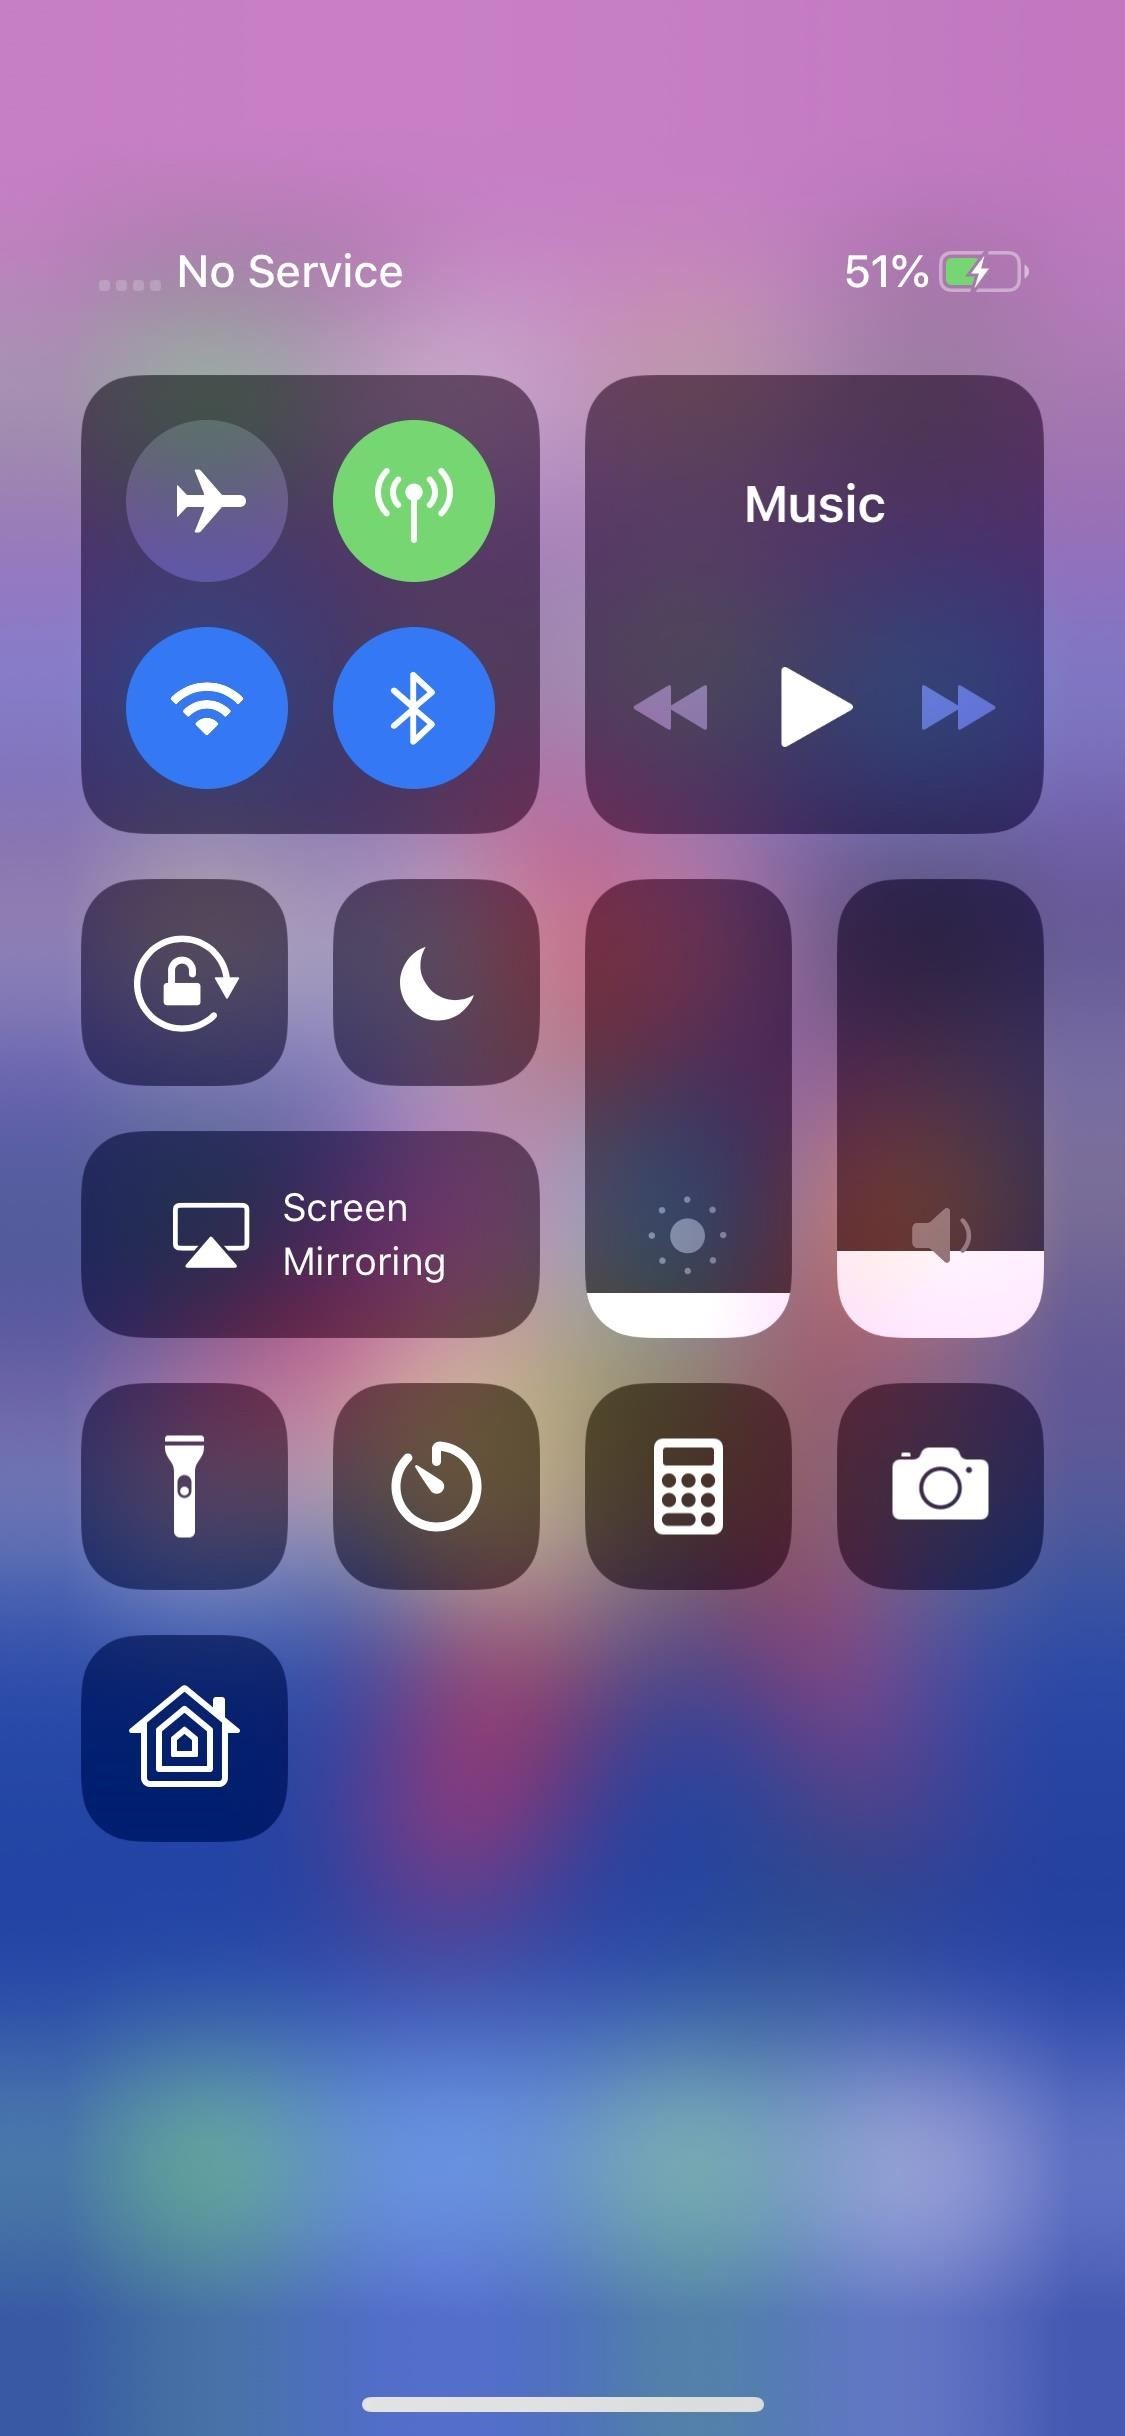
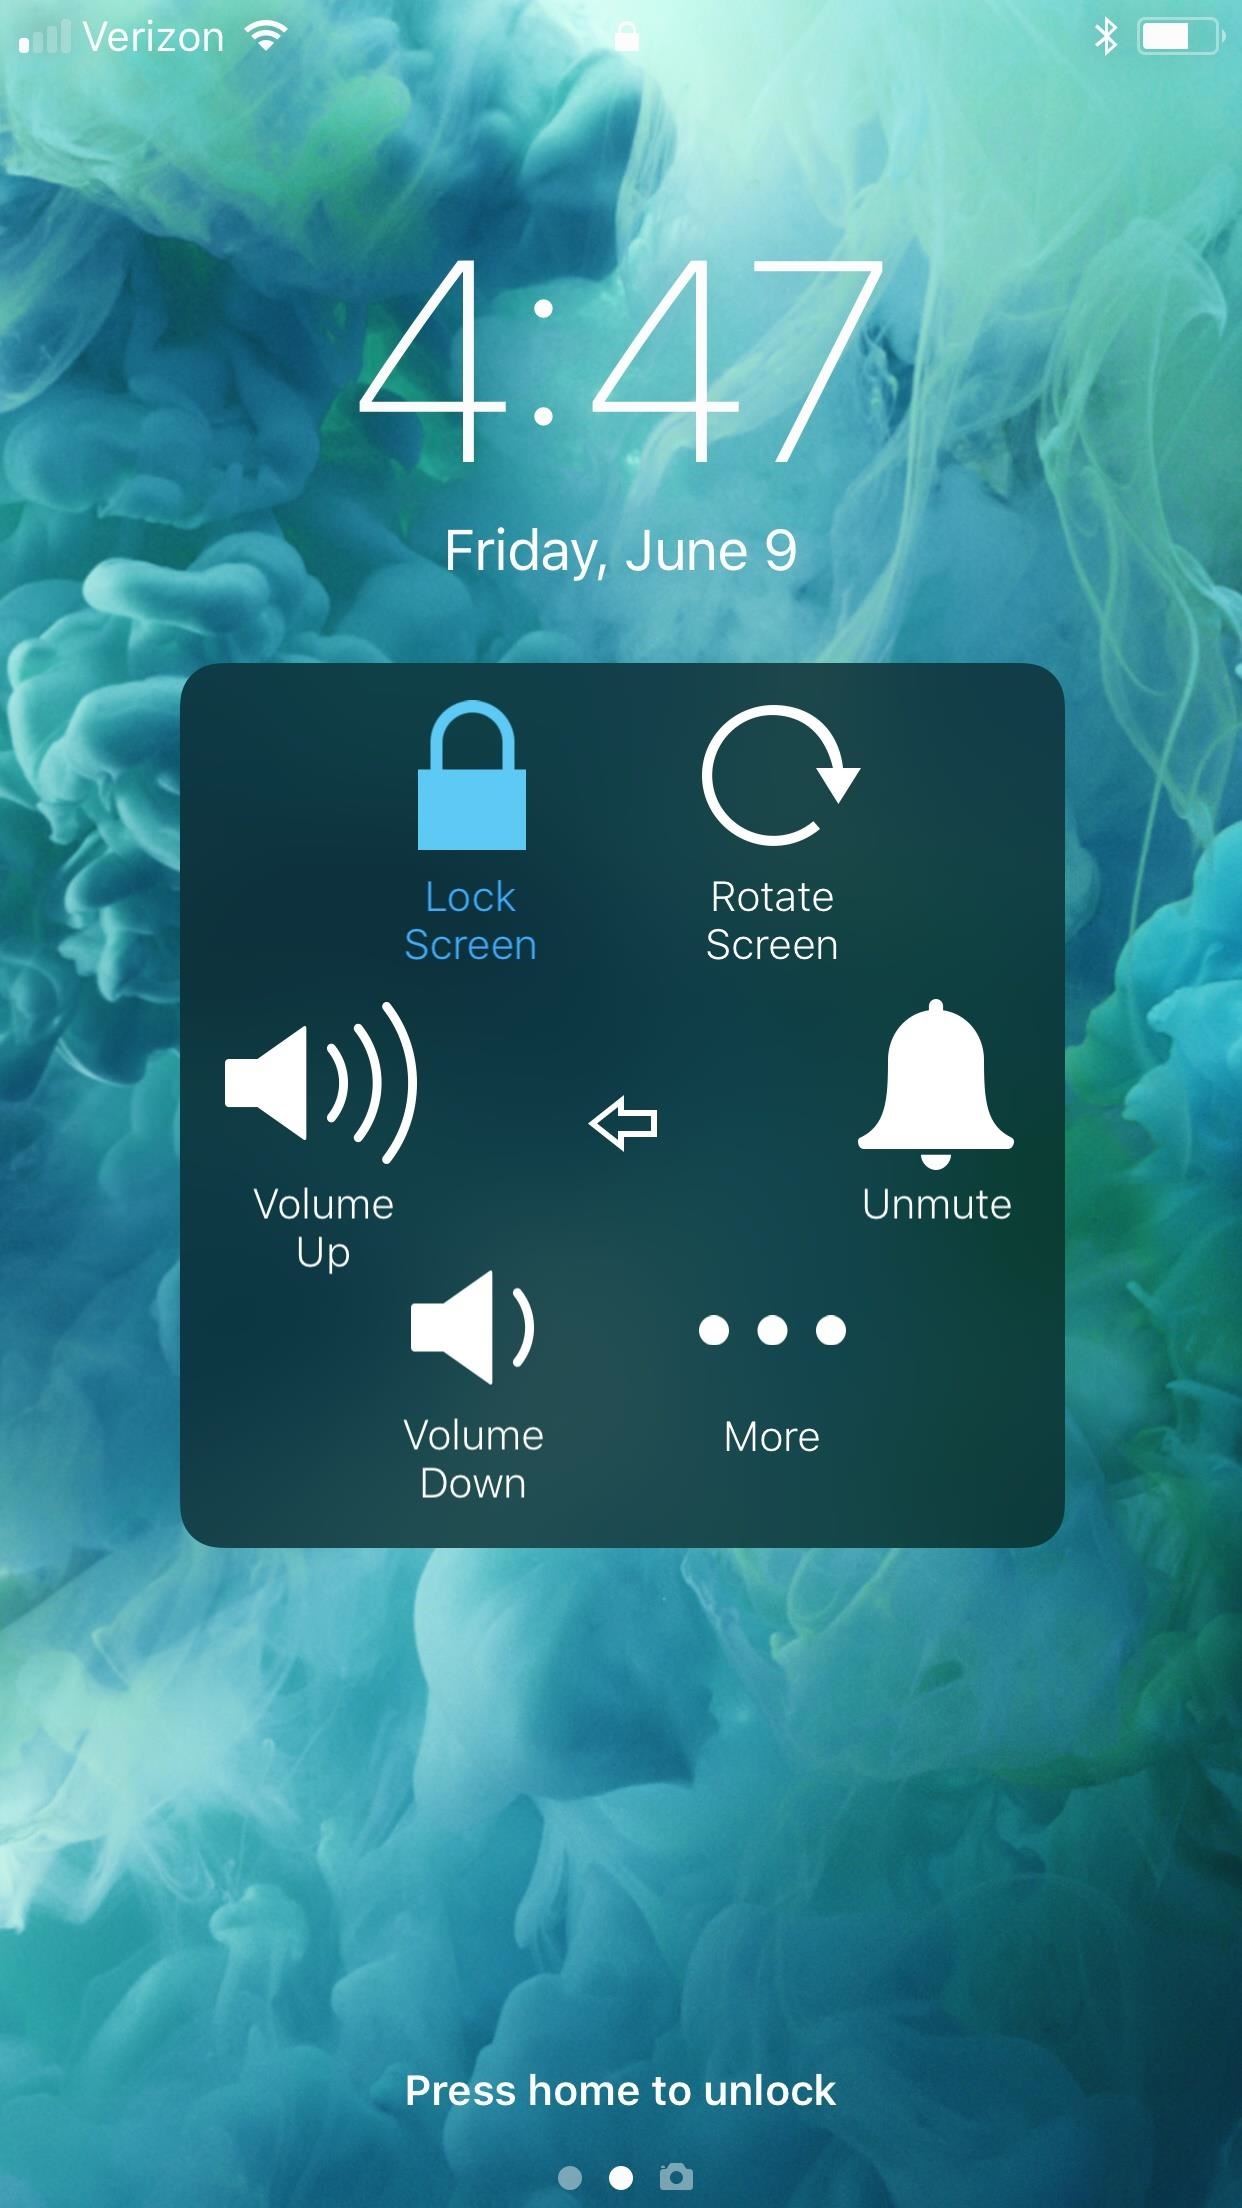
2. Add Control Center ButtonsIntroduced in iOS 11, you can customize Control Center's buttons and layout, other than the connections pane, music pane, orientation lock, Do Not Disturb, brightness, volume, and Screen Mirroring, that is.Full Guide: How to Customize Control Center with More Buttons
3. Customize the Share SheetThe Share Sheet is a powerful tool in iOS — you can send photos, videos, links, and more to contacts across apps. But it's not just for sharing — you can also use the Share Sheet to search for text on a page, add an article to your reading list, enable a third-party plug-in, and so much more.On top of its awesome features, you have a lot of freedom to customize your Share Sheet — you choose which apps and which tools appear in which order. Make sure your Share Sheet looks like no one else's.Full Guide: How to Add, Remove & Reorder Your Share Sheet Actions
4. Choose Your Zoom LevelIf you want a change in appearance, why not adjust your zoom level? Apple bakes two zoom sizes into iOS for certain iPhone models that impact app icons, chat bubbles, keyboards, UI accents, and so much more. Which level you choose is entirely up to you — apps will perform the same, just differ in appearance.Full Guide: How to Change the Display Zoom for a Smaller or Bigger Look Standard (left) vs. Zoomed (right).
5. Artificially Dim the Display with 'Reduce White Point'If you find yourself still squinting at an iPhone display with the brightness all the way down, this one's for you. "Reduce White Point" is a setting that reduces the brightness even further than you typically can.You'll find the option in Settings –> General –> Accessibility –> Display Accommodations. Tap the toggle to engage the feature, then use the slider to control the reduction by 25% all the way to 100%.
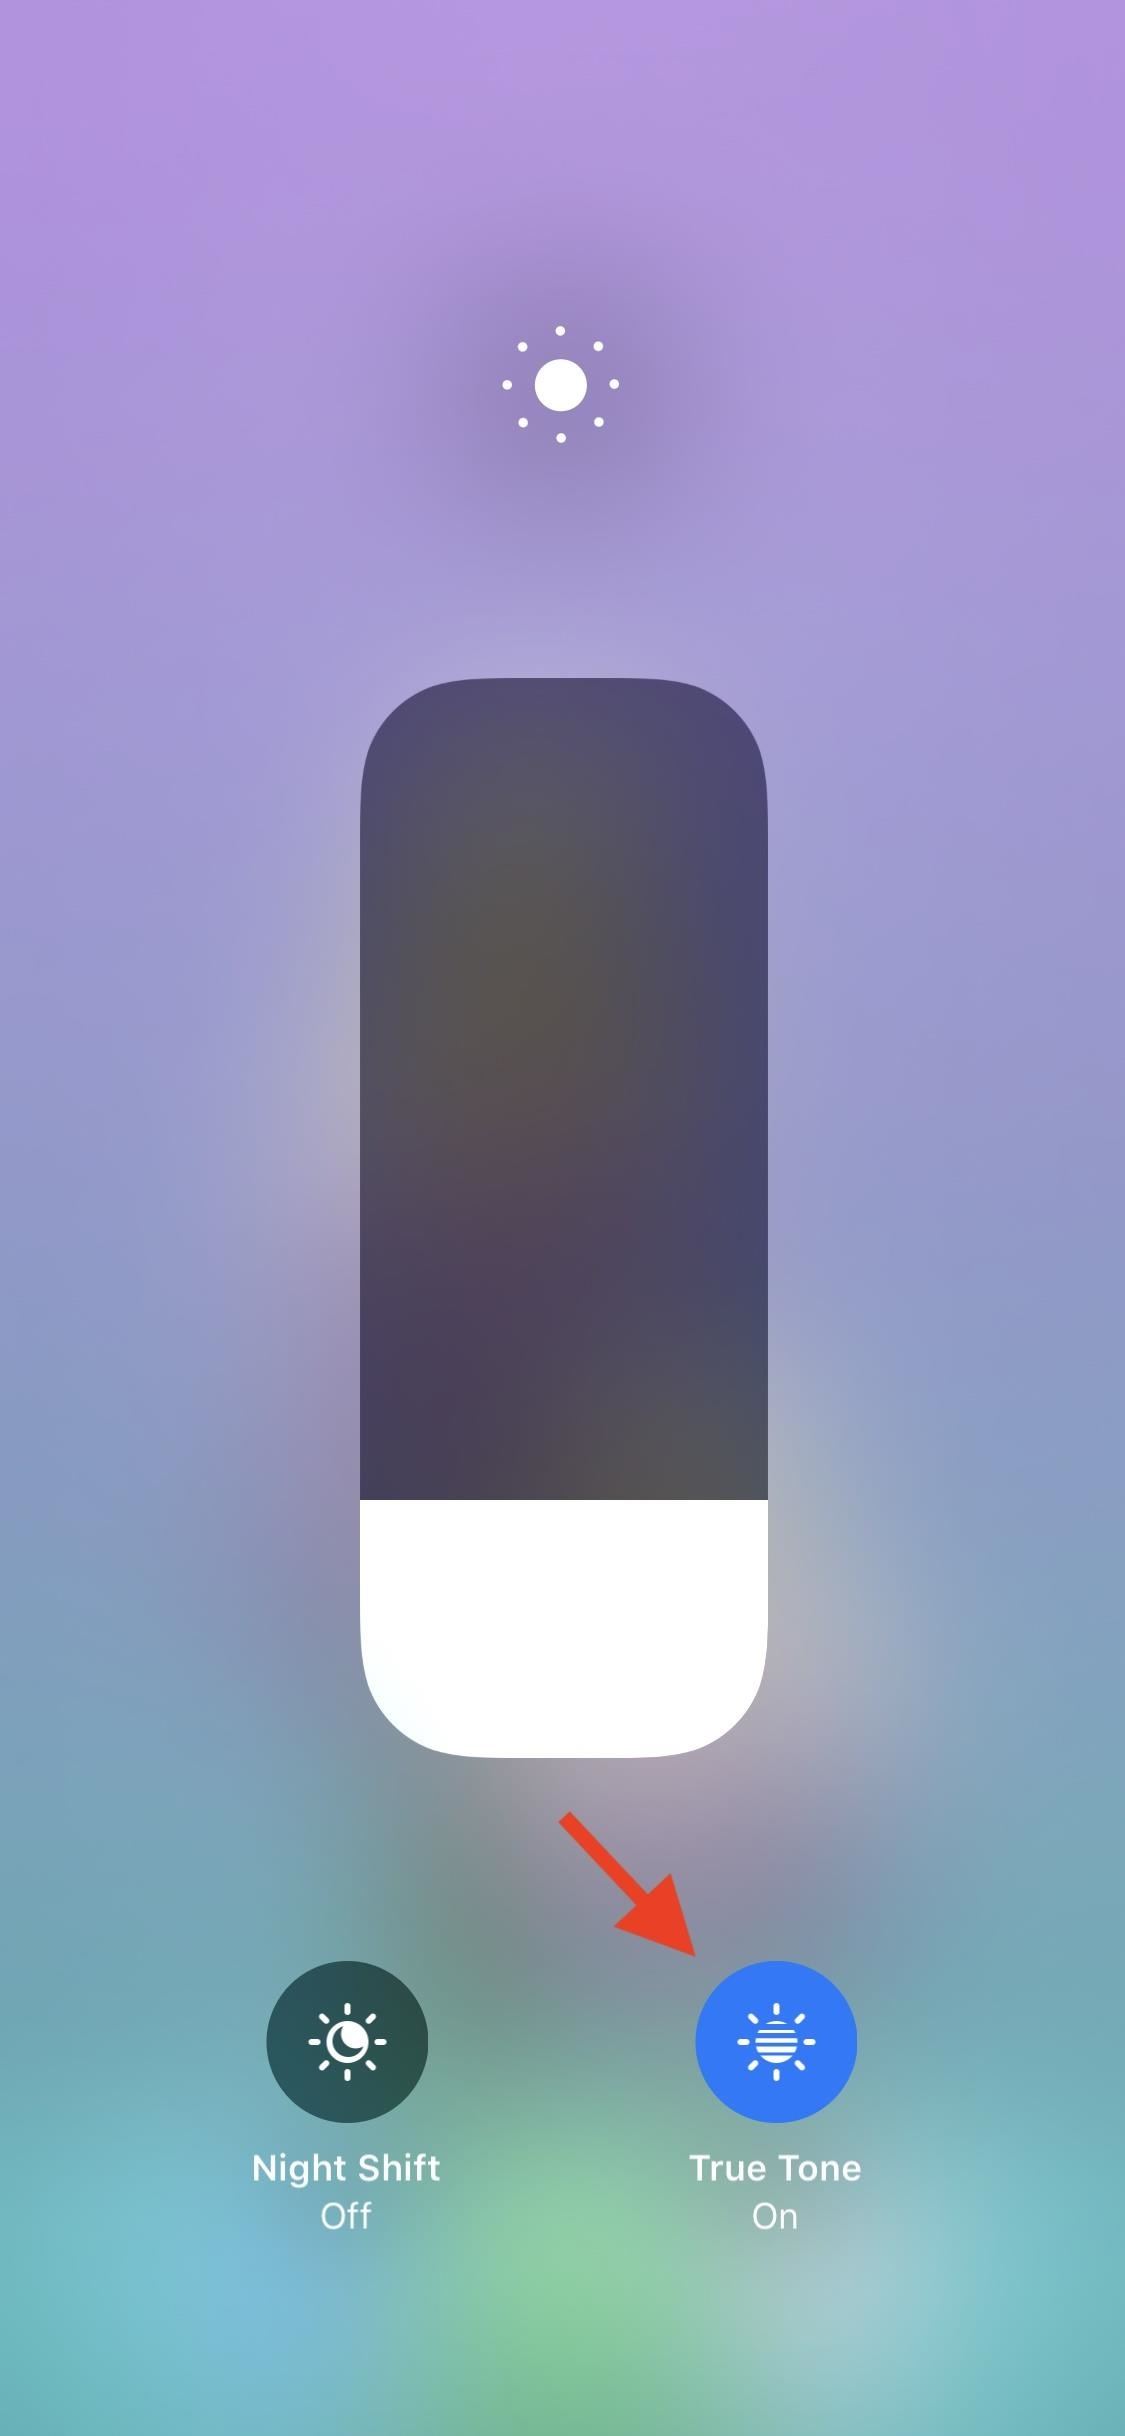
6. Disable TrueToneTrueTone is a cool feature that automatically changes the white balance of your iPhone 8, 8 Plus, X, XS, XS Max, or XR display depending on the light conditions of your surroundings. That said, if you need to have accurate colors on the screen, or you just like consistent color temperatures, TrueTone isn't for you.Luckily, it's easy to disable. Just 3D Touch or long-press the brightness slider in Control Center, then tap "True Tone" to turn it off. Alternatively, you can find the option in "Display & Brightness" in the Settings. Just make sure the toggle next to "True Tone" is disabled.
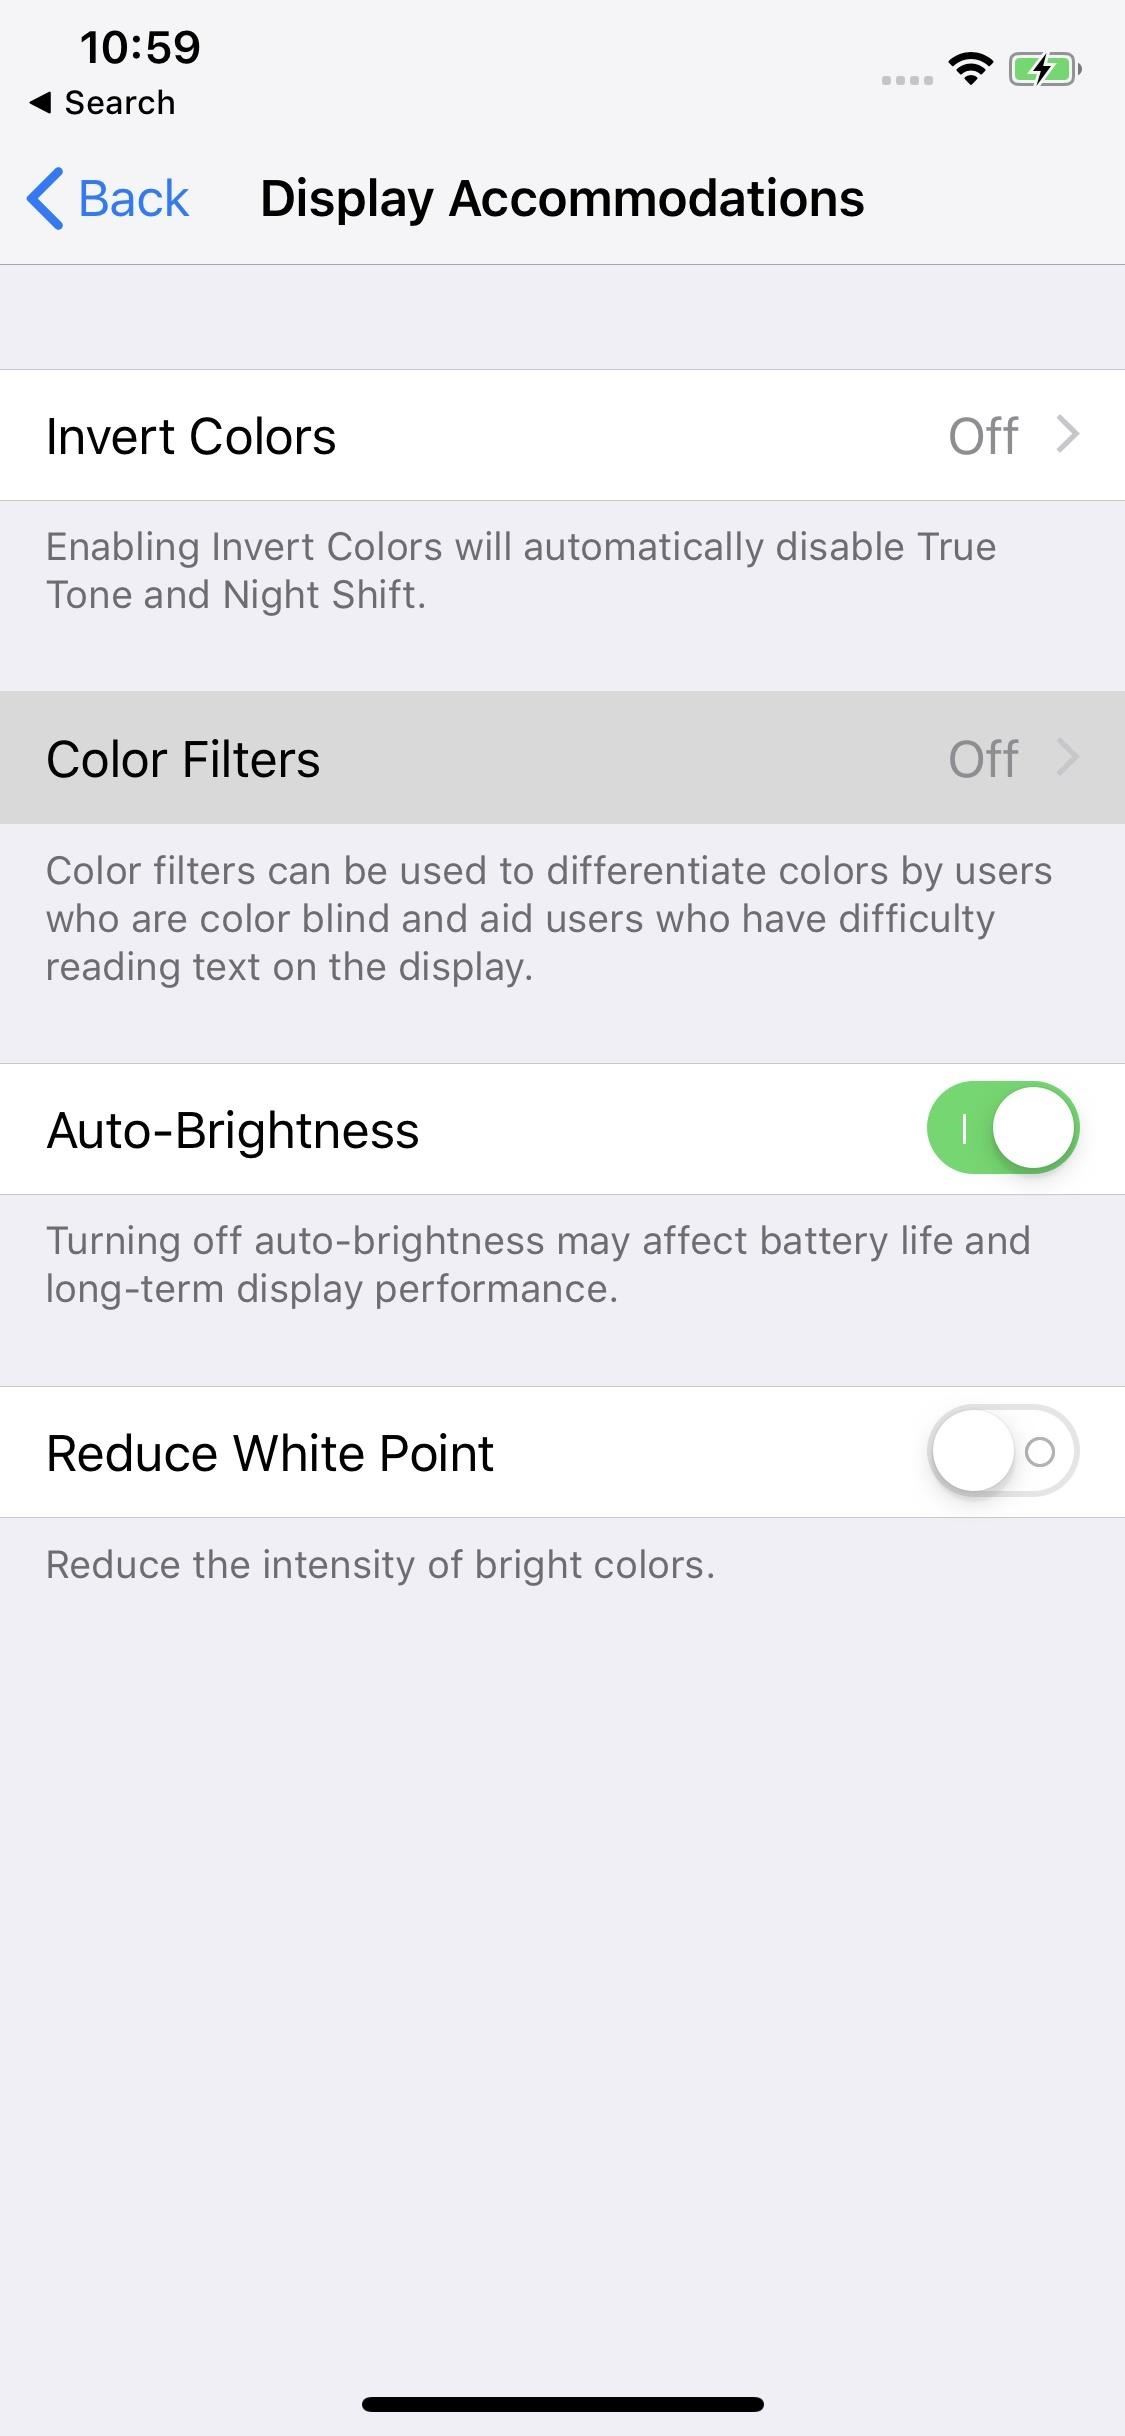
7. Turn Off Colors (Grayscale)If you're looking for a change of pace, why not turn off colors on your iPhone? It helps with viewing your iPhone in dark conditions and can potentially curb smartphone addiction as well. Plus, keeping your iPhone on Grayscale makes everything else look that much more colorful.To enable Grayscale, head over to Settings –> General –> Accessibility –> Display Accommodations. Select "Color Filters," then enable the toggle next to "Color Filters." Finally, select "Grayscale" from the list below.
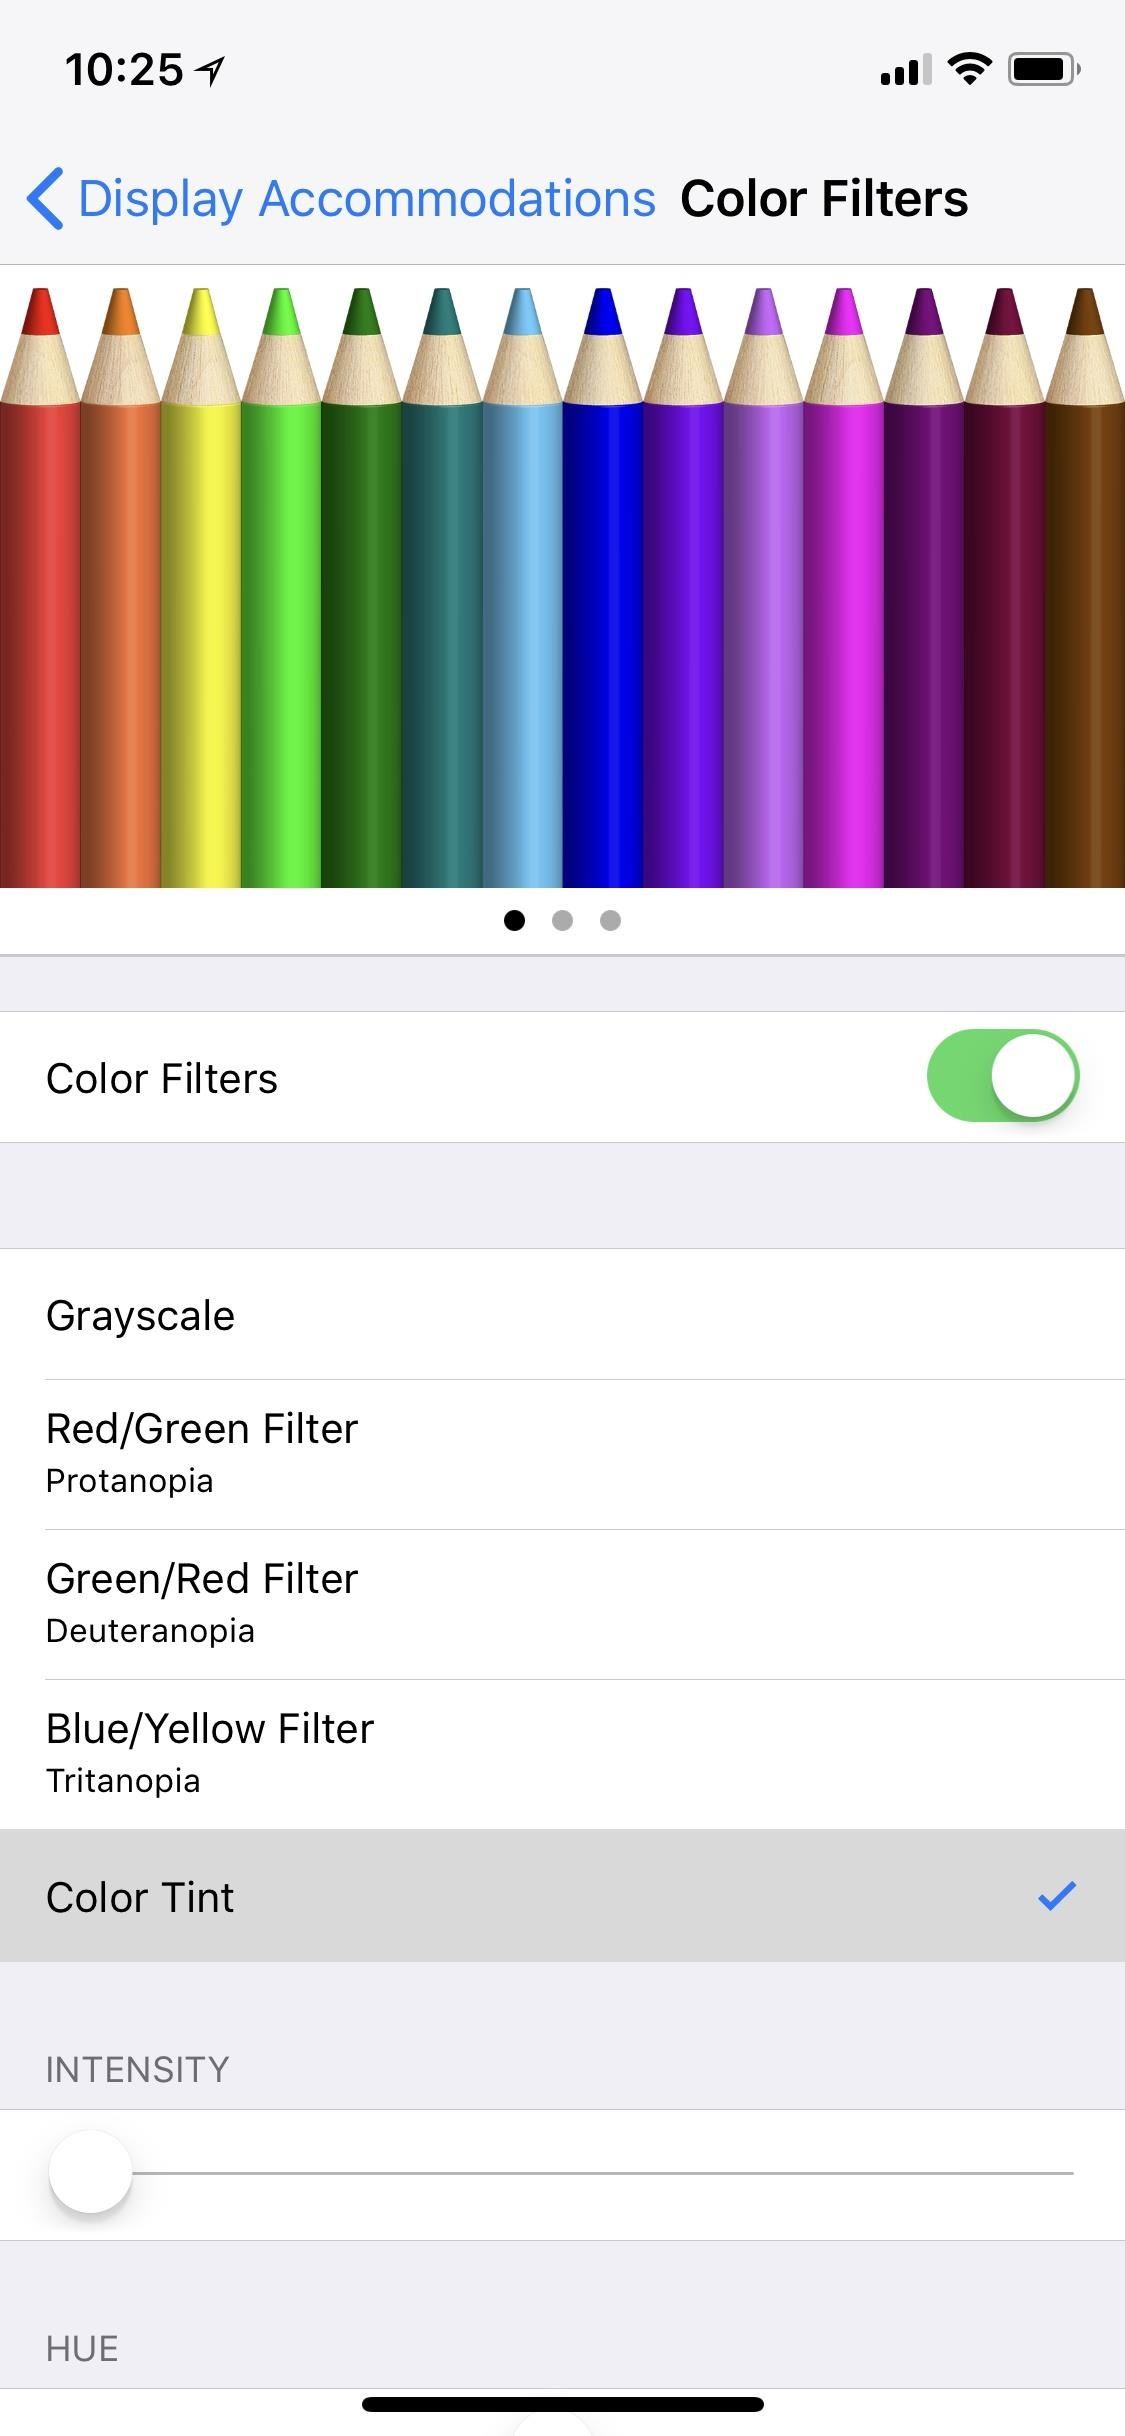
8. Add a Color FilterWhile checking out the Grayscale setting, you may have noticed a list of other color filters at your disposal. You have Red/Green, Green/Red, and Blue/Yellow filters to choose from, each with its own levels of customization. The red filter is considered to reduce eye strain at night and is the best color to use at night since it's harder to see by others at a distance.Full Guide: How to Change Color Filters for Your iPhone's Screen Images by Justin Meyers/Gadget Hacks
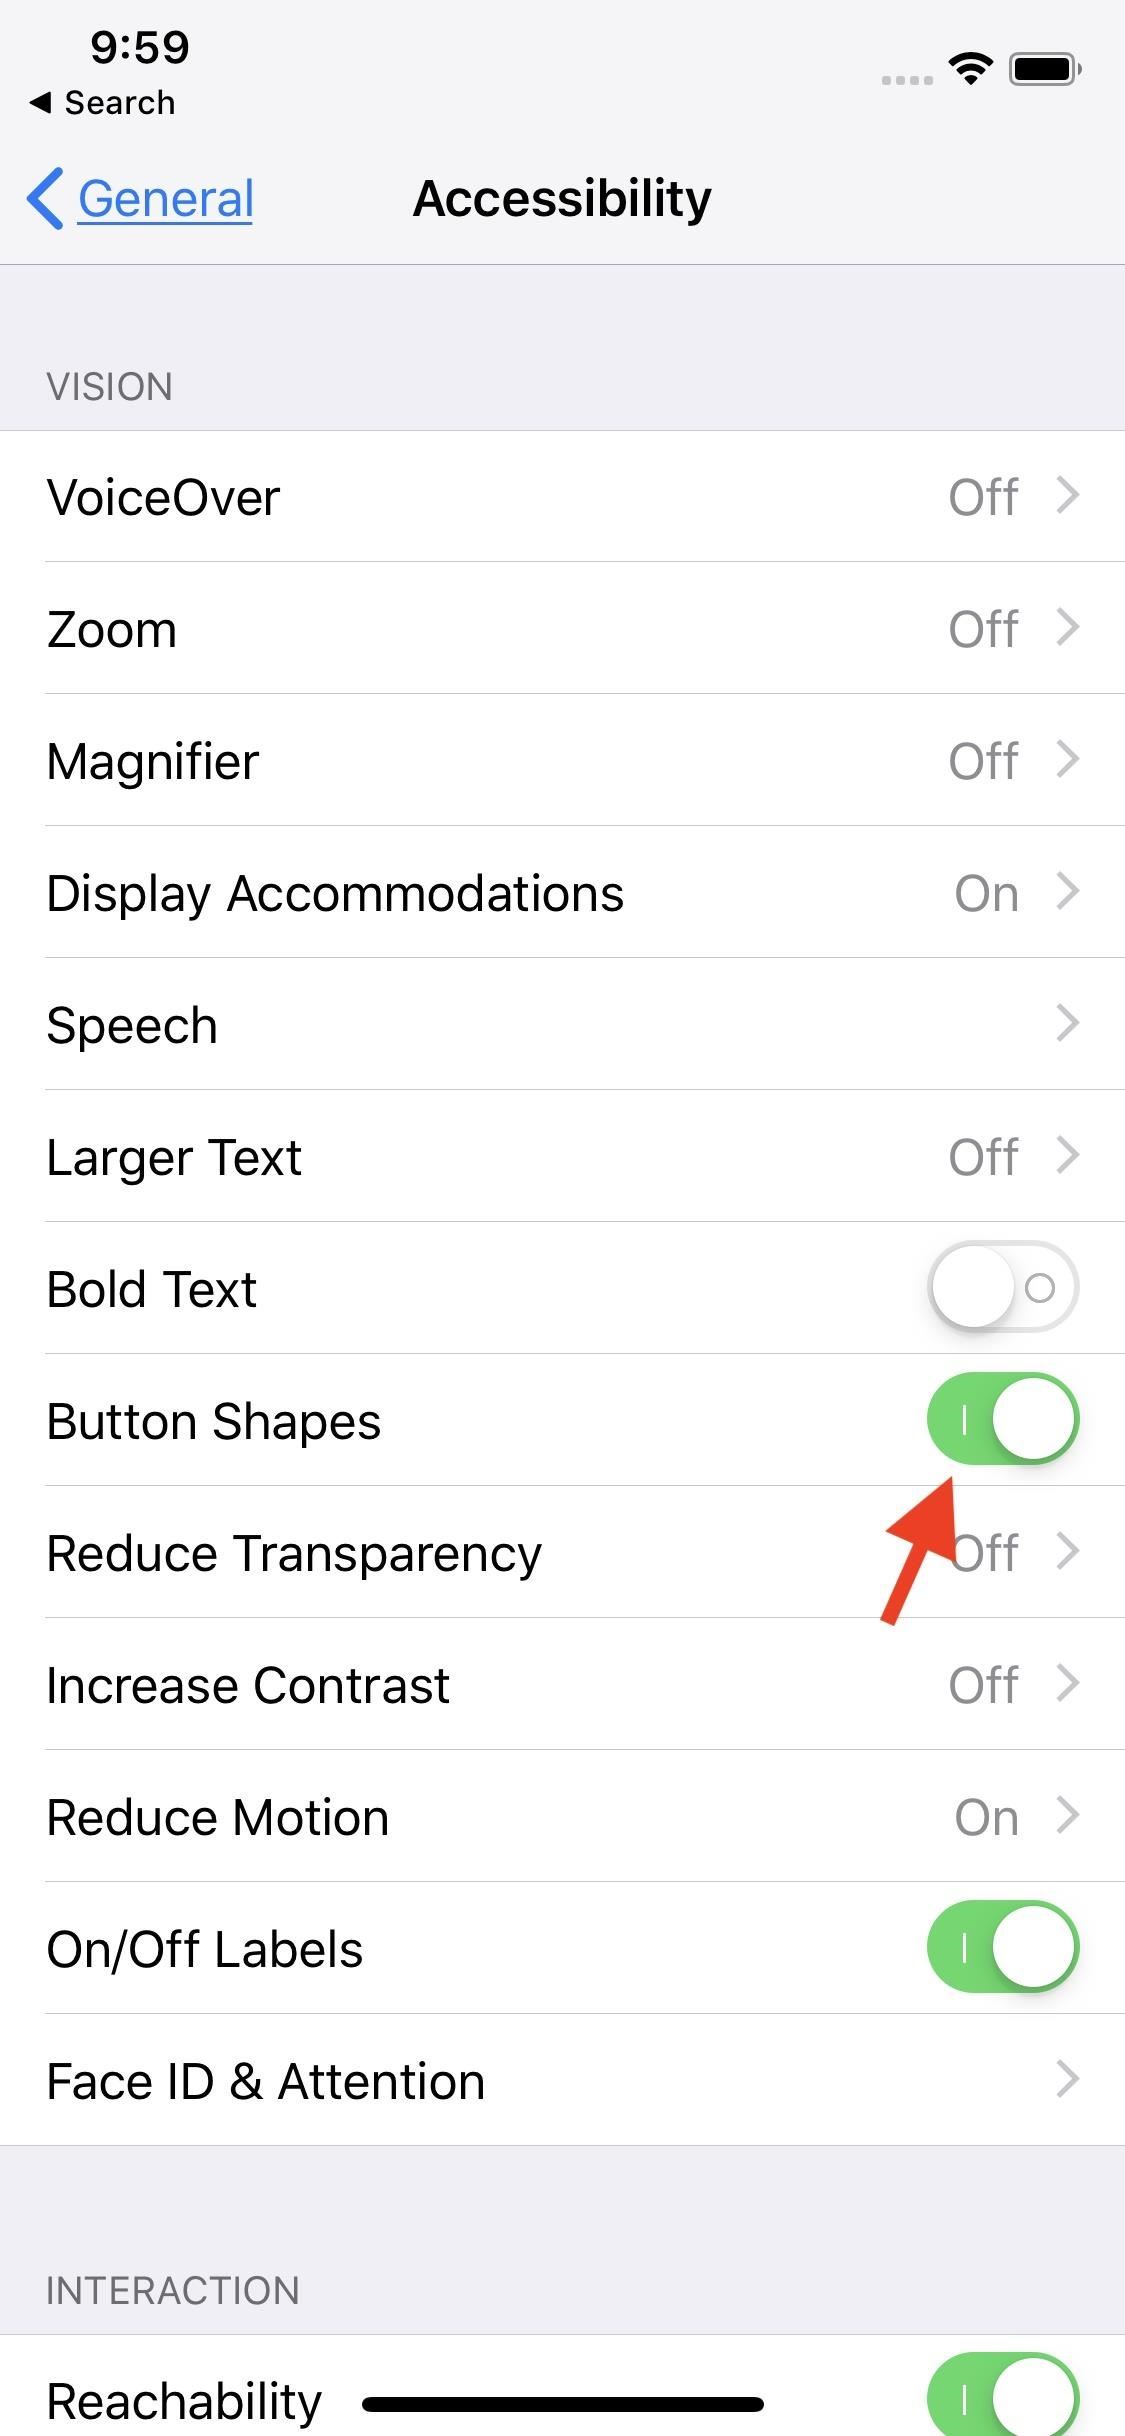
9. Enable Button ShapesButton shapes add a bit more depth to your iOS experience — active buttons on-screen will appear underlined or surrounded by a box, which can give you a better idea as to what's interactive and what's not. It adds a unique style most of your friends' iPhones probably don't have. To activate the feature, head over to Settings –> "General –> Accessibility, then enable the slider next to "Button Shapes."
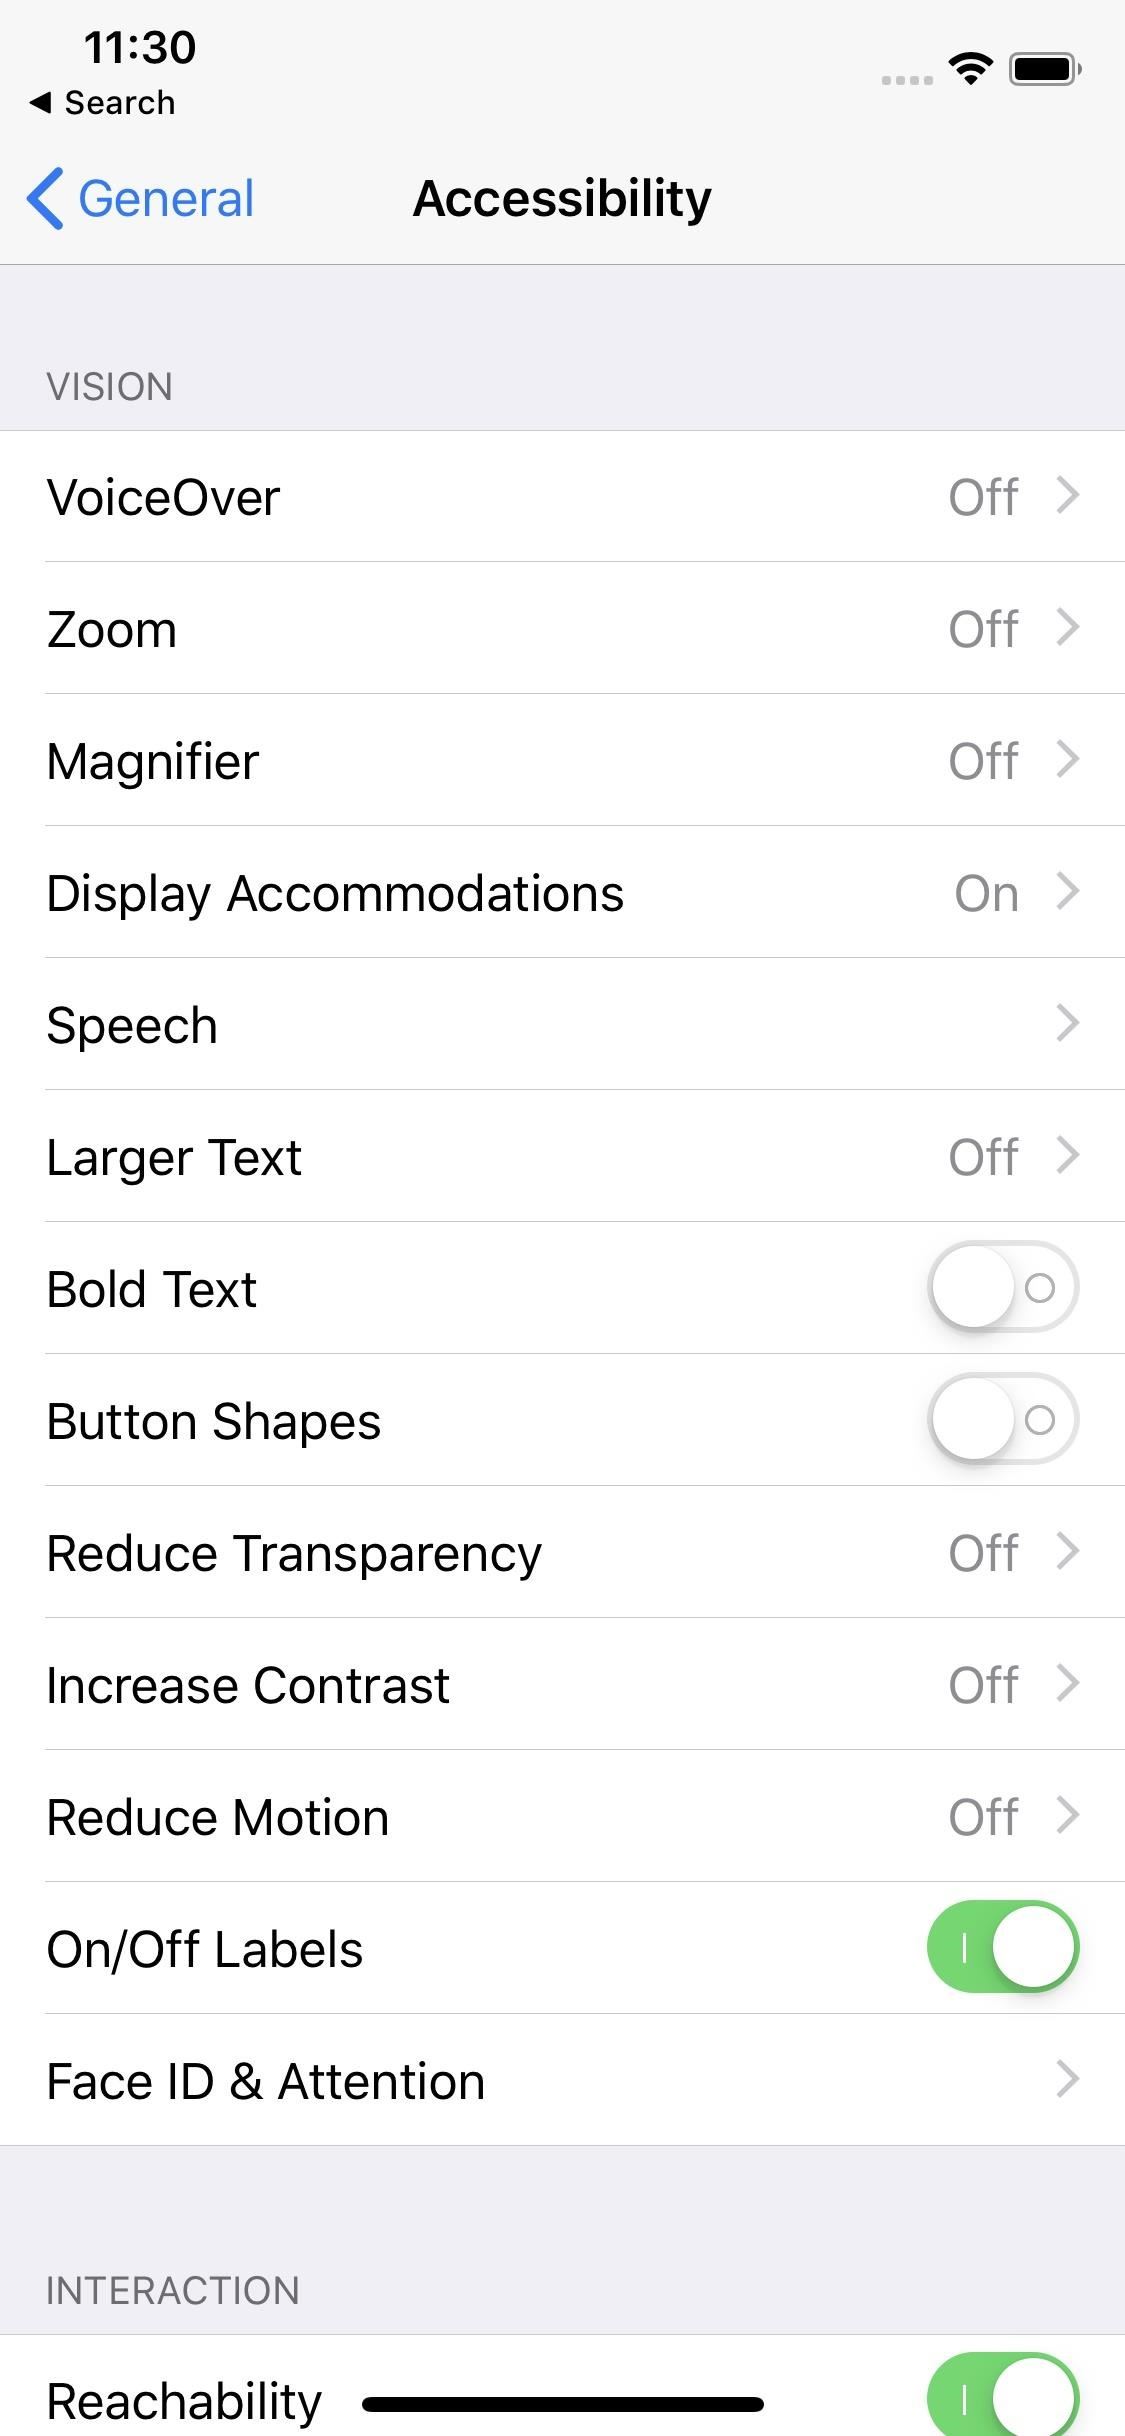
10. Enable I/O Buttons for Switches & TogglesHere's a fun tweak — iOS lets you add I/O (on/off) symbols for switches and toggles. It won't change how these toggles behave, but it's a fresh look. Quickly enable the feature in by tapping the "On/Off Labels" toggle in Settings –> Accessibility under the Vision section. Notice the difference between symbols on (left) and symbols off (right).
11. Schedule Night Shift to Turn On & Off AutomaticallyNight Shift is a tool that turns your iPhone's display more orange at night, to help you fall asleep easier. While you can enable the feature manually, there's a better way, one that changes the screen color without you needing to think about it at all.Full Guide: How to Schedule Night Shift Mode So You Don't Have to Remember
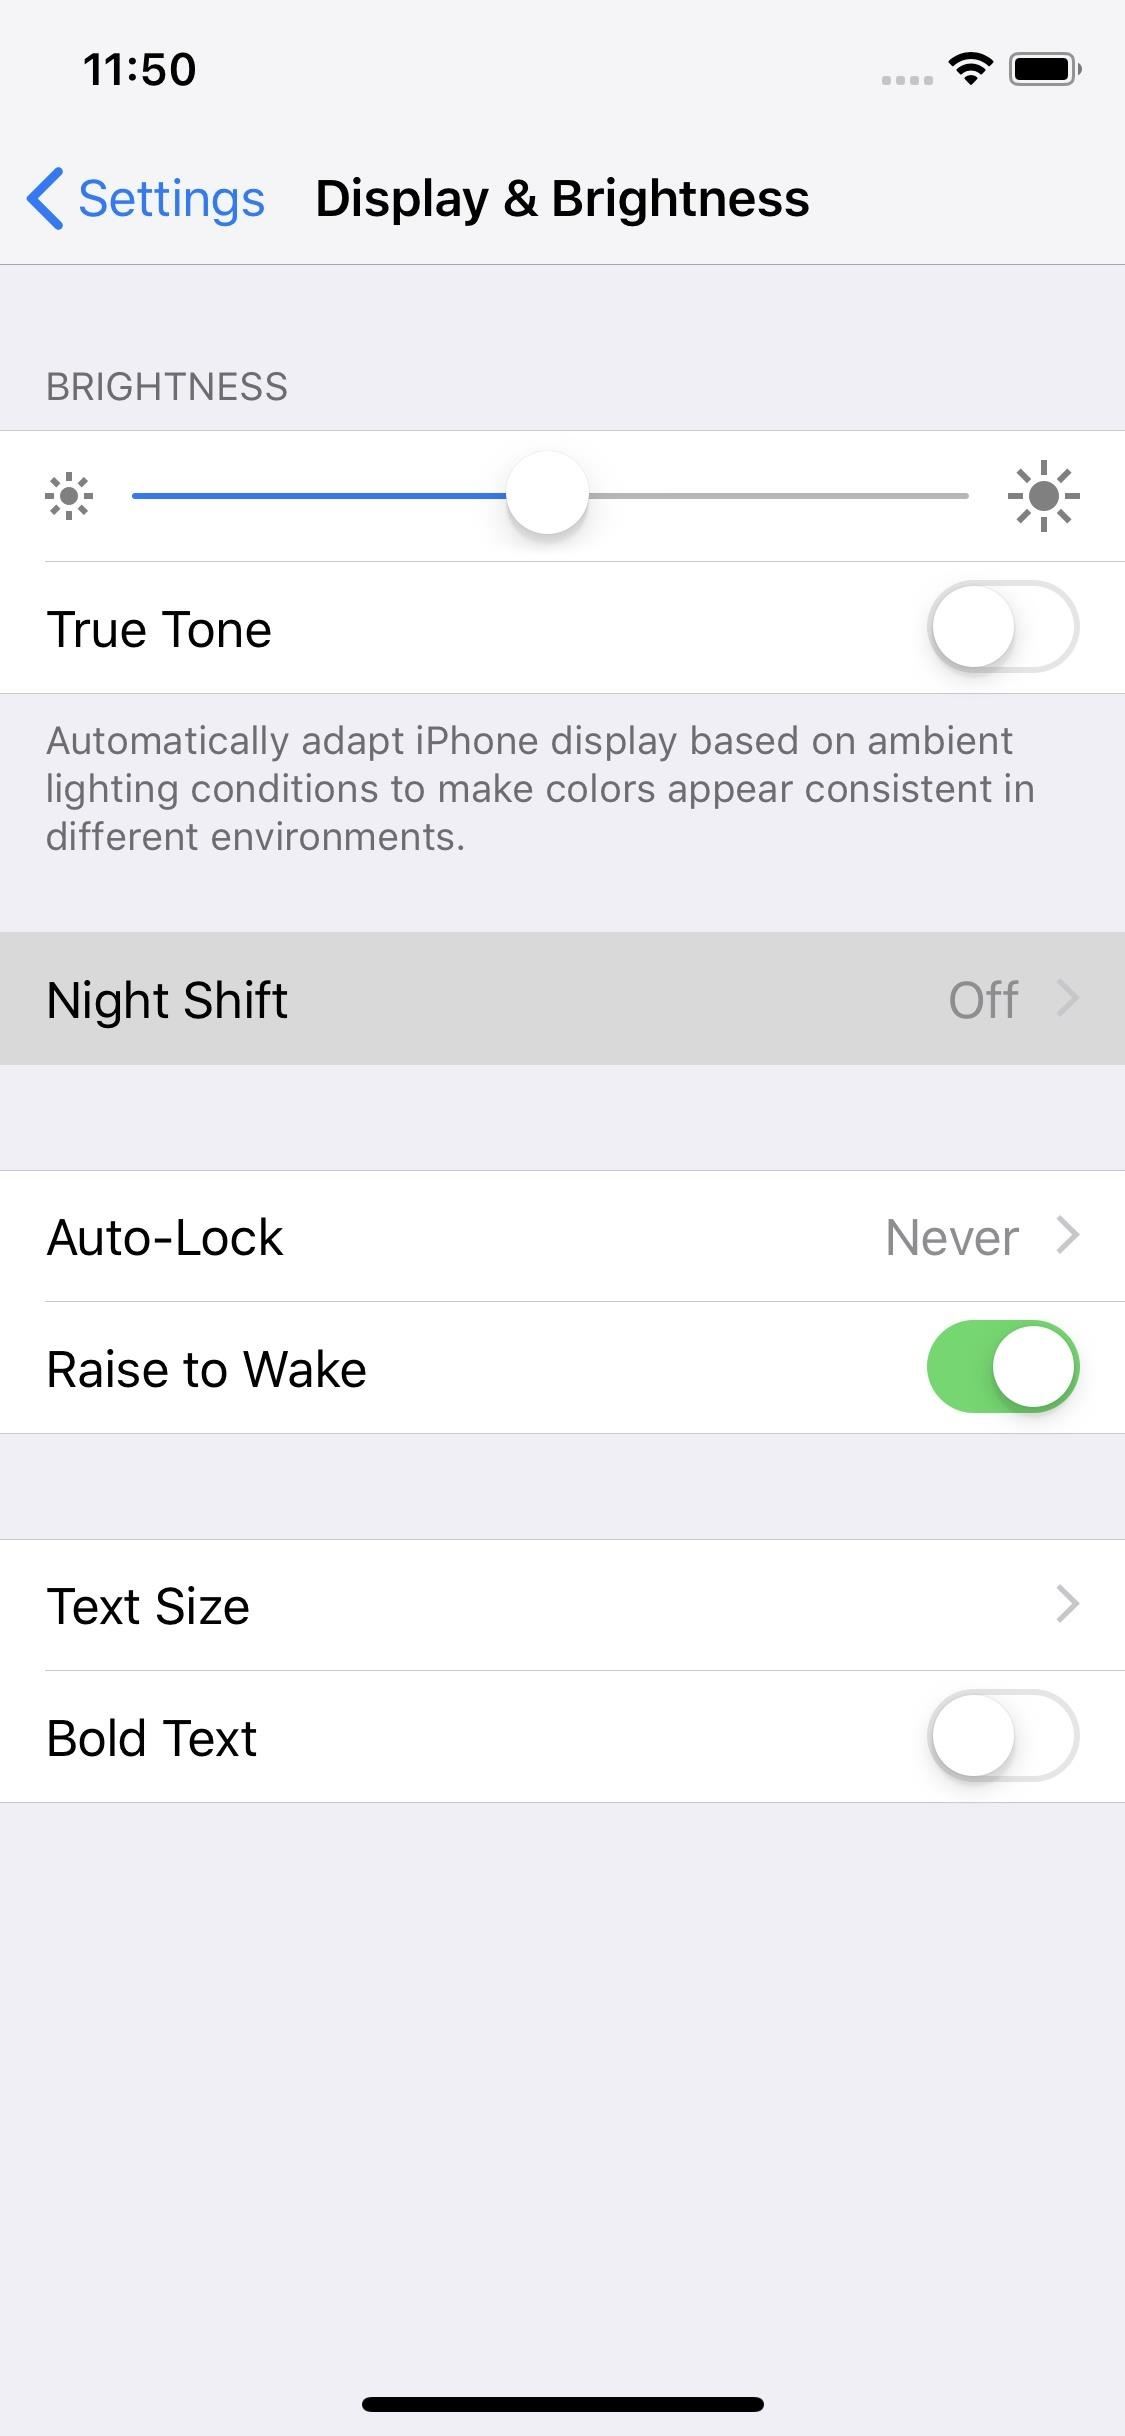
12. Choose Night Shift Color TemperatureOnce Night Shift is scheduled on your iPhone, you'll want to tweak it to match your style — you can choose to have the orange color more or less intense, depending on what looks better to you. You'll find these options in the Settings–> Display & Brightness –> Night Shift.Just move the slider in either direction, and you'll see a corresponding color preview overlayed on your display. Leave the slider at the color point you prefer, and you'll be all set.
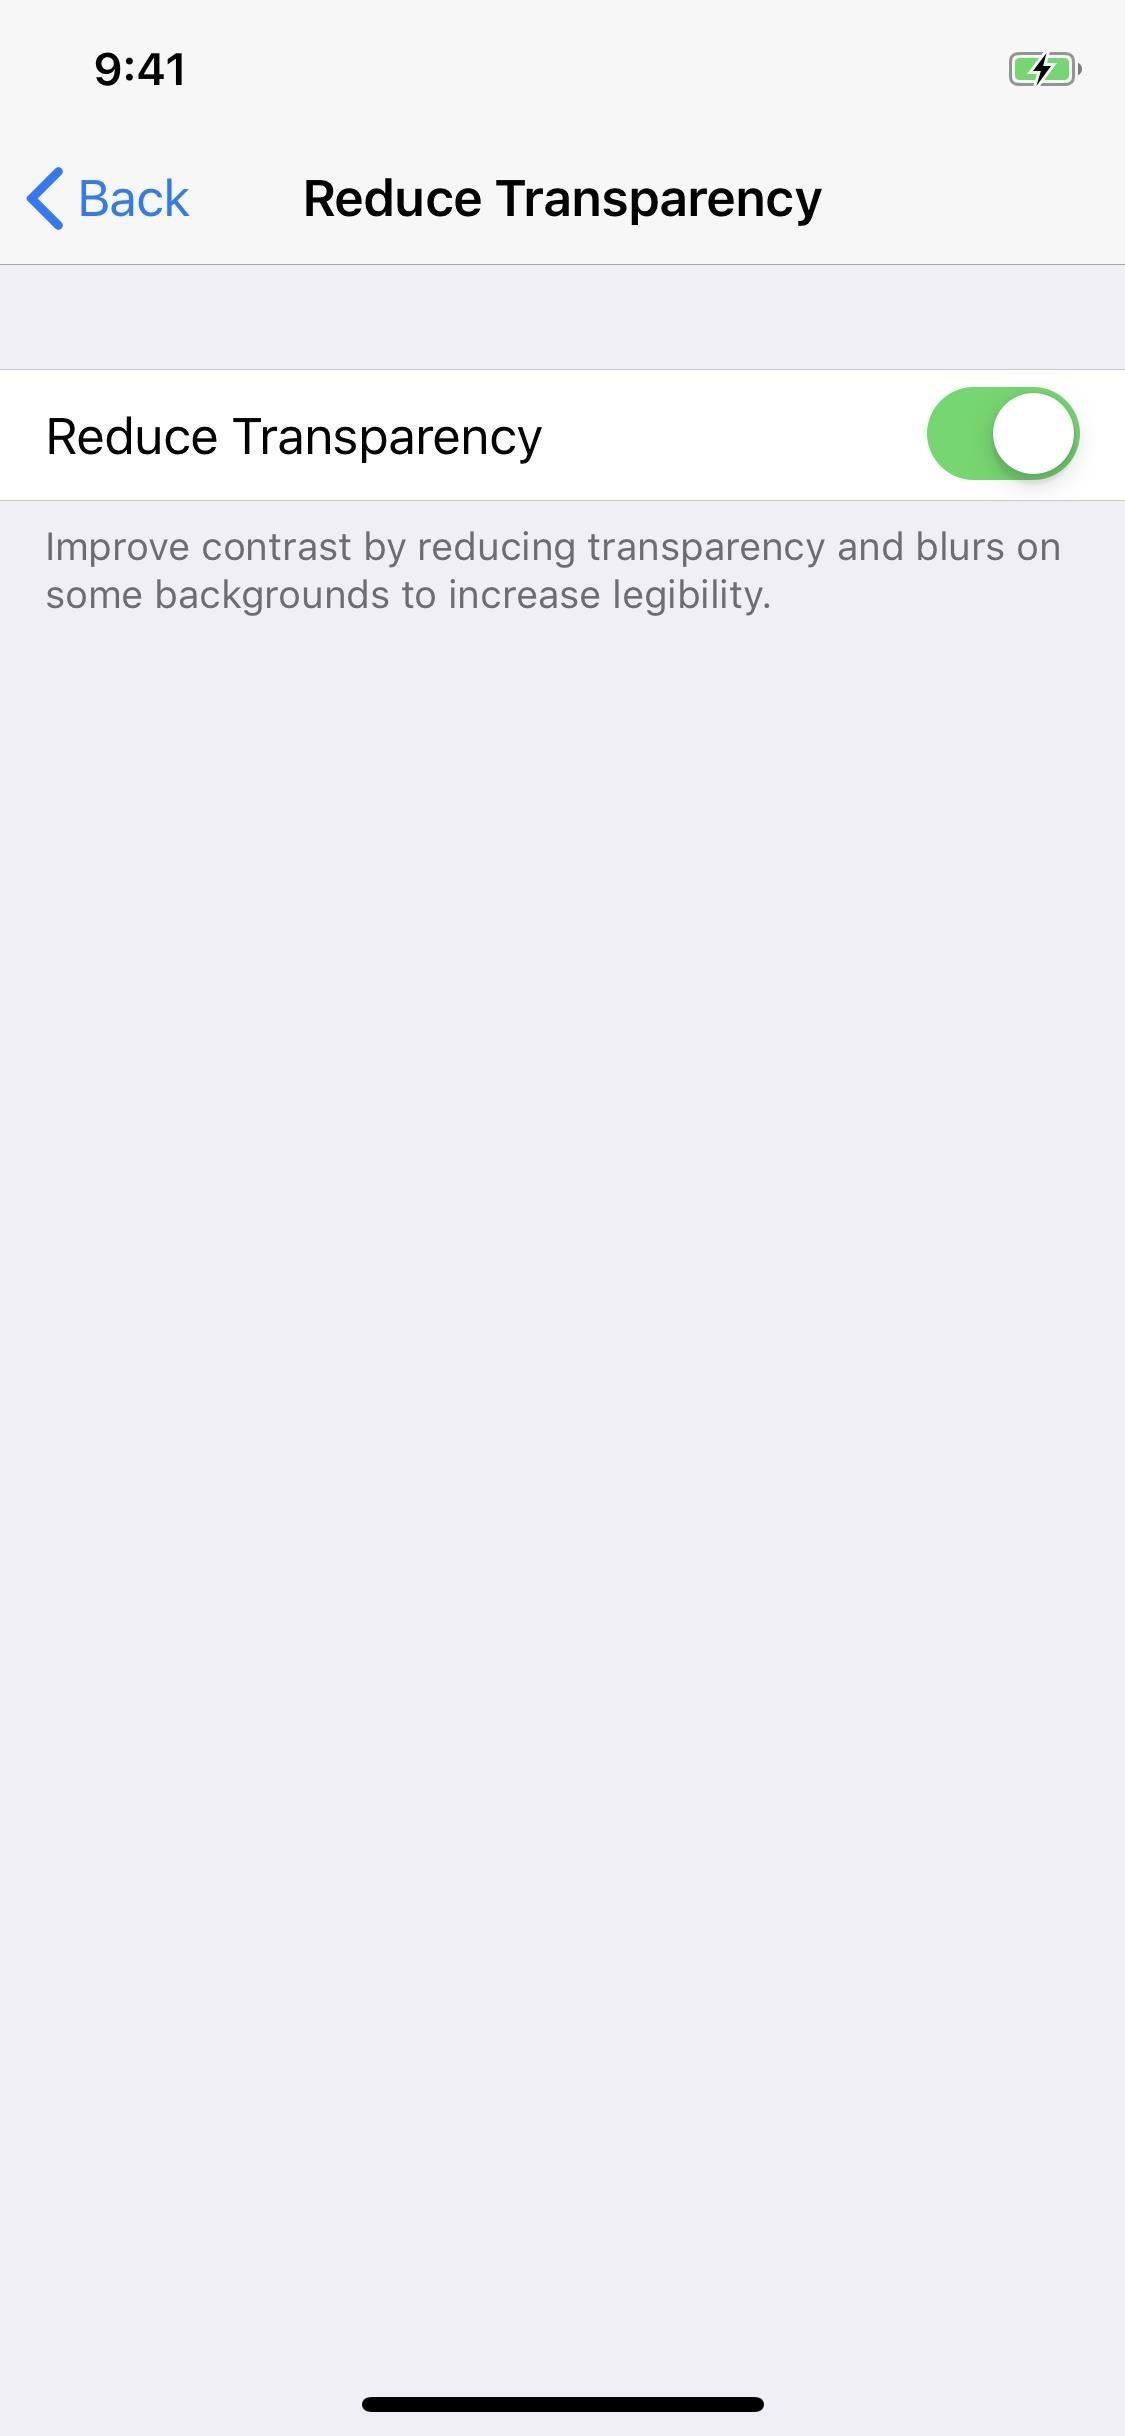
13. Reduce TransparencyApple includes plenty of exciting designs in transparency in iOS. If you want your iPhone to stand out a bit, consider enabling "Reduce Transparency." This setting will take away the transparency design throughout much of iOS, giving your iPhone more defined elements. Just take a look at the docks below to see what we mean. To enable it, jump over to Settings –> General –> Accessibility –> Reduce Transparency. Notice the difference between the docks
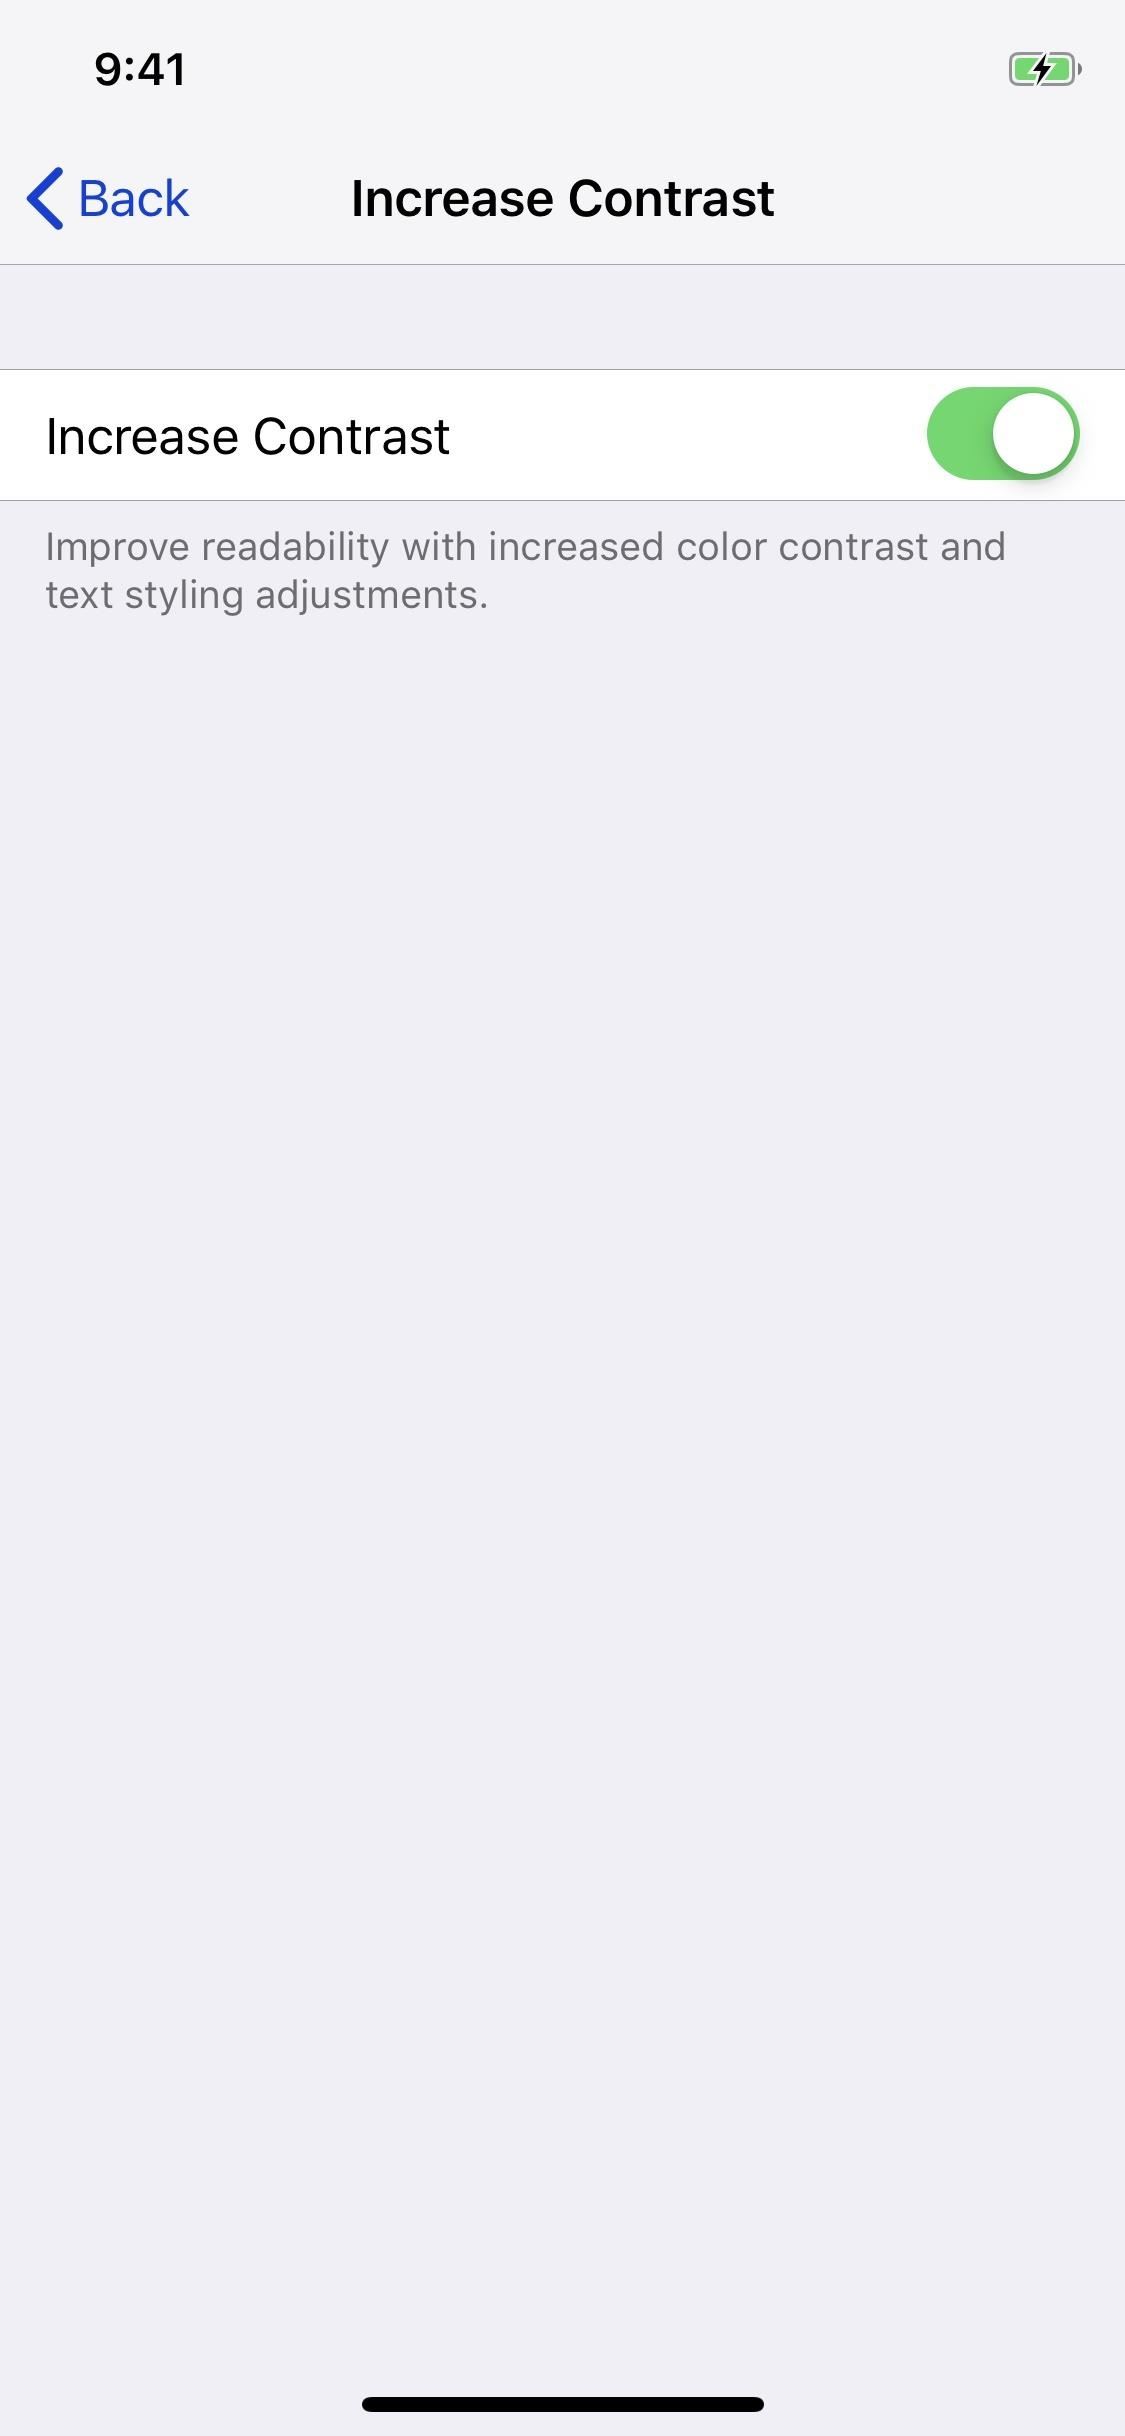
14. Increase ContrastAll iPhones have the same color scheme. Why not change that up? By increasing the contrast of your display, colors become significantly darker. Your friends will probably ask you why your iMessage bubbles are "bluer" than theirs. If they do, show them this trick! Go to Settings –> General –> Accessibility –> Increase Contrast, then toggle it on. Increased Contrast (Middle) vs. Standard (Right)
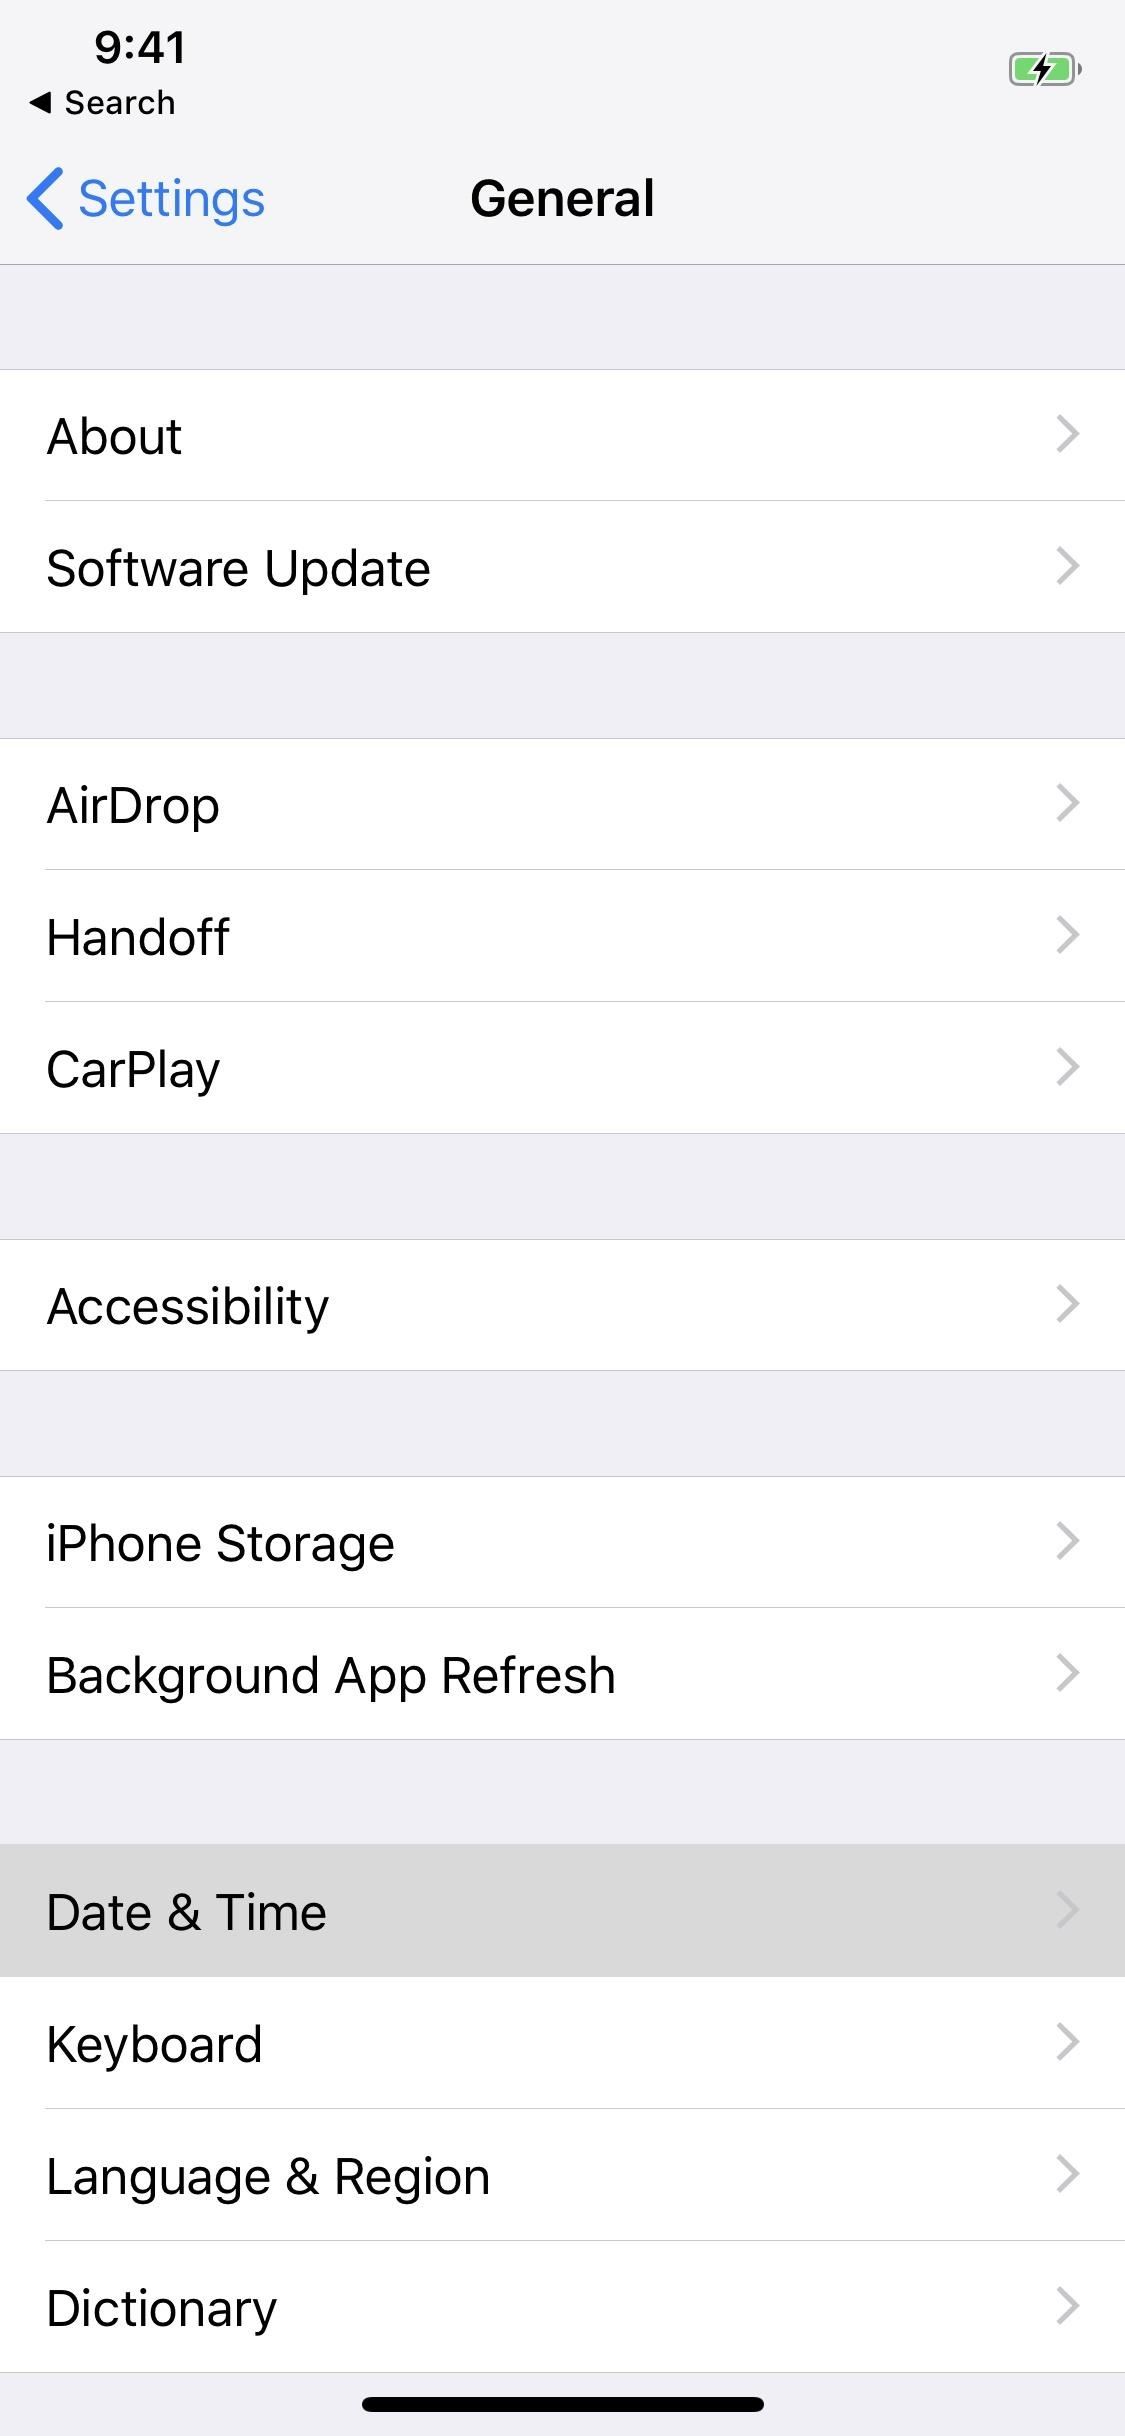
15. Use 24-Hour TimeWant to follow military-time instead of the default a.m./p.m. structure on the iPhone? Go ahead and switch. Jump into Settings, then tap "General," followed by "Date & Time." Finally, tap the slider next to "24-Hour Time." If you switch in the morning, you'll see a 0 now in front of the time (e.g., 09:15 vs. 9:15).

16. Change Region FormatIf you travel with your iPhone regularly, you might want to change its programmed region, for various formatting corrections. You'll find these options in Settings –> General –> Language & Region. You'll see a preview of your chosen region's formatting at the bottom of this screen.

17. Disable Status Bar (When Applicable)Some apps let you disable the status bar, so all you see is the content you're meant to see. If you want to look at the time, network connections, etc., great — this is just an option in case you don't. You'll find this option more on Home button iPhones, as the corners of notched iPhones add extra real-estate for the status bar.
Ringtones & Text TonesApple's suite of ringtones and text tones are iconic (how often have you heard a classic iPhone ringtone and thought your phone was going off?) That said, Apple hasn't updated their library en masse since 2013, so it's possible you're a little bored with the selection. Unless the iPhone X's "Reflection" is enough for you, you might want to expand your horizon with custom tones.Don't Miss: Get the iPhone X, XS, XS Max, and XR-Exclusive Ringtone
1. Make Your Own RingtonesThat's right — you can make your own ringtones for your iPhone. In fact, it isn't that hard. You just need a song or sound file, an iPhone, and a computer running iTunes.Full Guide: How to Make Custom Ringtones from Any Song
2. Make Your Own Text TonesAlong the same lines, you can also make text tones for your iPhone. Apple is a bit annoying on this front and won't let you separate your custom text tones into the "Alert" section of the Sound Settings. That said, as long as you label correctly, you won't have a problem finding your text tones alongside your custom ringtones.Full Guide: How to Make Custom Text Tones Using iTunes
3. Make Ringtones & Text Tones from GarageBand SongsDon't have access to a computer with iTunes? No problem! You can make custom ringtones and text tones directly on your iPhone using GarageBand. GarageBand comes free with every iPhone, so you won't have to spend a dime to make your own sounds.Full Guide: How to Save Your GarageBand Songs as Ringtones & Text Tones
AccessibilityAccessibility settings in iOS have a wide array of functions. They're essential for those who need them but can also add some customization to your overall iPhone experience.
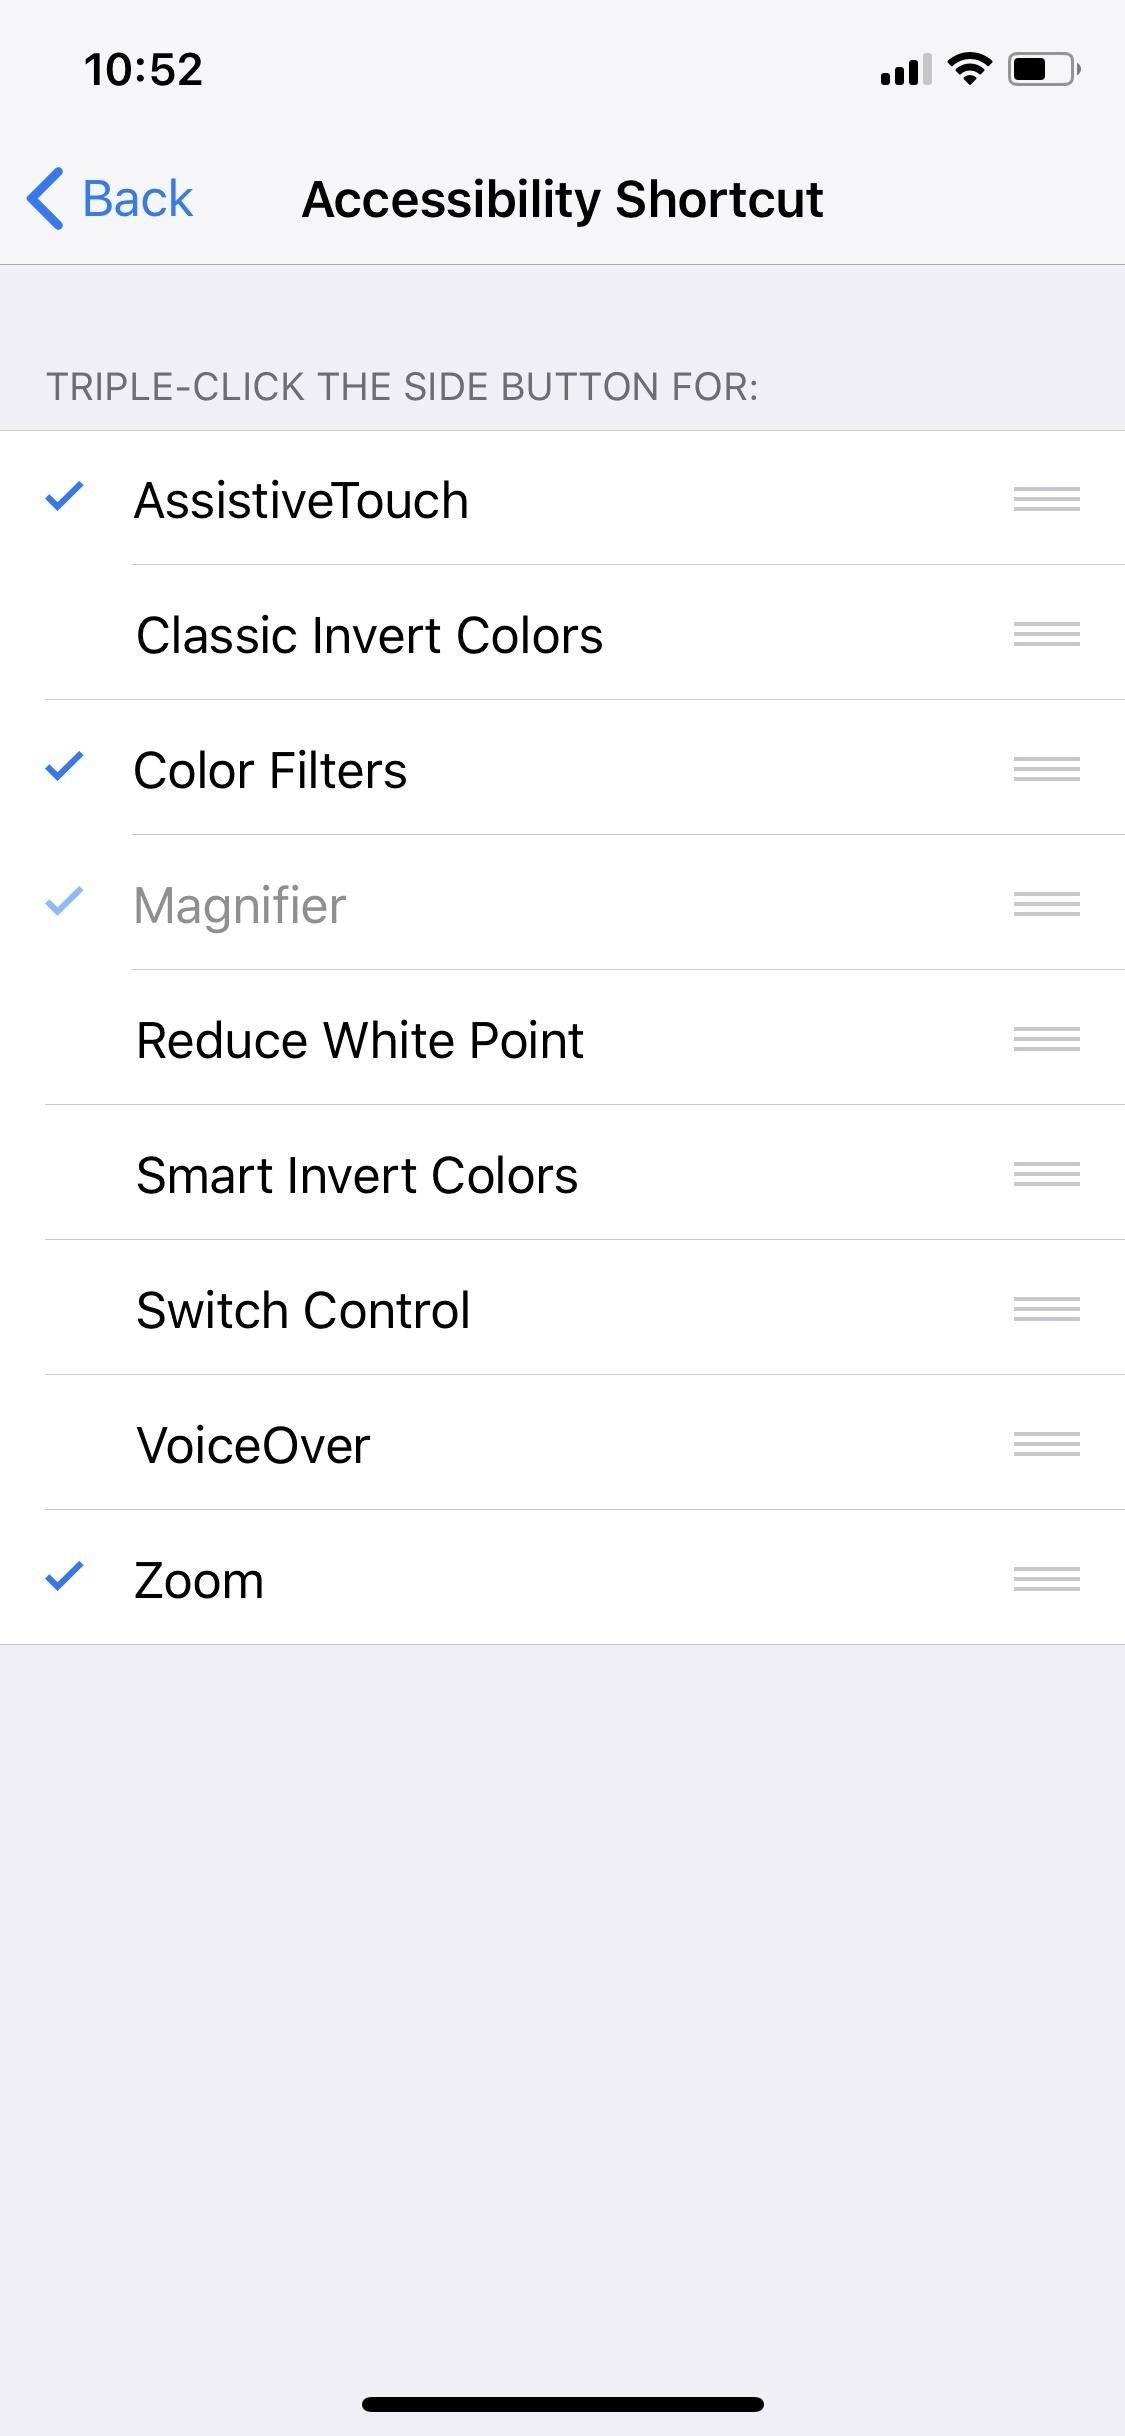
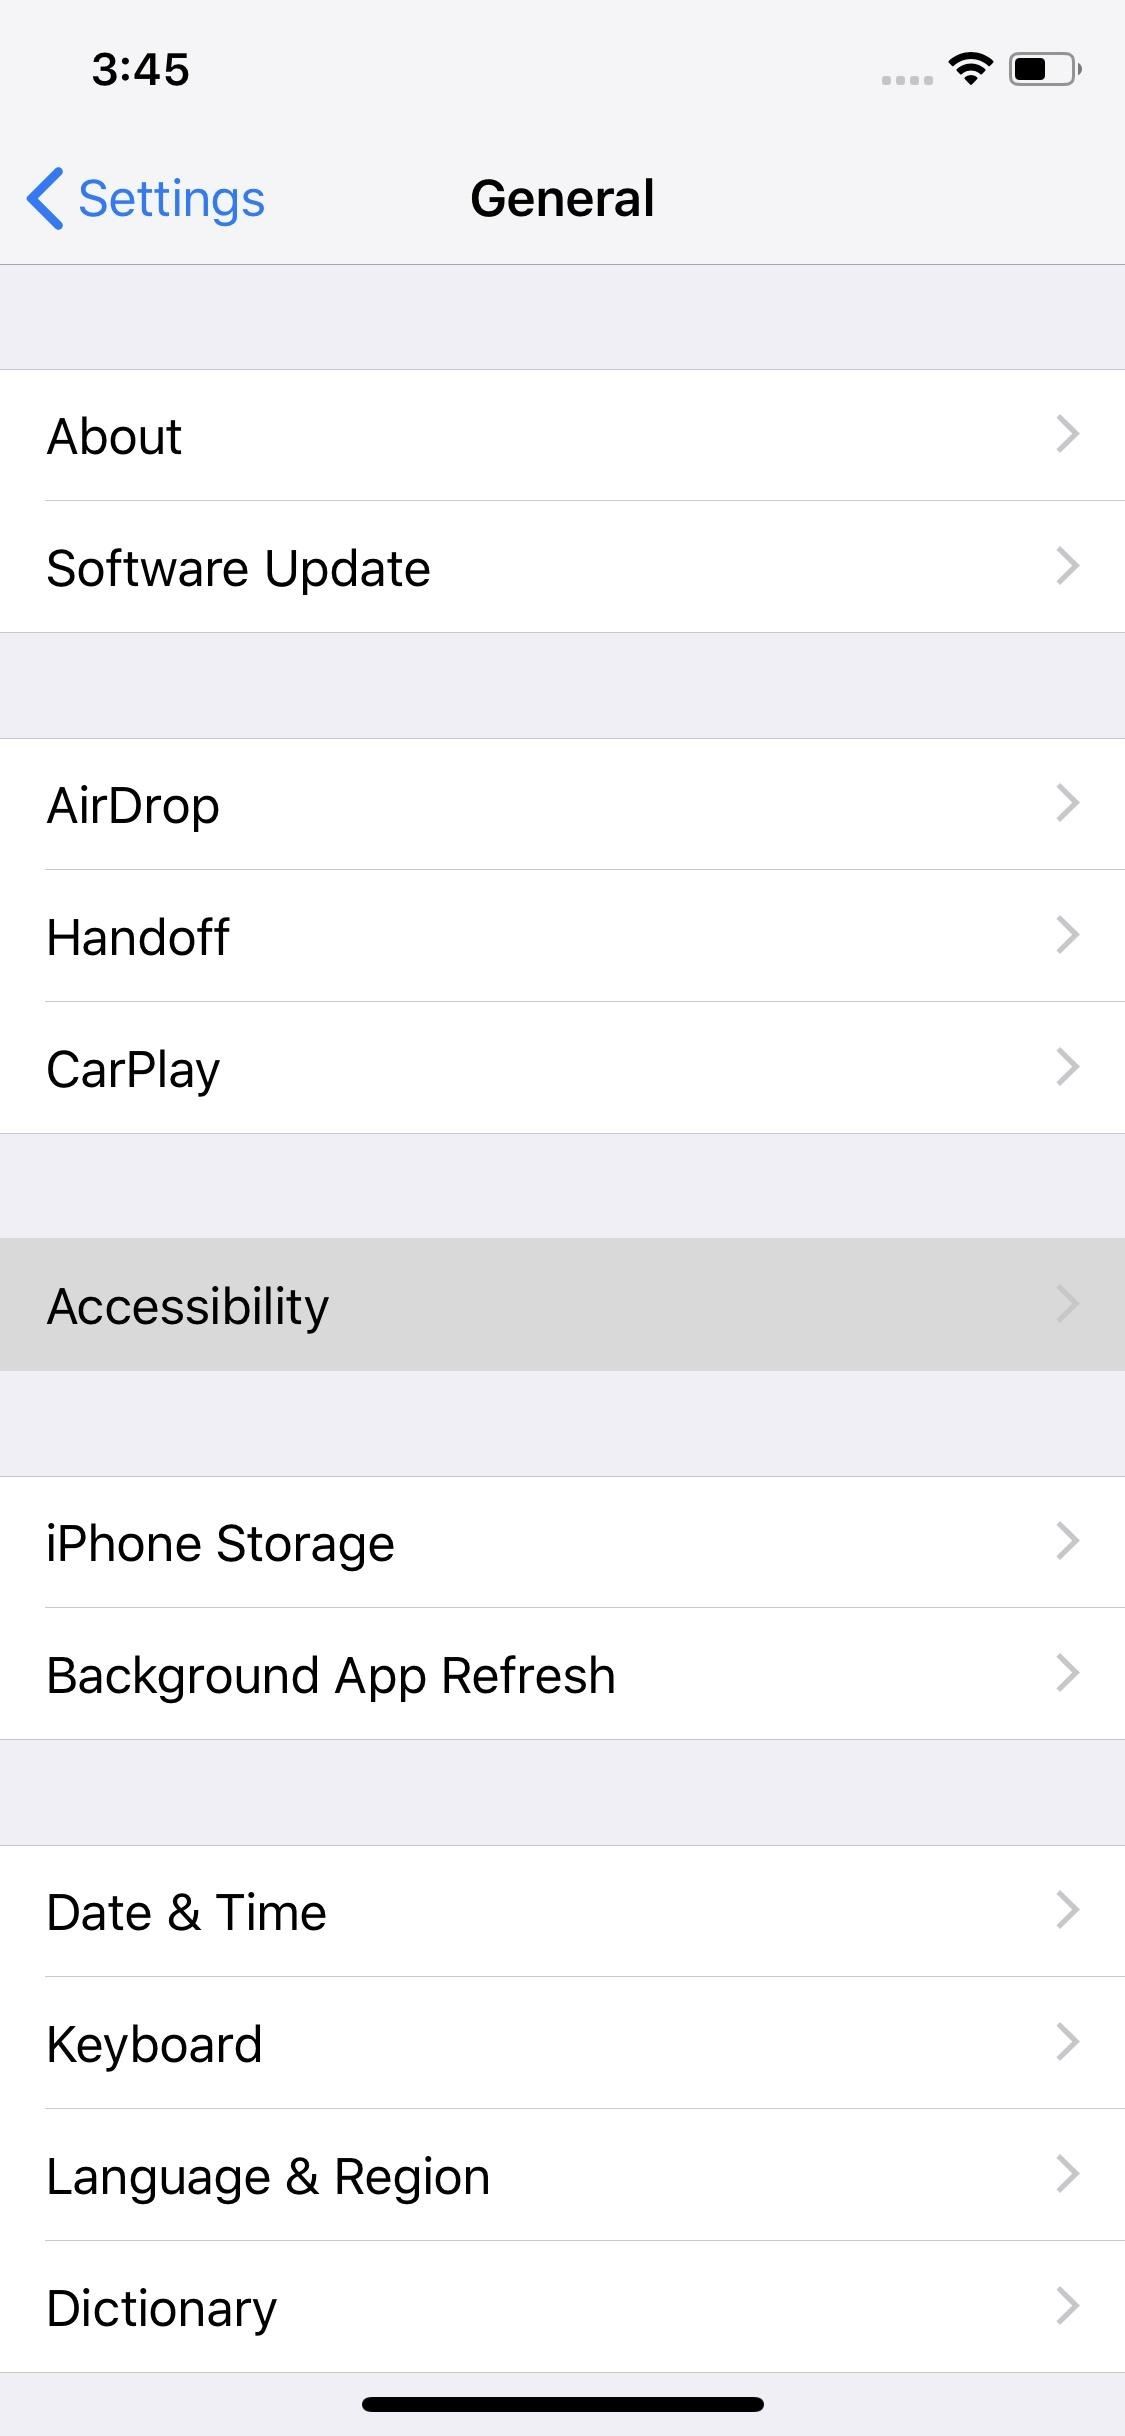
1. Set Accessibility Shortcuts to Your Home or Side ButtonFirst thing's first — if you flip between accessibility settings, you're going to want to enable Accessibility Shortcuts to your Home button or Side button. That way, if you wish to enable or disable specific accessibility options, your settings are just a triple-click away.Full Guide: How to Open Accessibility Shortcuts with the Home or Side Button Images by Dallas Thomas/Gadget Hacks
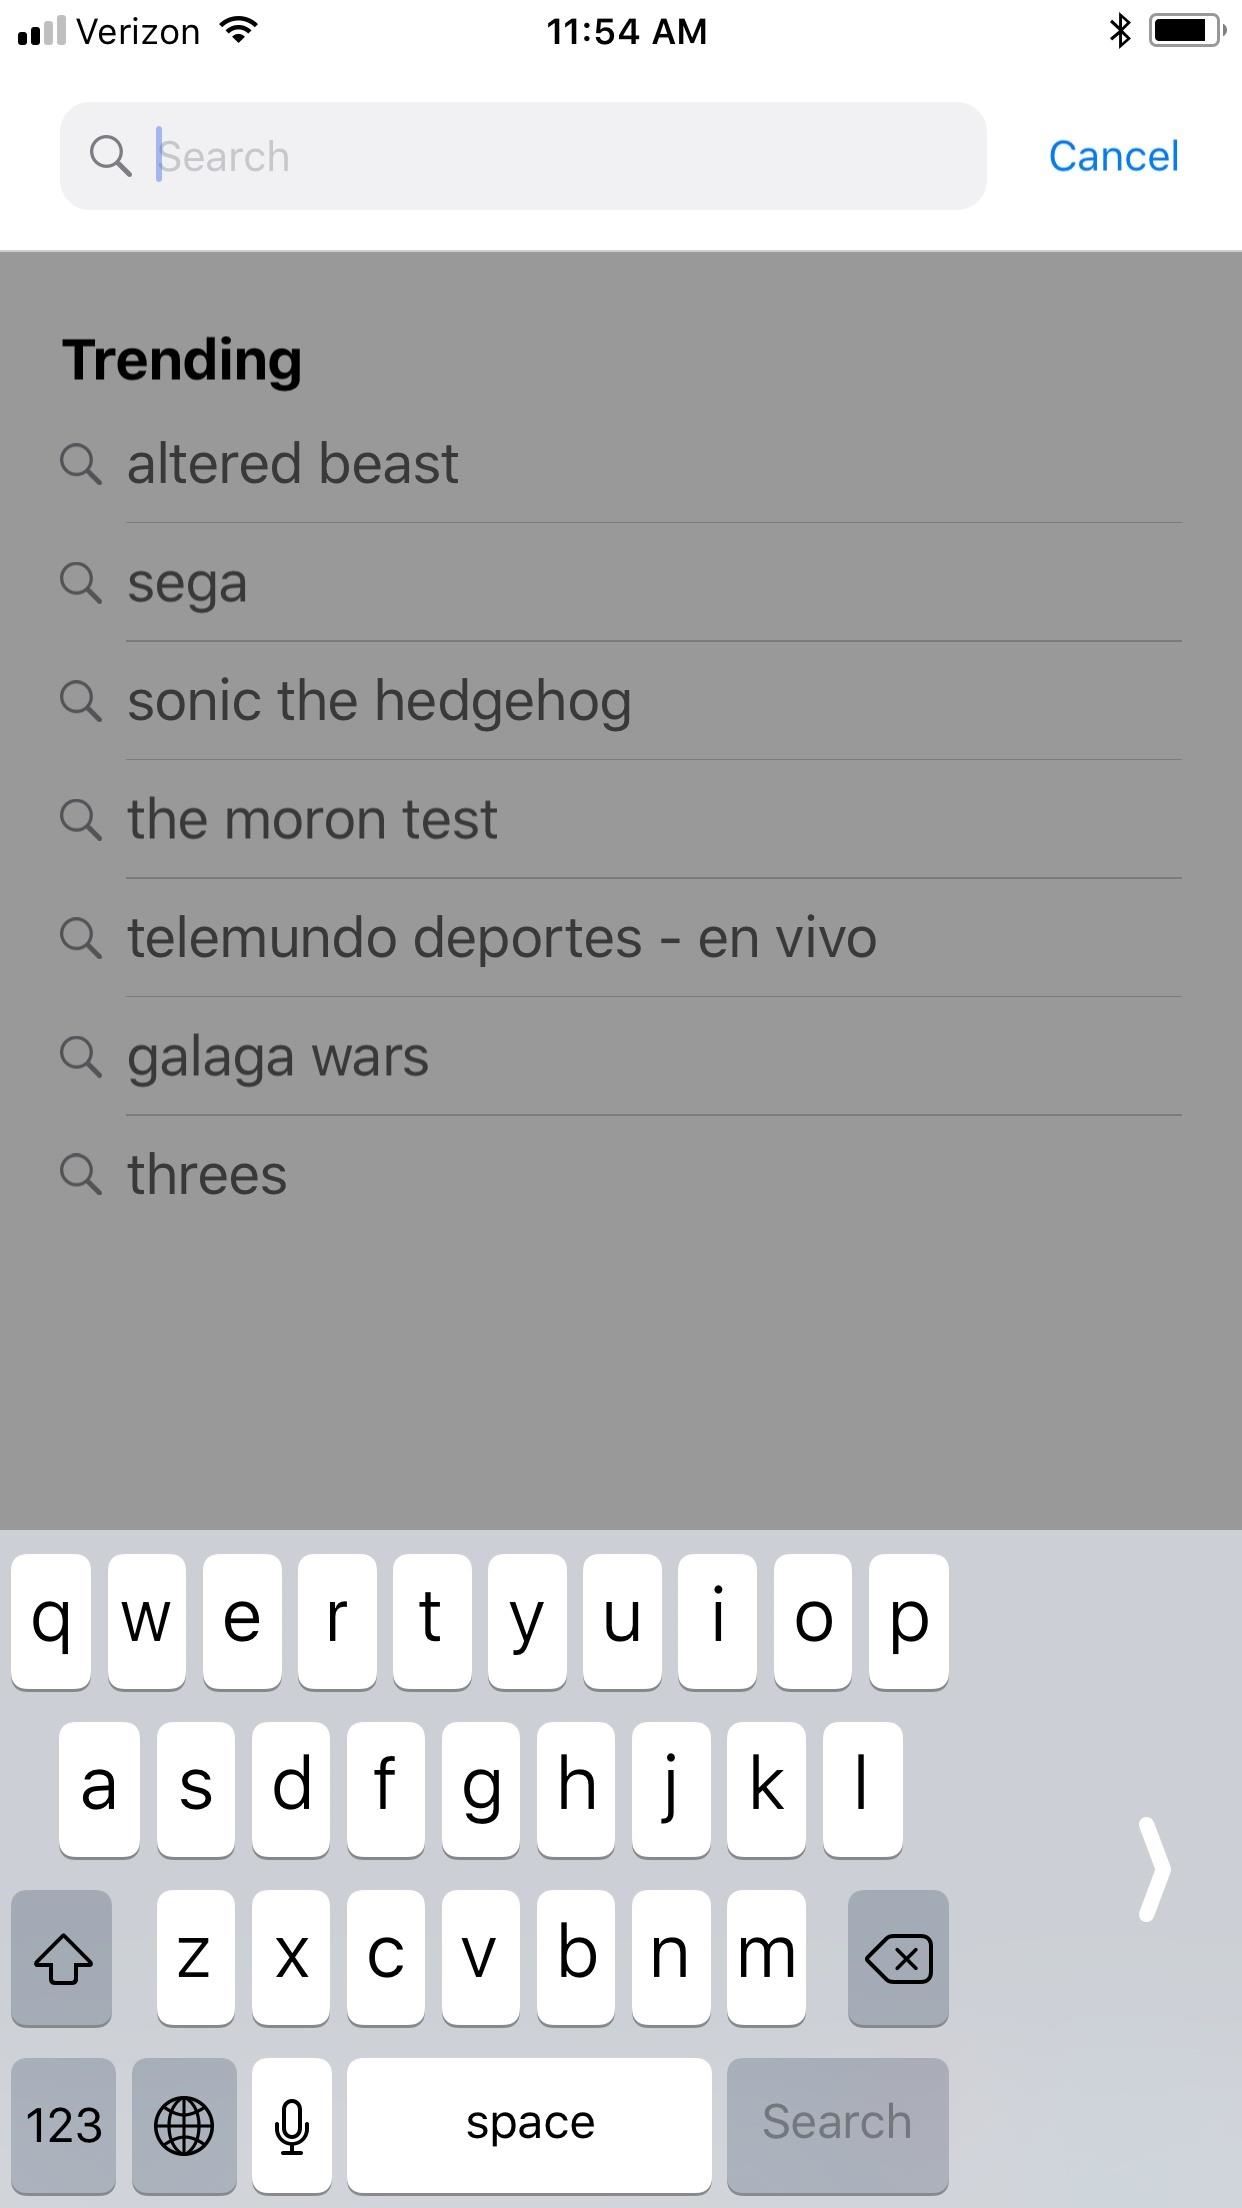
2. Stop Your Friends from Swiping Through Too Many PhotosIt's your worst nightmare — you hand your iPhone over to a friend to show them a photo, and then begin swiping through photos they should never have seen. Other than beg people not to swipe, what can you really do?Thanks to a specific accessibility setting named "Guided Access," you can stop friends from swiping dead in their tracks. The feature lets you block all touch controls on your iPhone. If your friend tries to swipe, they might as well assume your iPhone is broken!Full Guide: How to Prevent Your Friends From Swiping to Things They Shouldn't See
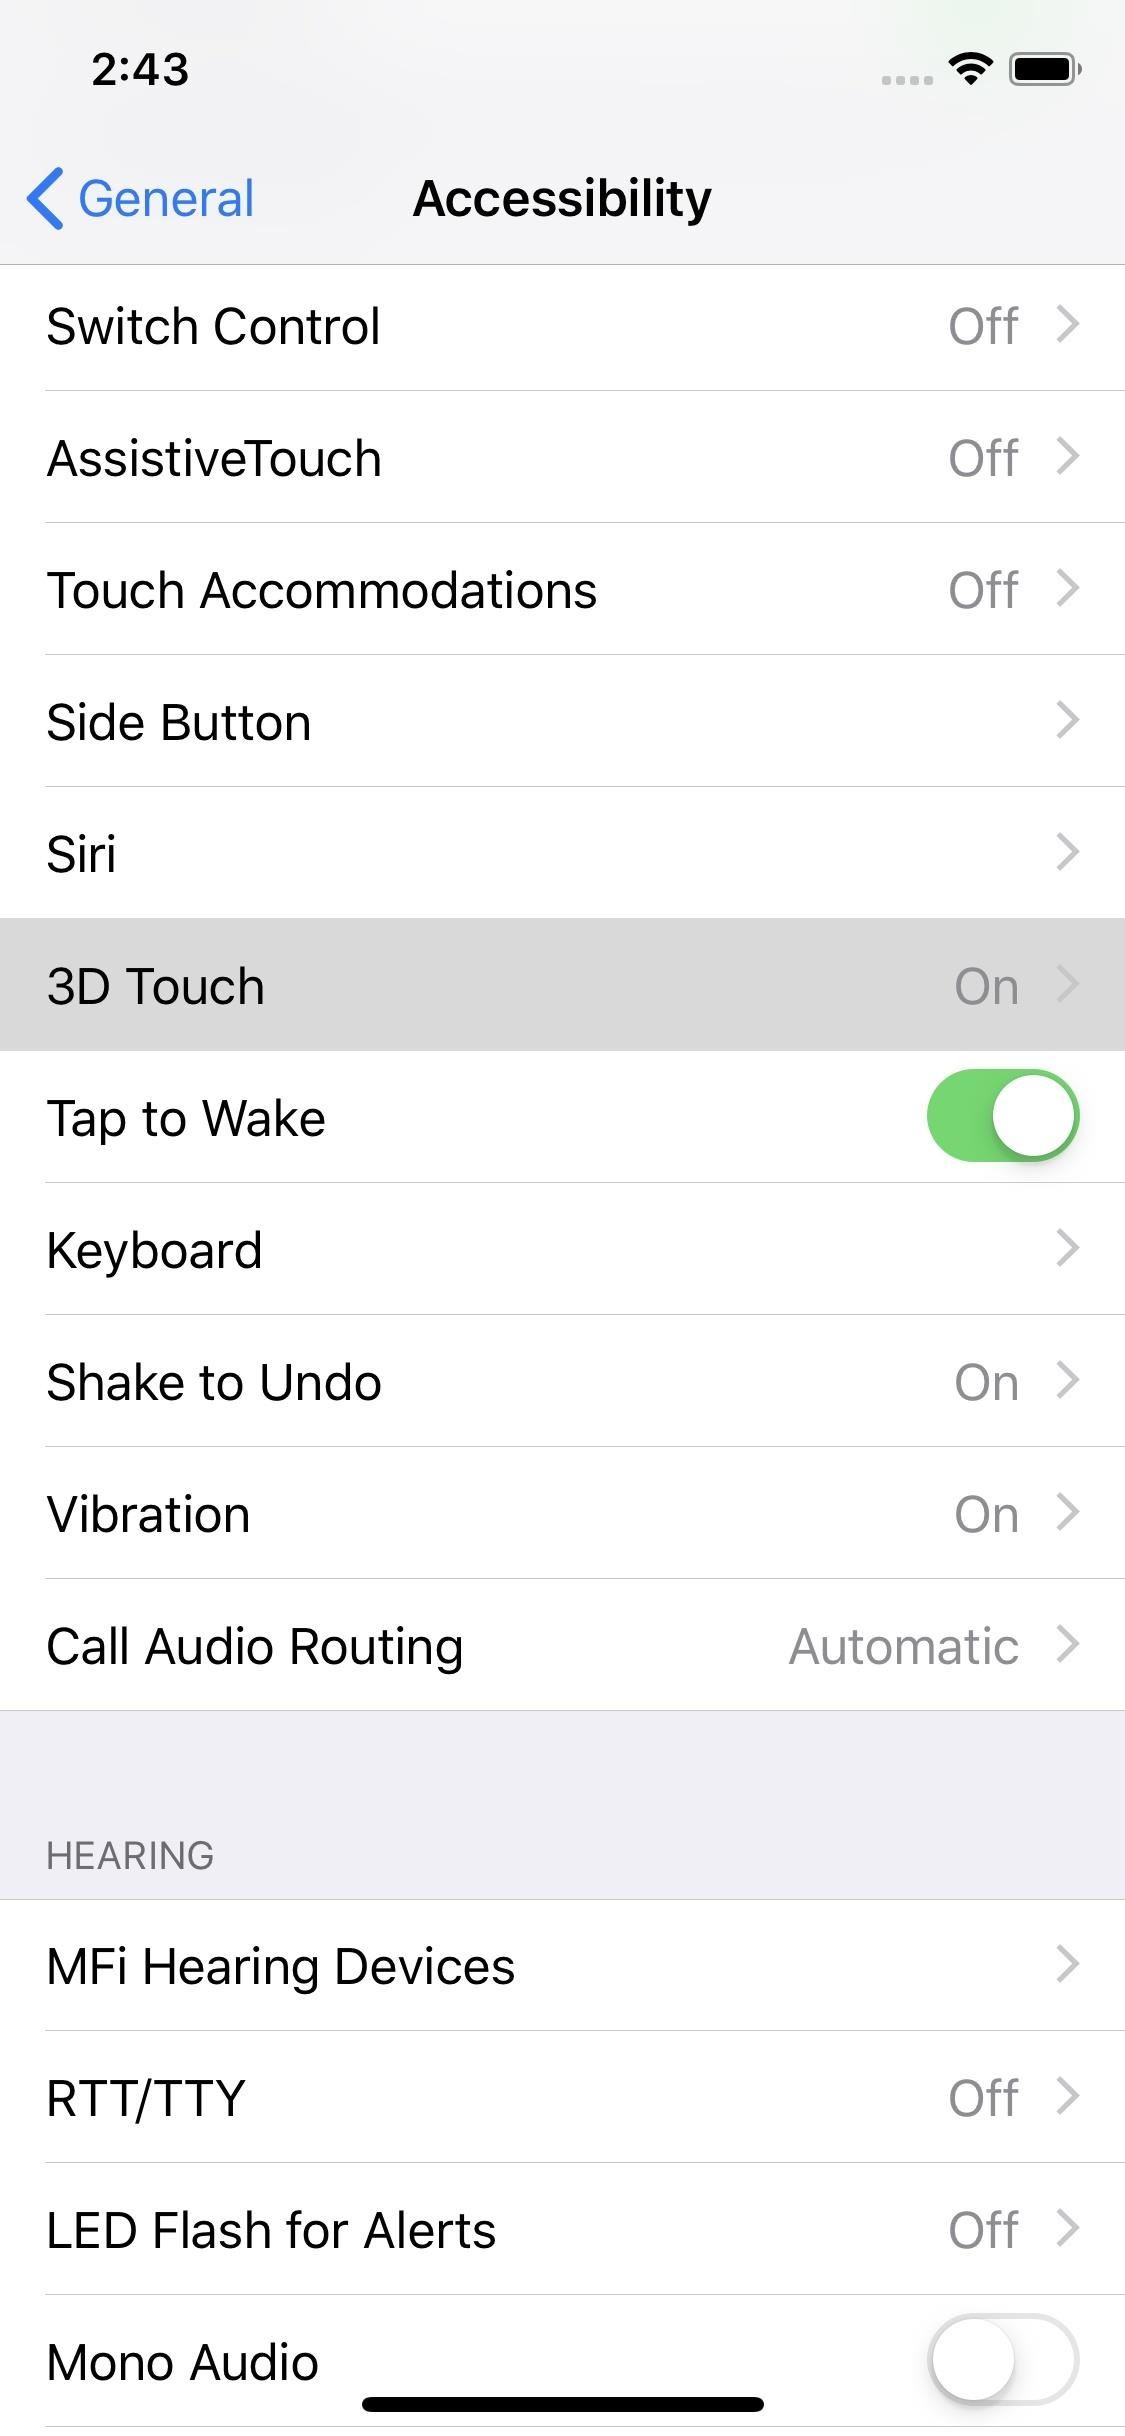
3. Change 3D Touch SensitivitySorry iPhone XR owners (and owners of iPhone 5s, 6, 6 Plus, and SE) — this one's not for you. For all others running iOS 12, did you know you can change the sensitivity of 3D Touch? Even if you like how 3D Touch works on your iPhone as-is, it's worth taking a look at these settings to make sure it's ideally suited to your needs.To change sensitivity, open Settings –> General –> Accessibility –> 3D Touch. Here, you can set 3D Touch sensitivity to either "Light," "Medium," or "Firm," using the slider below. Test out each setting using the image of the flowers at the bottom of the display.
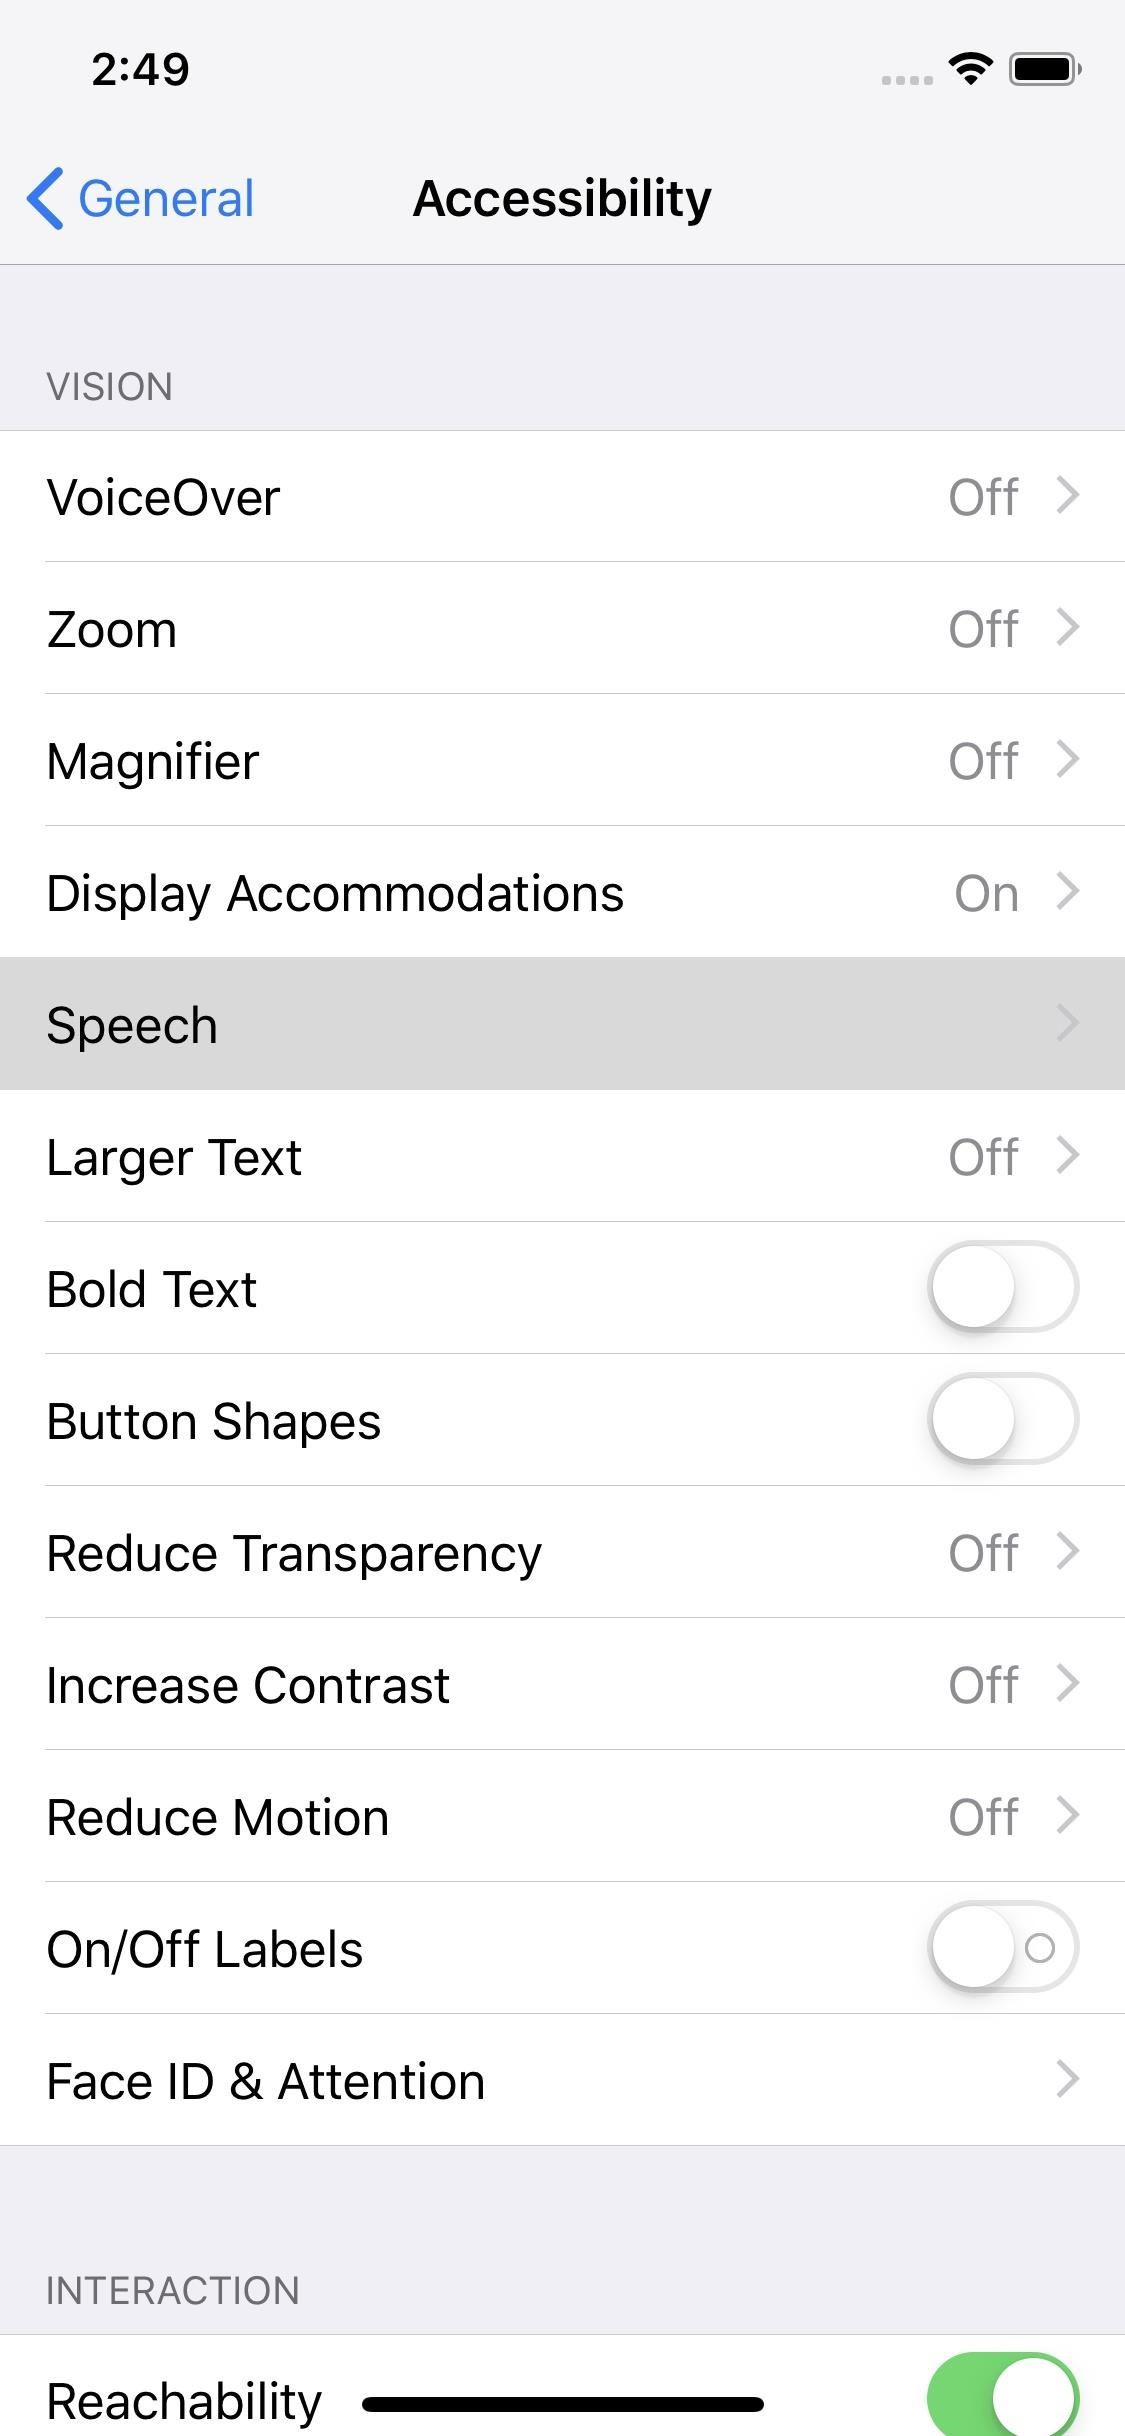
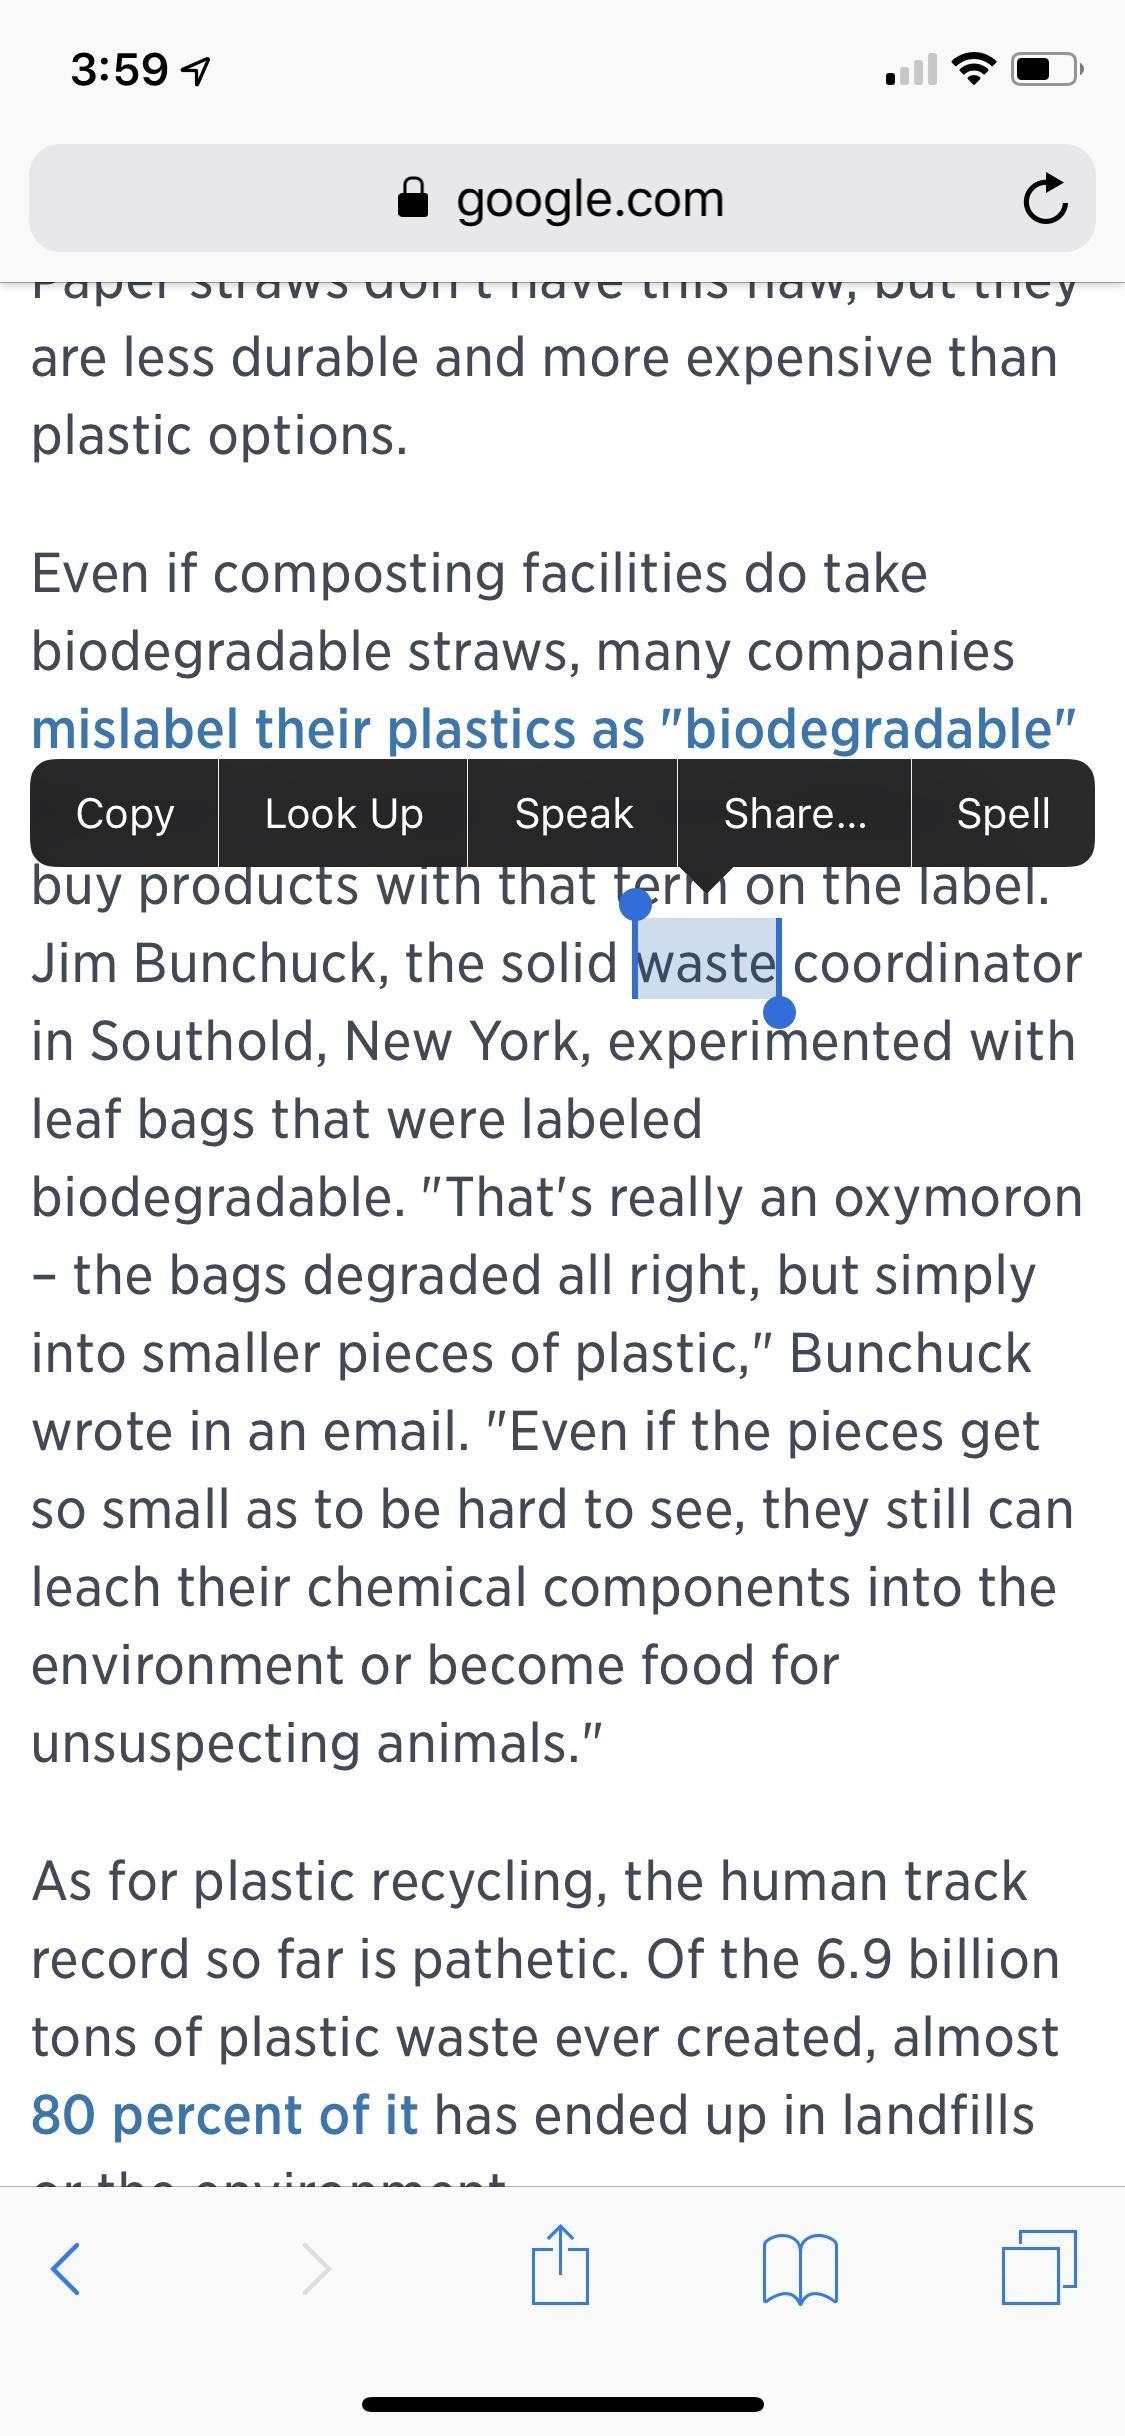
4. Ask Your iPhone to Read to YouOn your computer, it's not too difficult to highlight some text and have your selection read to you. On your iPhone, that feature is buried a bit deep. Once you know how to activate it, however, it works like a charm.In your Settings, jump over to "General" > "Accessibility" > "Speech." Here, you can tap the slider next to "Speak Selection" to enable Speech on your iPhone. Now, whenever you highlight text on your phone, you'll find a "Speech" button in the array. Tap that, and your iPhone will begin reading the text.Full Guide: How to Make Your iPhone Speak Aloud Selected Text You can also enable "Speak Screen" directly below "Speak Selection." This feature will read all of the text on-screen without needing to highlight. All you have to do is drag down from the top of the display with two fingers to activate. Try it slowly — too fast, and iOS thinks you're trying to access Notification Center.Once your iPhone begins reading, you can adjust the speed by tapping the tortoise or hare symbols. Skip lines by pressing the fast-forward and rewind arrows. Pause and resume audio by tapping the play/pause button. Tap the X to exit, and tap the arrow to collapse the player, and move it wherever you'd like on screen.Full Guide: This Feature Makes Your iPhone Read Books & Articles Aloud
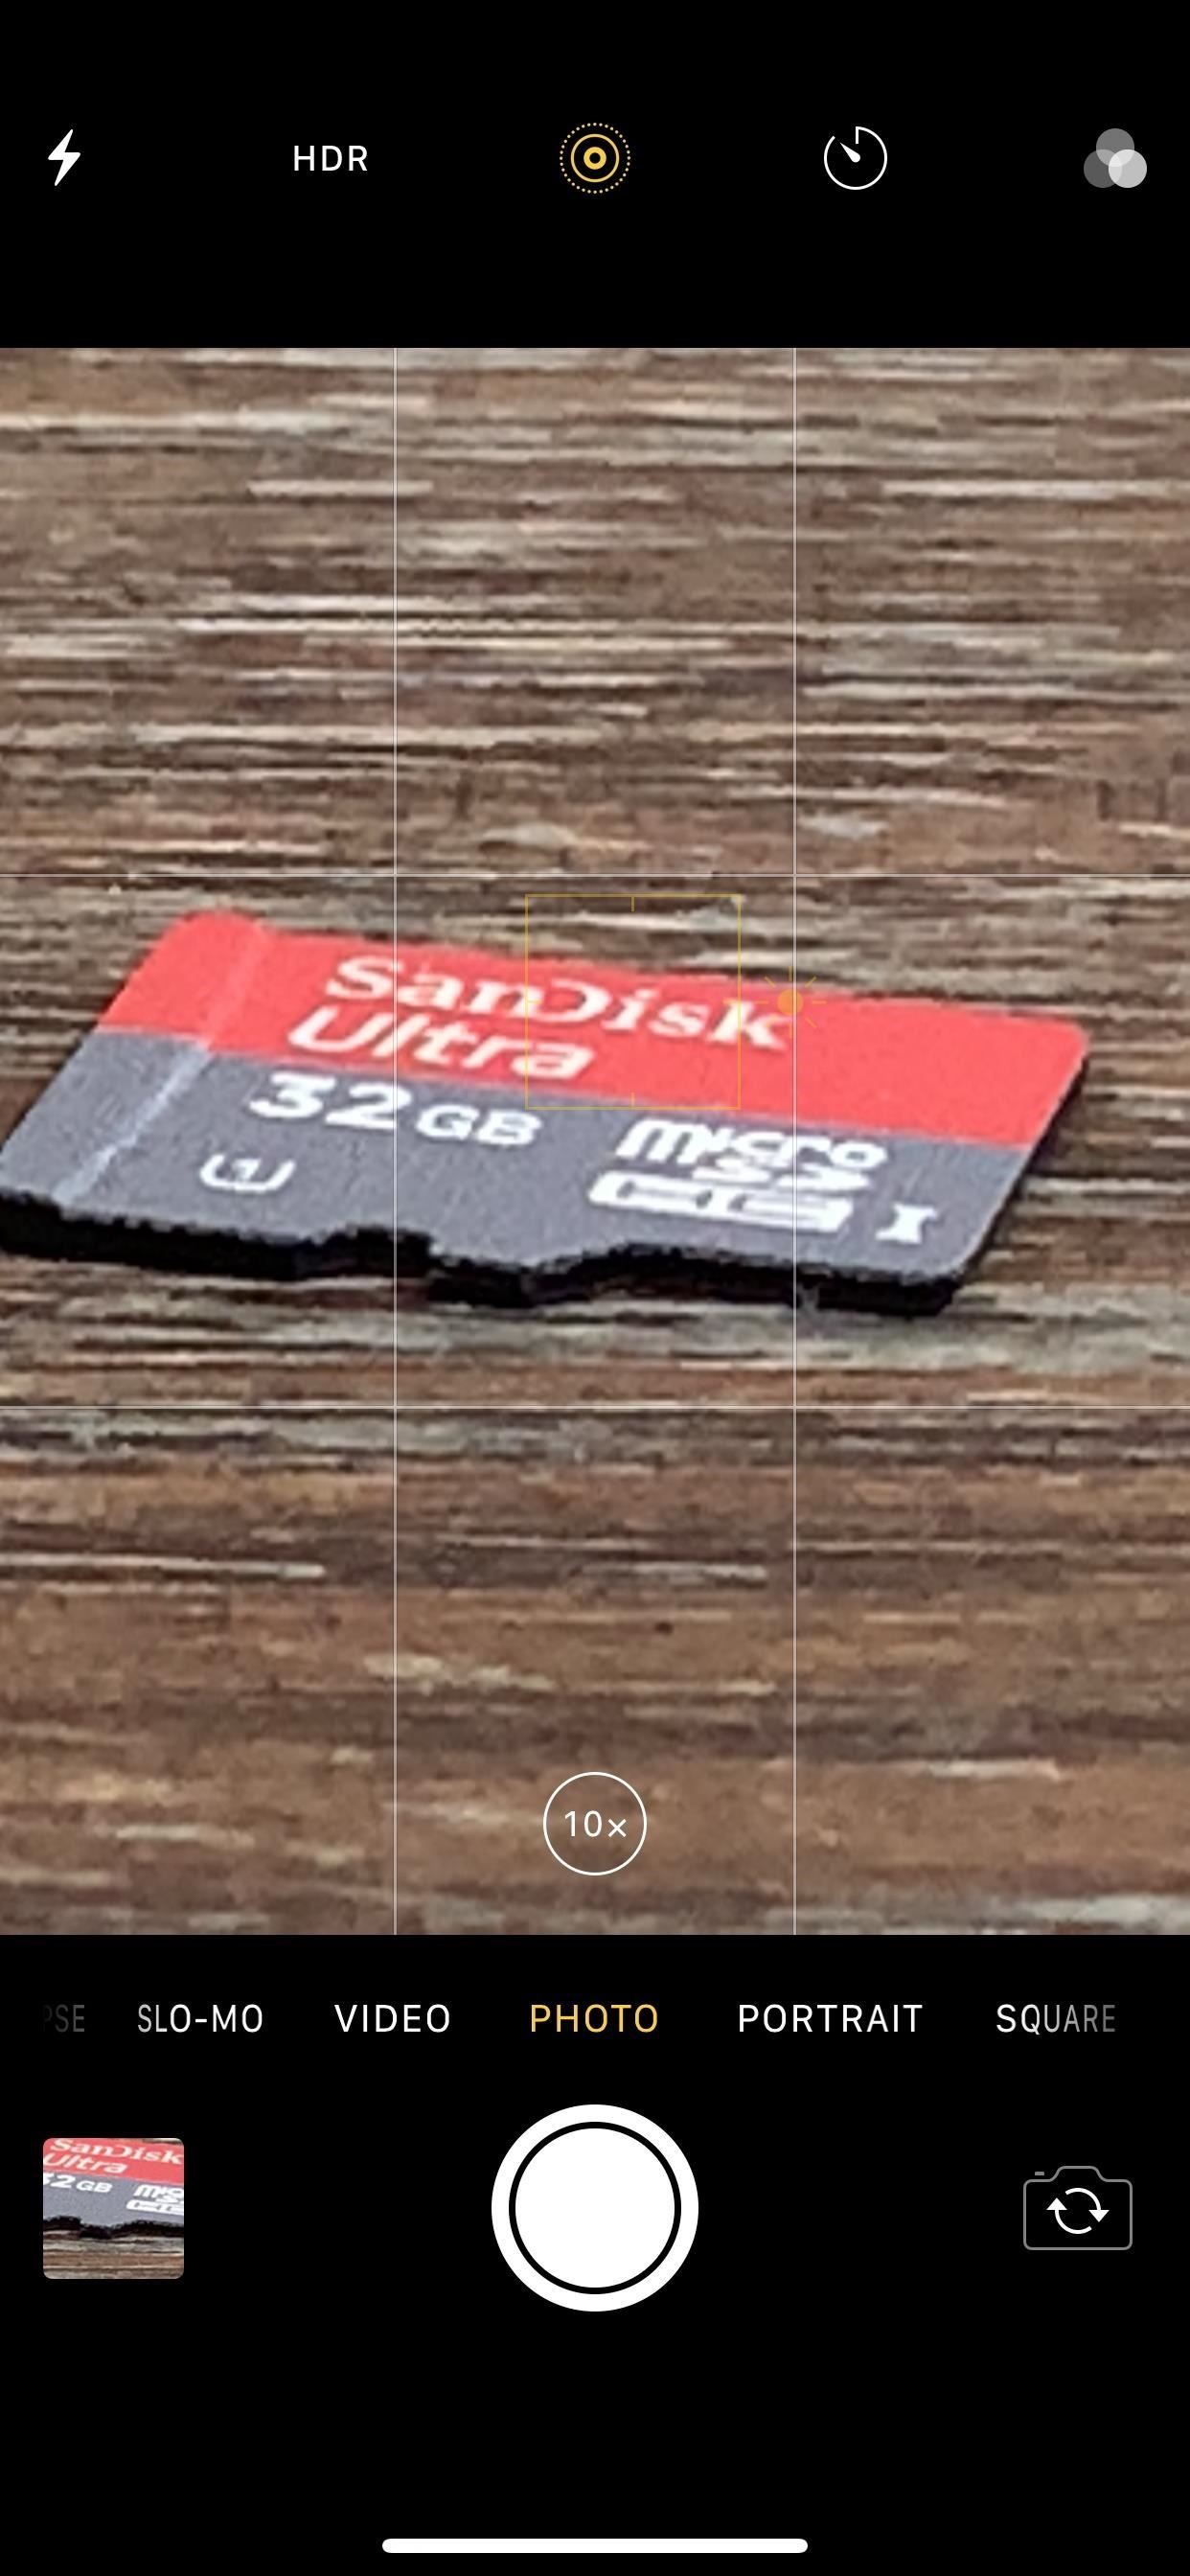
5. Activate the MagnifierYour iPhone's camera has a decent digital zoom, but what happens when you need to get even closer? No, you don't have to move — just use the Magnifier. This setting in iOS allows you to zoom in super close to your subject, and while things get pretty grainy at full zoom, you can check out details you might've missed while relying on the Camera app. Max zoom with Camera app (left) vs. max zoom with Magnifier (right). Images by Justin Meyers/Gadget Hacks You can even enhance your zoomed image with flash for additional lighting, exposure lock and unlock, and color filters. When you're ready, you can snap a pic of your subject just as you usually would.Full Guide: How to Activate Your iPhone's Hidden Magnifying Glass Images by Justin Meyers/Gadget Hacks

6. Adjust Click Speed for Home & Side ButtonYou frequently click your iPhone's Home button or Side button — triple-click for Accessibility Shortcuts, double-click for Apple Pay, that button gets pressed a lot. If you're unhappy with how quickly you need to click the button for your iPhone to register the action, you can adjust the speed it takes to do so.You'll find these speed options in Settings –> General –> Accessibility –> Side Button or Home Button. Under Click Speed, you'll find "Default," the default click speed, "Slow" a slower click speed, and "Slowest," the slowest you can go. When you tap each option, iOS will buzz your iPhone at its corresponding click speed.
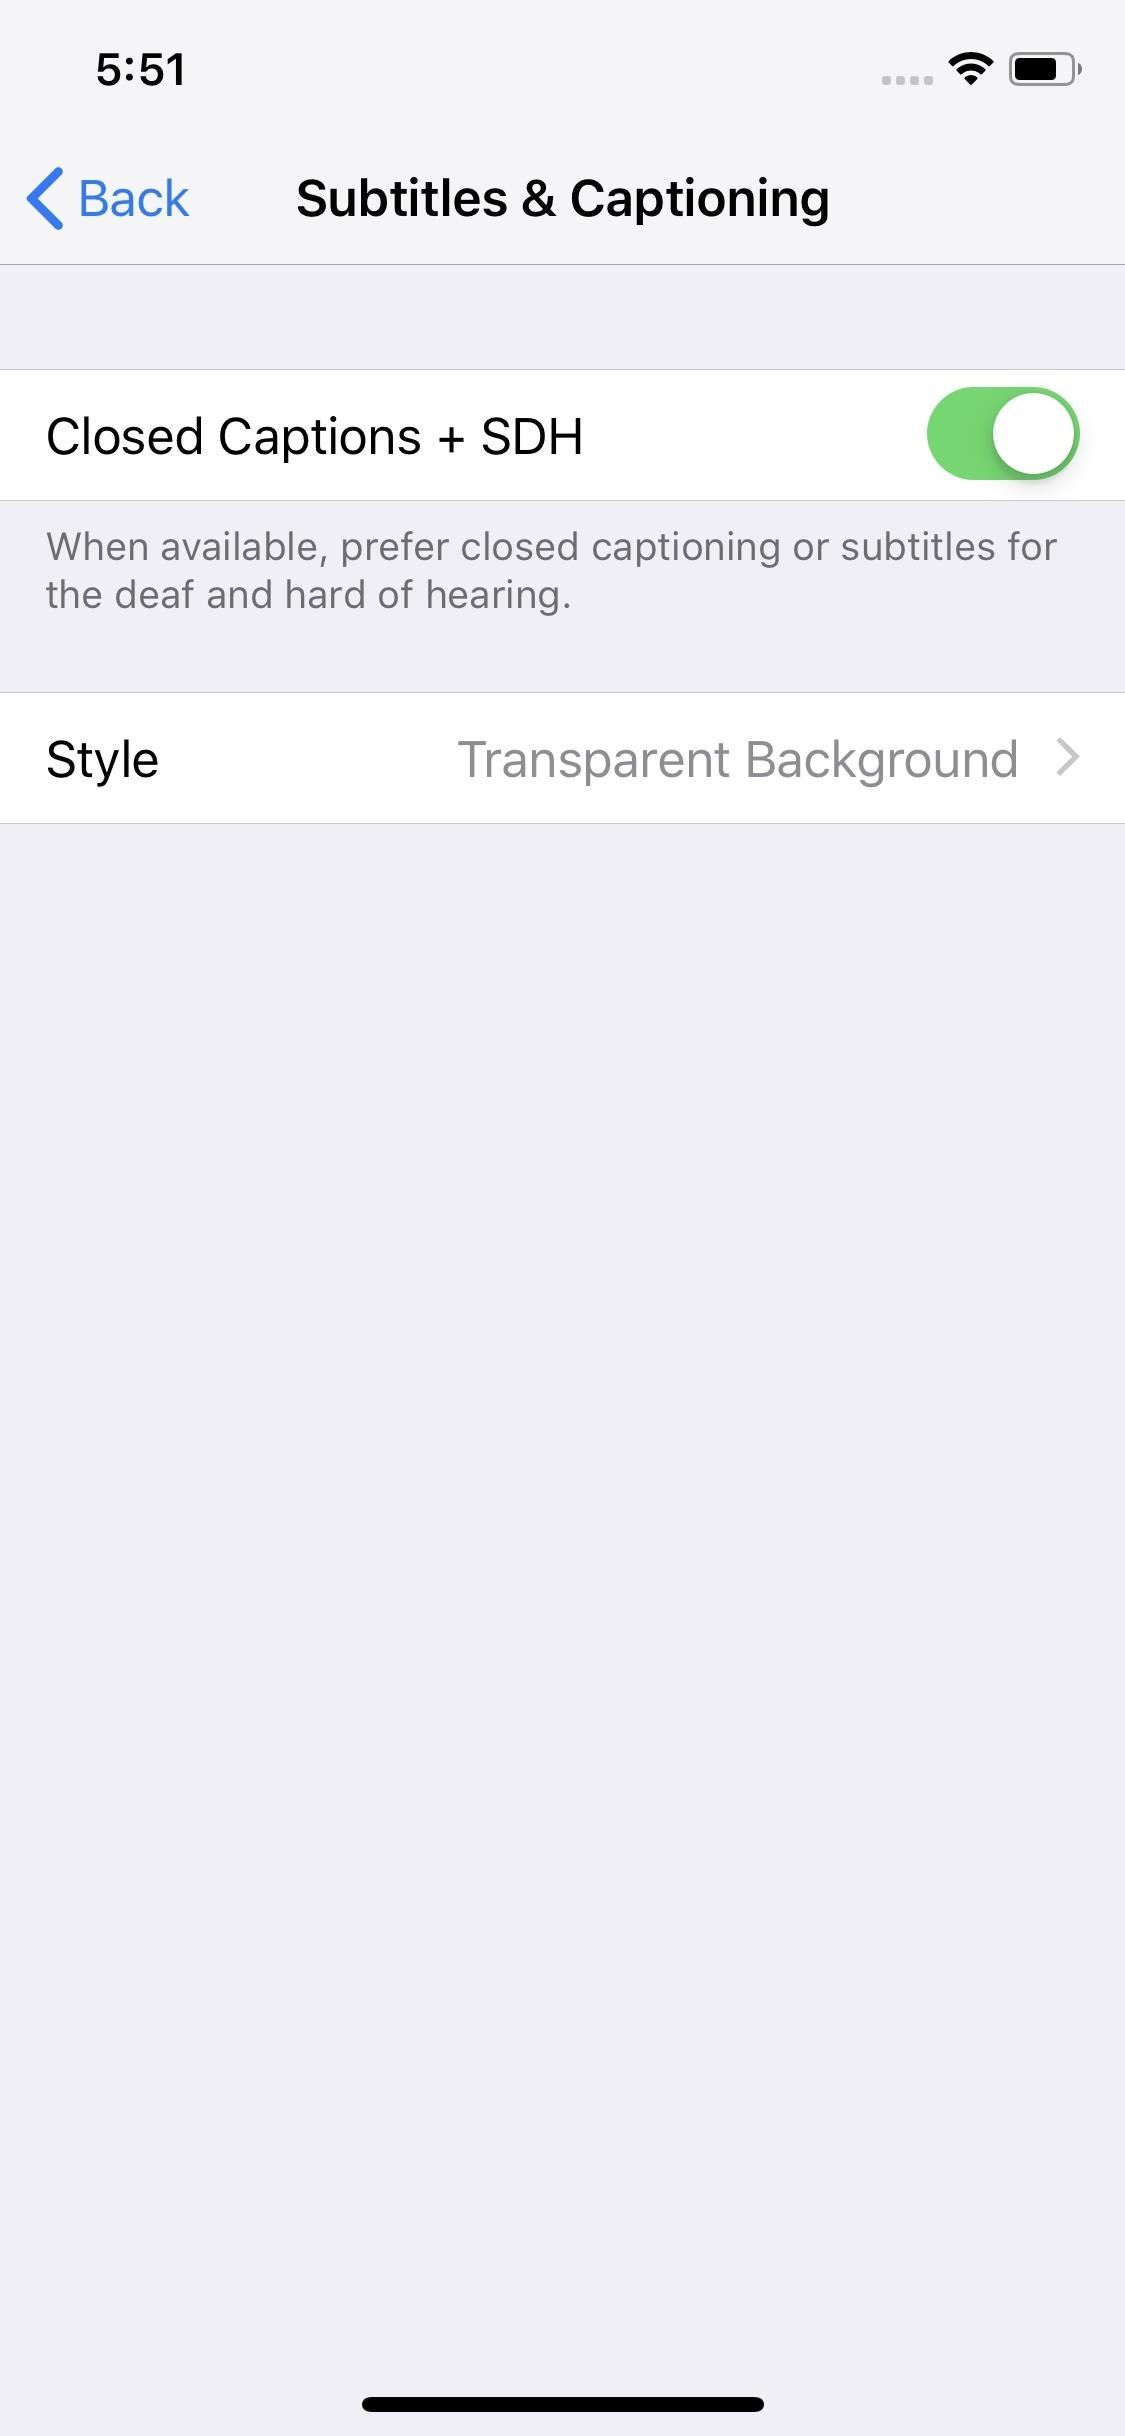
7. Add Subtitles & CaptionsIf you want to make sure subtitles and captions come on automatically when available, make sure to enable "Closed Captions + SDH" in the Settings. You find this option under General –> Accessibility –> Subtitles & Captioning.
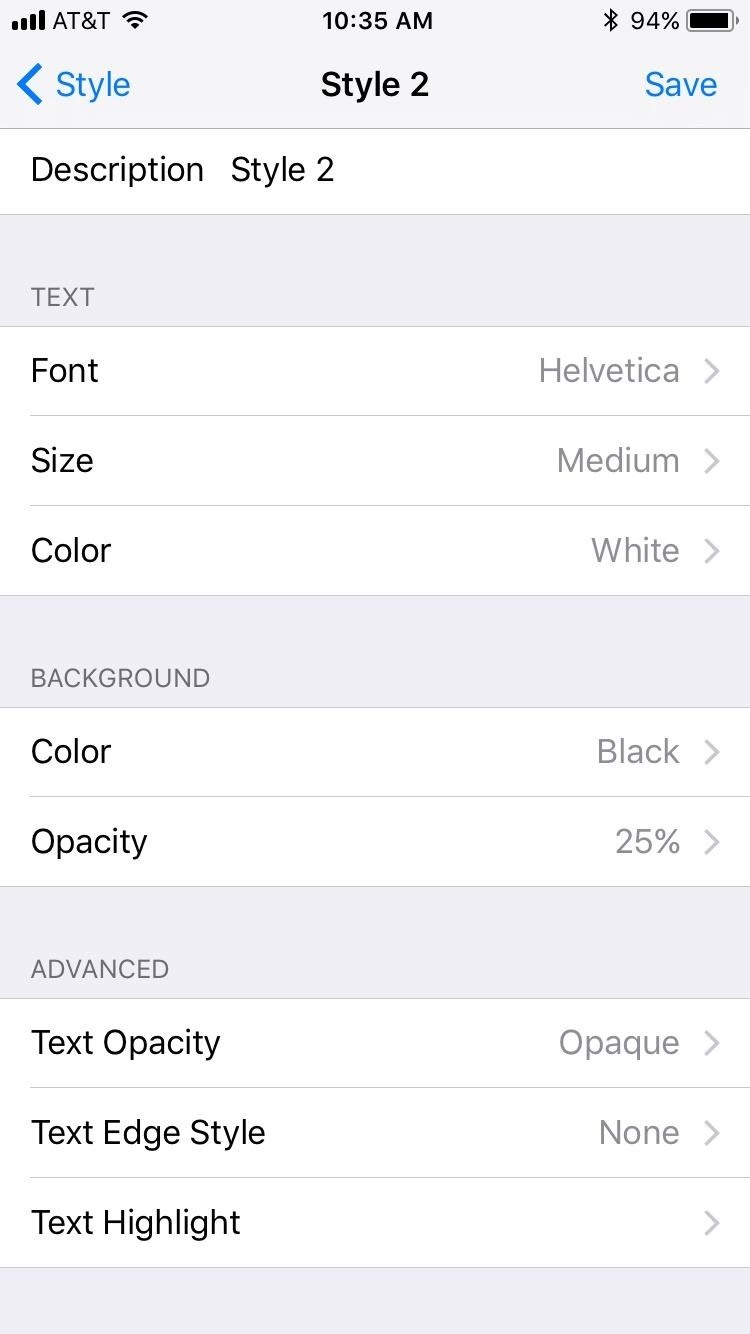
8. Customize Your Subtitles & CaptionsIf you enabled "Closed Captions + SDH," you might have noticed you can customize you subtitles and captions however you'd like. Apple made sure to bake plenty of options for fonts, colors, and backgrounds into iOS, so you'll see your styled captions in any app that supports them.Full Guide: How to Change the Appearance of Your Subtitles & Captions Images by Justin Meyers/Gadget Hacks

9. Disable Ask to Join NetworksIf you're tired of getting popups for Wi-Fi networks you don't typically connect to, consider disabling "Ask to Join Networks." When no known networks are available, this setting tries to pair you to another network in your area. However, the resulting popup might not be worth it, especially if you don't know that networks credentials in the first place. You'll find this option in the Wi-Fi settings.
SiriThe iconic iOS digital assistant is better than ever in iOS 12. Not only is Siri smarter this time around, but the assistant also offers you more control over your own choice of apps in iOS than ever before.
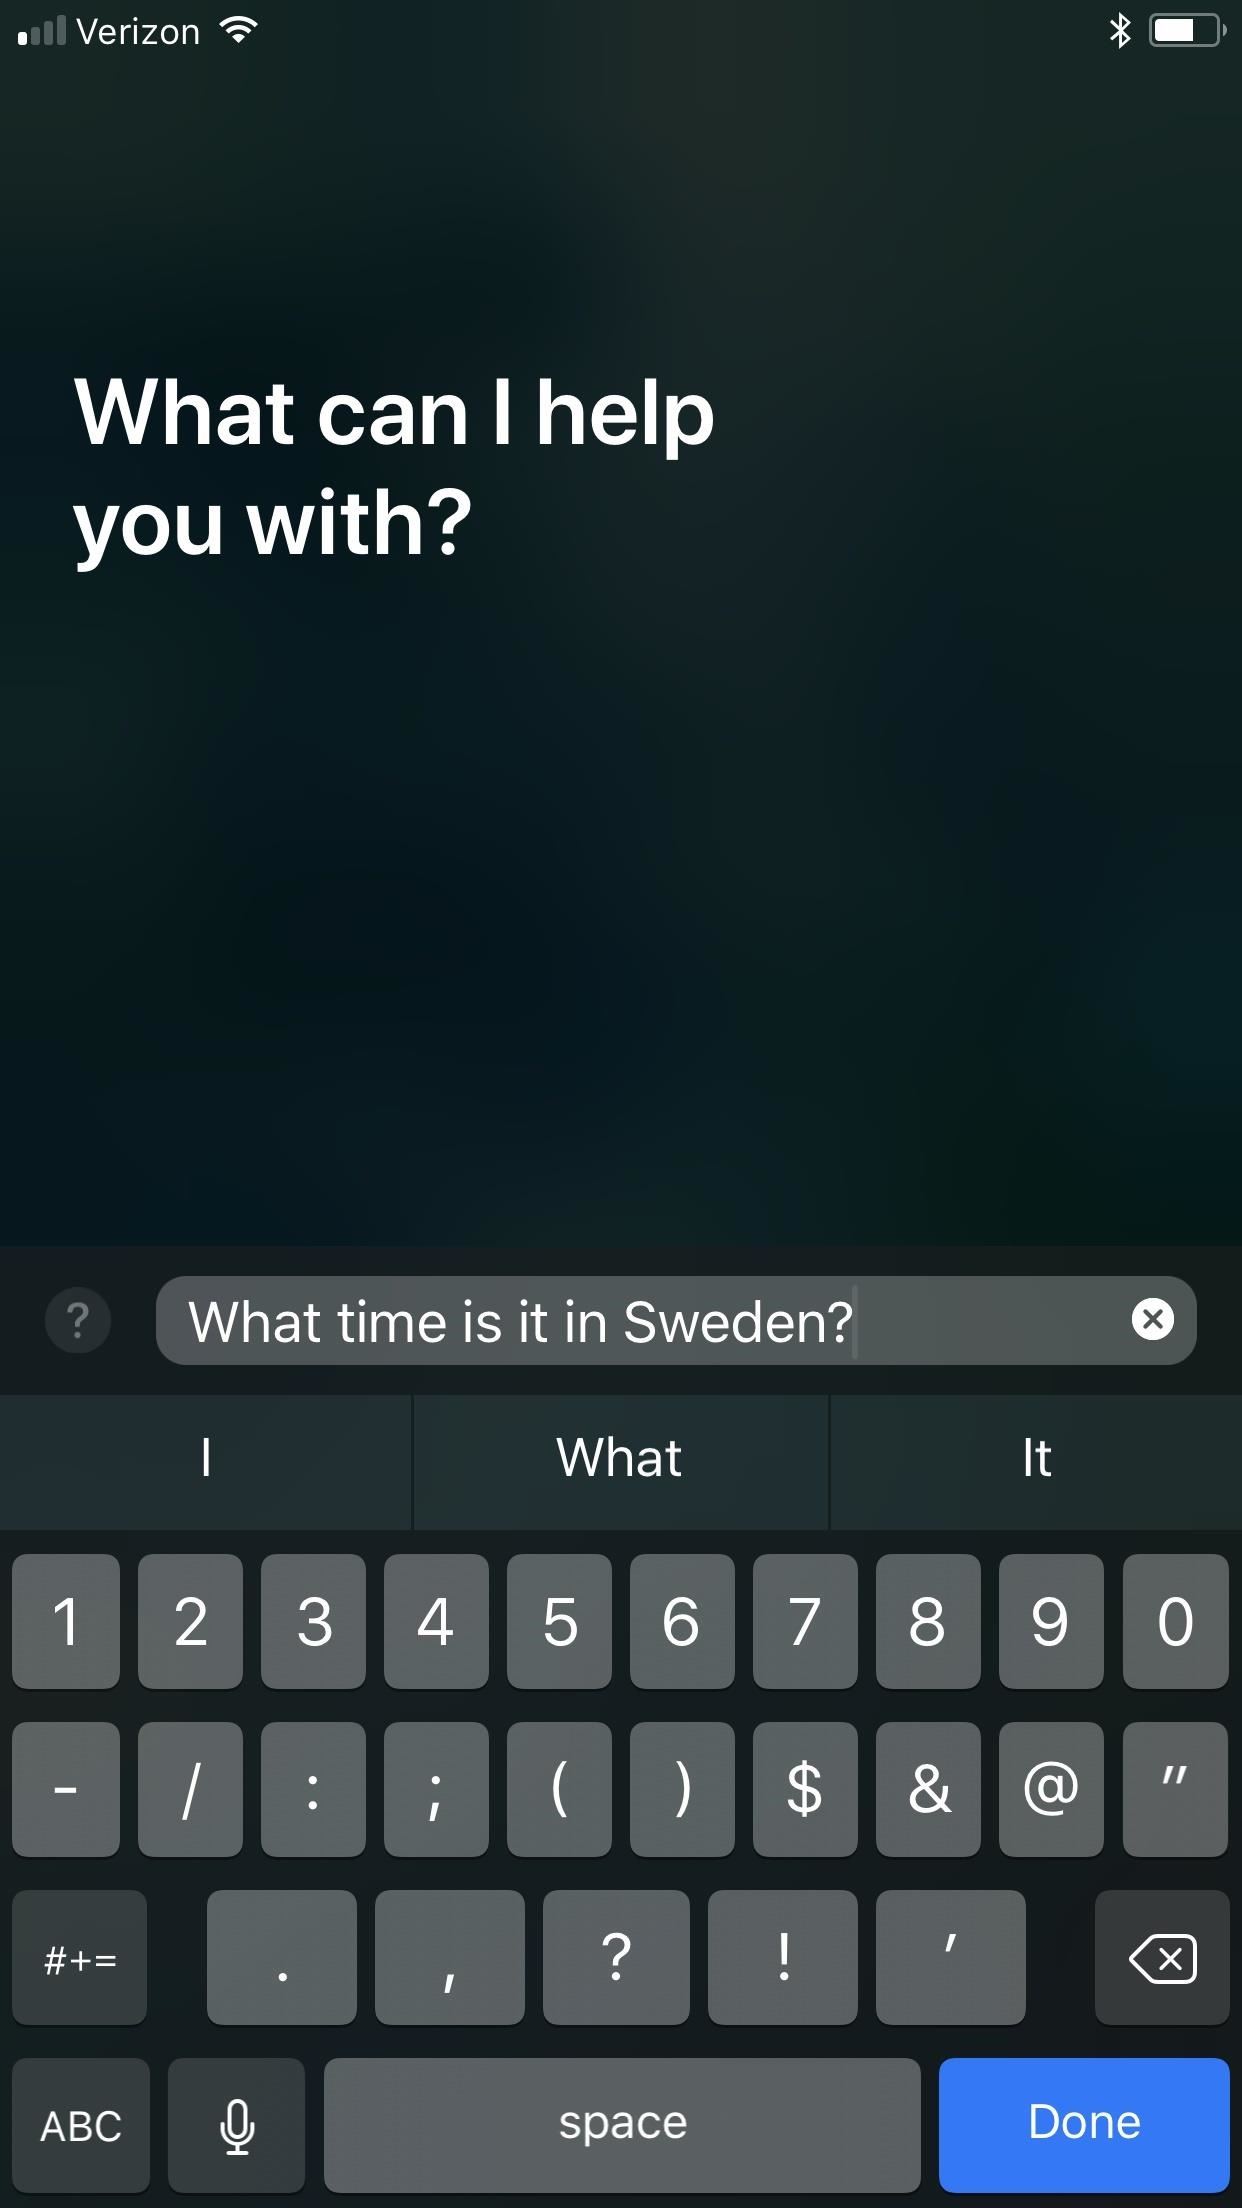
1. Type to Siri Instead of TalkingIf you're uncomfortable asking Siri a question out loud, why not type it instead? Introduced in iOS 11, you can silently type your queries to Siri, assuming you've set up the feature in Settings ahead of time. Unfortunately, by enabling "Type to Siri," you won't be able to use the Home or Side button to speak to Siri. On the bright side, you can still use "Hey Siri," so you won't be missing out too much by opting for typing.Full Guide: How to Type to Siri When You Don't Want to Talk Images by Justin Meyers/Gadget Hacks
2. Mute SiriWhat's the point of opting to type to Siri if the world is going to hear her answer anyway? In these cases, you're going to want to make sure Siri is muted. IOS even lets you customize Siri's voice feedback — choose whether the assistant will only respond to you vocally when using "Hey Siri" or whether you control the feedback via the ring switch.Full Guide: How to Mute Siri & Disable Voice Feedback
3. Change Siri's Voice to One of 10 OptionsYou read that right — as of iOS 12, Siri now supports up to ten different voice options. Choose between American, Australian, British, Irish, or South African, and, of course, whether Siri is male or female.Full Guide: How to Change Siri's Accent for a Better-Sounding Assistant
4. Set Up Siri ShortcutsSiri Shortcuts are one of iOS 12's shining features. You can assign a shortcut — either one you've made or one you've downloaded — to Siri using a custom phrase. Whenever you speak that phrase to Siri, the digital assistant jumps into action and runs the shortcut in the background. It adds a whole new level of customization and efficiency to iOS.Full Guide: How to Create Your Own Siri Shortcuts Here are a few reasons why Siri Shortcuts changes the customization game on iPhone:
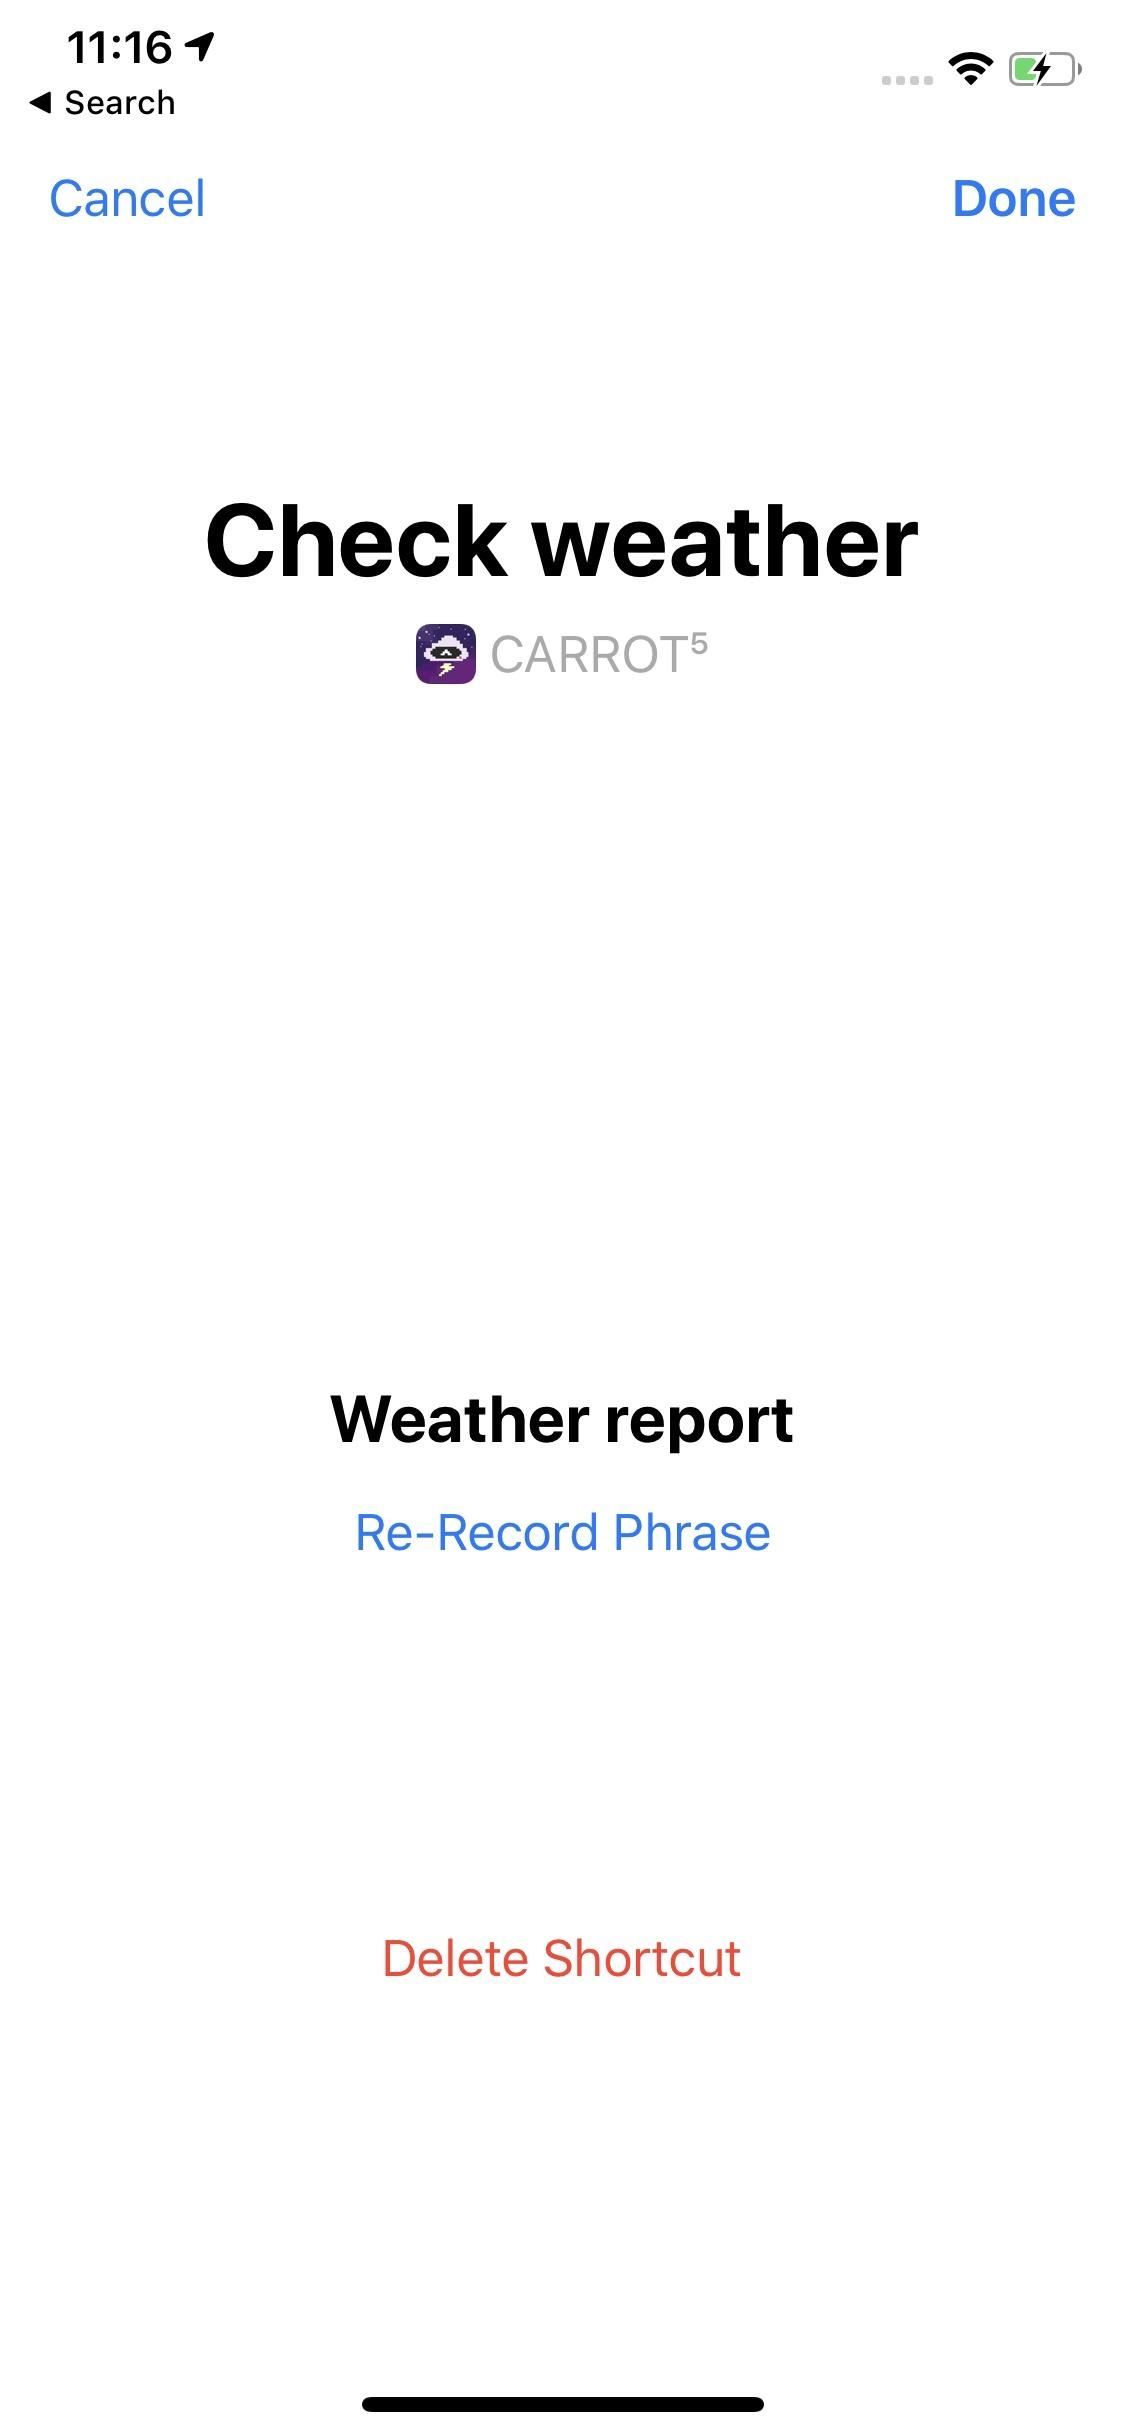
5. Use Your Own Weather App with SiriWhile there are plenty of excellent third-party weather apps out there, the only one compatible with Siri used to be the stock Weather app. That's changed — with Siri Shortcuts, you can use your weather app of choice — assuming compatibility — with Siri, to get updates, check tomorrow's weather, whatever you'd like to know.
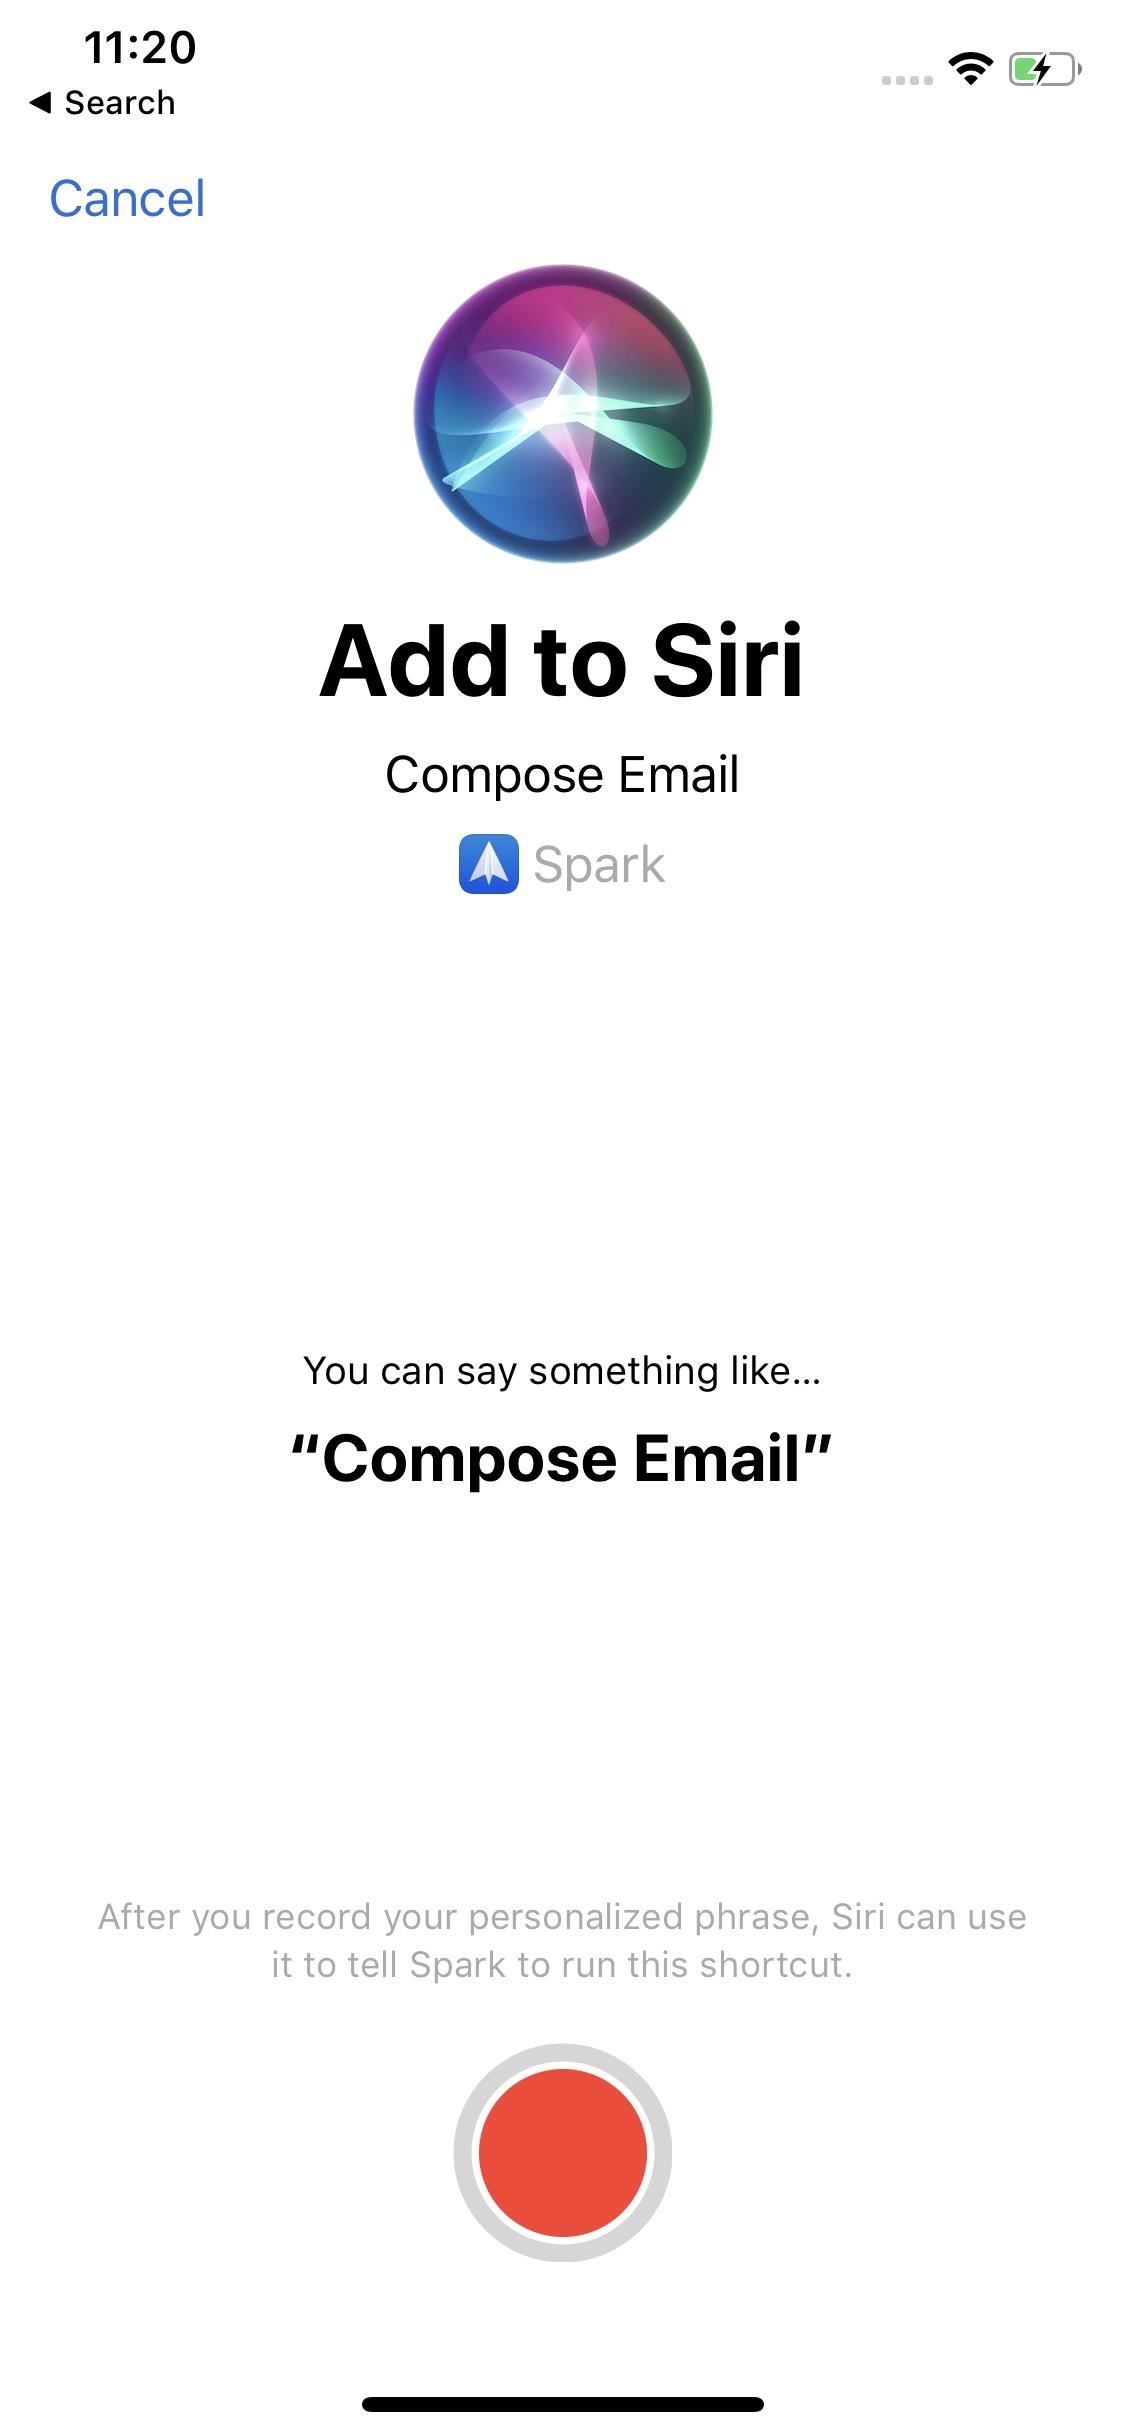
6. Use Your Own Email Client with SiriIn the same vein, you can set up your favorite email app to work with Siri, over the stock Mail app. If you prefer to use, say, Spark as your email client, you can set it up to open a folder, search your archives, or compose a new email, including specificity for contact(s), subject, body, and signature. Each client may differ in what you can do with Siri. However, it's all in the name of customization — you choose what works best for you.
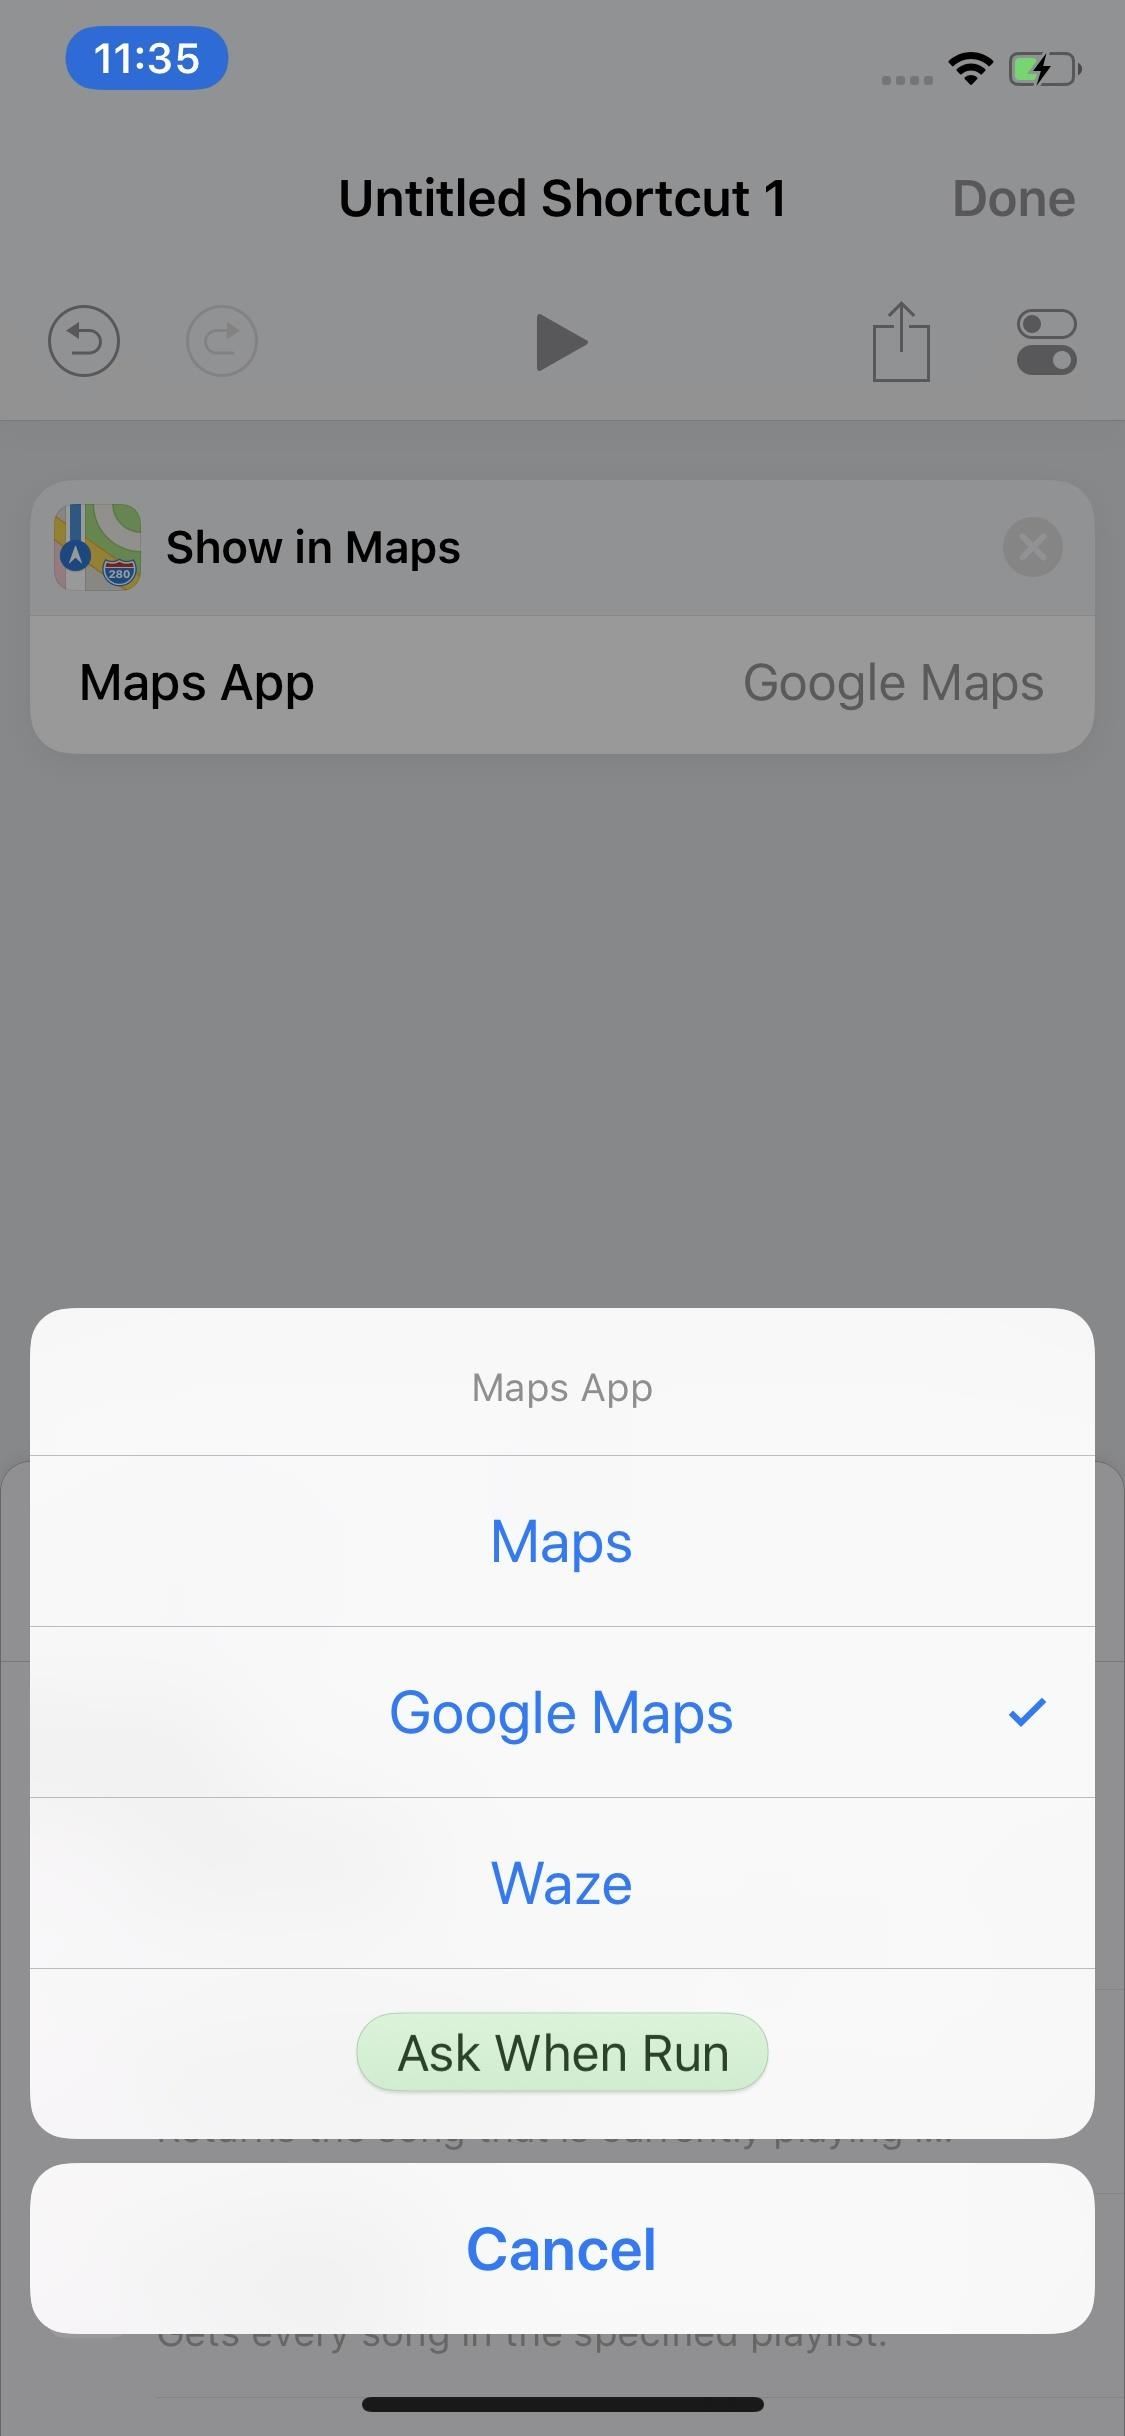
7. Use Your Own Navigation App with SiriWhile Apple Maps is significantly better than the flop it was upon release, you might be partial to other apps such as Google Maps or Waze. Fear not — Siri is no longer tied to Apple Maps in iOS 12. You can set either of the other two popular third-party navigation apps to the digital assistant in the Shortcuts app.
8. Use Your Own Apps with SiriAt the end of the day, there are too many different types of apps you can use with Siri to list here. If an app's developers make it possible, you can use that app with Siri instead of an equivalent stock app.Full Guide: All the Ways Your Favorite Apps Are Adding Siri Shortcuts
AppsThere's an app for that. No, really, there is. With over 2.1 million titles as of March 2018, it's hard to imagine there not being an app to solve any given problem. With all those apps comes personalization. Apps are designed to solve problems for all users, but that doesn't mean you can't add your spin to things.

1. Enable Widgets for Instant Updates on Your Favorite AppsAs previously mentioned, Apple's widgets aren't quite as versatile as Android's. However, they are beneficial for quick updates on the apps you use most, in one easy-to-access location. Unlike iOS 12's new Weather widget, general iOS widgets rest in the Today View next to your home screen, lock screen, and Notification Center. Once added, widgets, and their data, are just a swipe away.Full Guide: How to Add Widgets to the Today View — The Easy Way
2. Set Timers for Apps to Reduce Your UsageScreen Time in iOS 12 offers users more control over their iPhone use. One feature of Screen Time, "App Limits," allows you to set timers for apps you feel you use too much. Once you've used up your allotted time for the day, the app locks up, until the timer resets the next day.Full Guide: How to Set App Limits in Screen Time to Focus on the Real World More
3. Find More Powerful Alternatives for Stock AppsThe App Store is a big place, full of apps designed to compete for your use (and your money). If you find Apple's stock apps, such as Mail or Weather, to be lacking, know there are dozens, if not hundreds, of alternatives for you to test out instead.Don't Miss: The 5 Best Free Email Clients for iOS
4. Delete Stocks AppsSpeaking of underused stock apps, why keep any you aren't using? The Stocks app is only taking up space on your home screen, and you don't need to shove it in an unnecessary folder either. You can remove many staple apps from your iPhone, so you never need to look at them again.In the past, "deleting" stock apps would only remove the icon from your home screen, to ensure the user could redownload the app no matter what. Nowadays, iOS will truly delete the app in questions, requiring an internet connection if you ever want it back.Full Guide: How to Remove Stock Apple Apps for a Less Cluttered Home Screen
Phone"Who makes phone calls anymore?" There's some truth to that common joke, but in reality, many of us still rely on our iPhones to make calls. To get the most out of the iPhone's namesake feature, try out these fun customizations:
1. Have Phone Calls Answer AutomaticallyHave you ever needed to pick up the phone, but something was stopping you from doing so? Maybe your iPhone was too far away, or maybe you have food all over your hands from dinner. What are you supposed to do?Well, you can enable your iPhone to answer phone calls for you automatically. This setting, introduced in iOS 11, erases your responsibility to pick up calls yourself. You can even adjust how long your iPhone waits before answering the call, giving you time to notice the call in the first place.Full Guide: How to Automatically Answer Phone Calls When You Can't Yourself
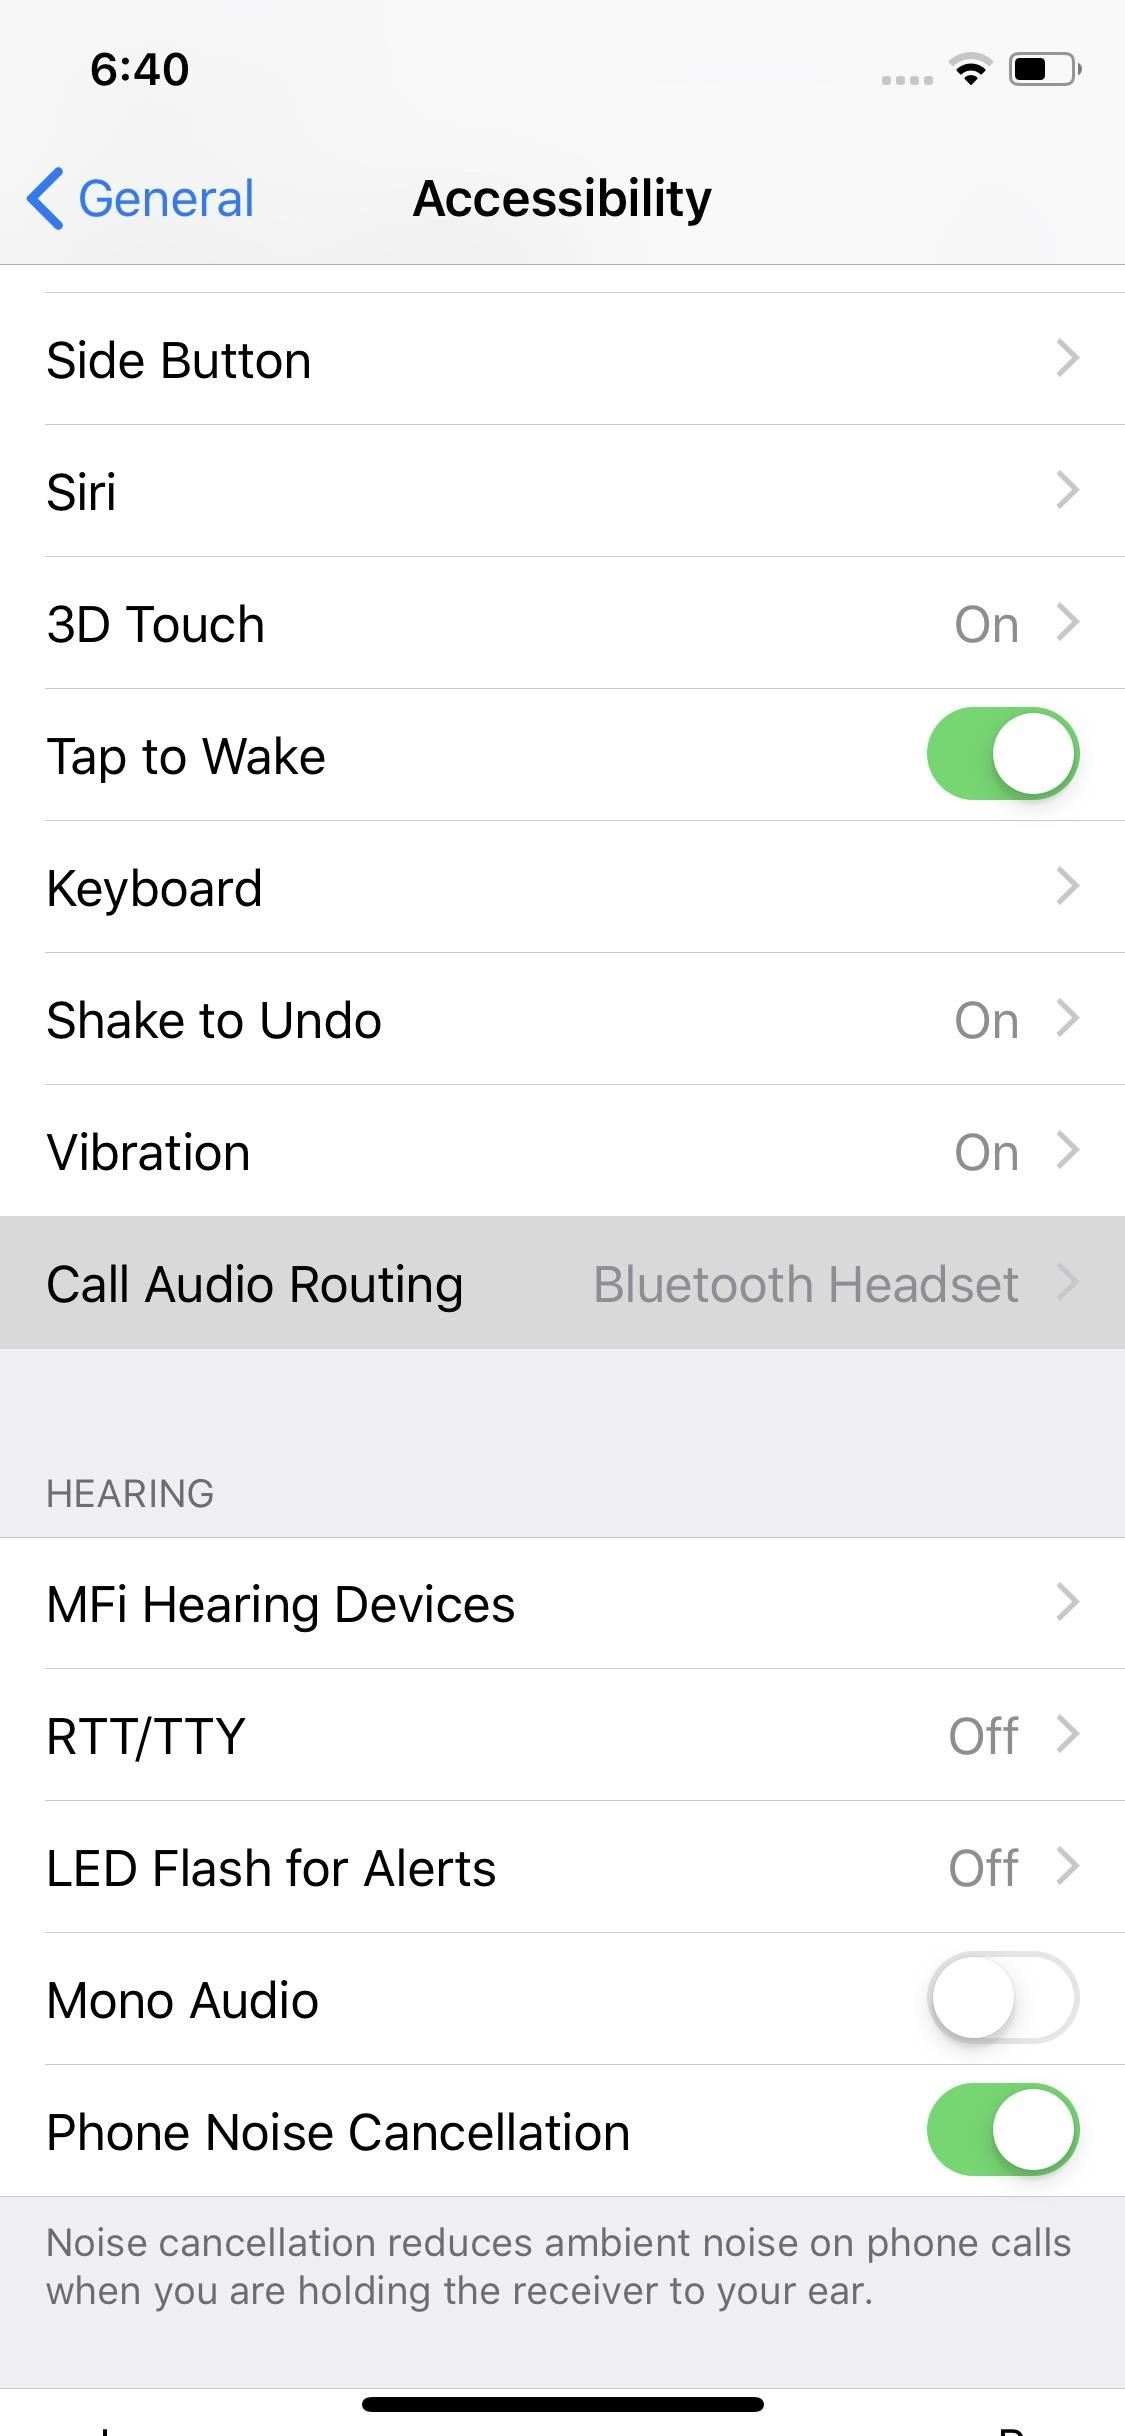
2. Choose What Audio Source Calls Are Sent ToWhether you enable "Auto-Answer Calls" or not, you can control what audio source your iPhone directs your calls to. By default, your iPhone sends the audio to the location it thinks makes the most sense; This might not always be to your advantage, however, as a call might be routed to your iPhone's speaker while you're using wireless headphones.Instead, dive into this setting by going to Settings –> General –> Accessibility –> Call Audio Routing. Other than "Automatic," you can set your iPhone to "Bluetooth Headset," which will always favor your Bluetooth headphone or speaker, or "Speaker," which will likewise always favor your internal speaker.Full Guide: How to Change Where Phone Calls Are Automatically Sent To
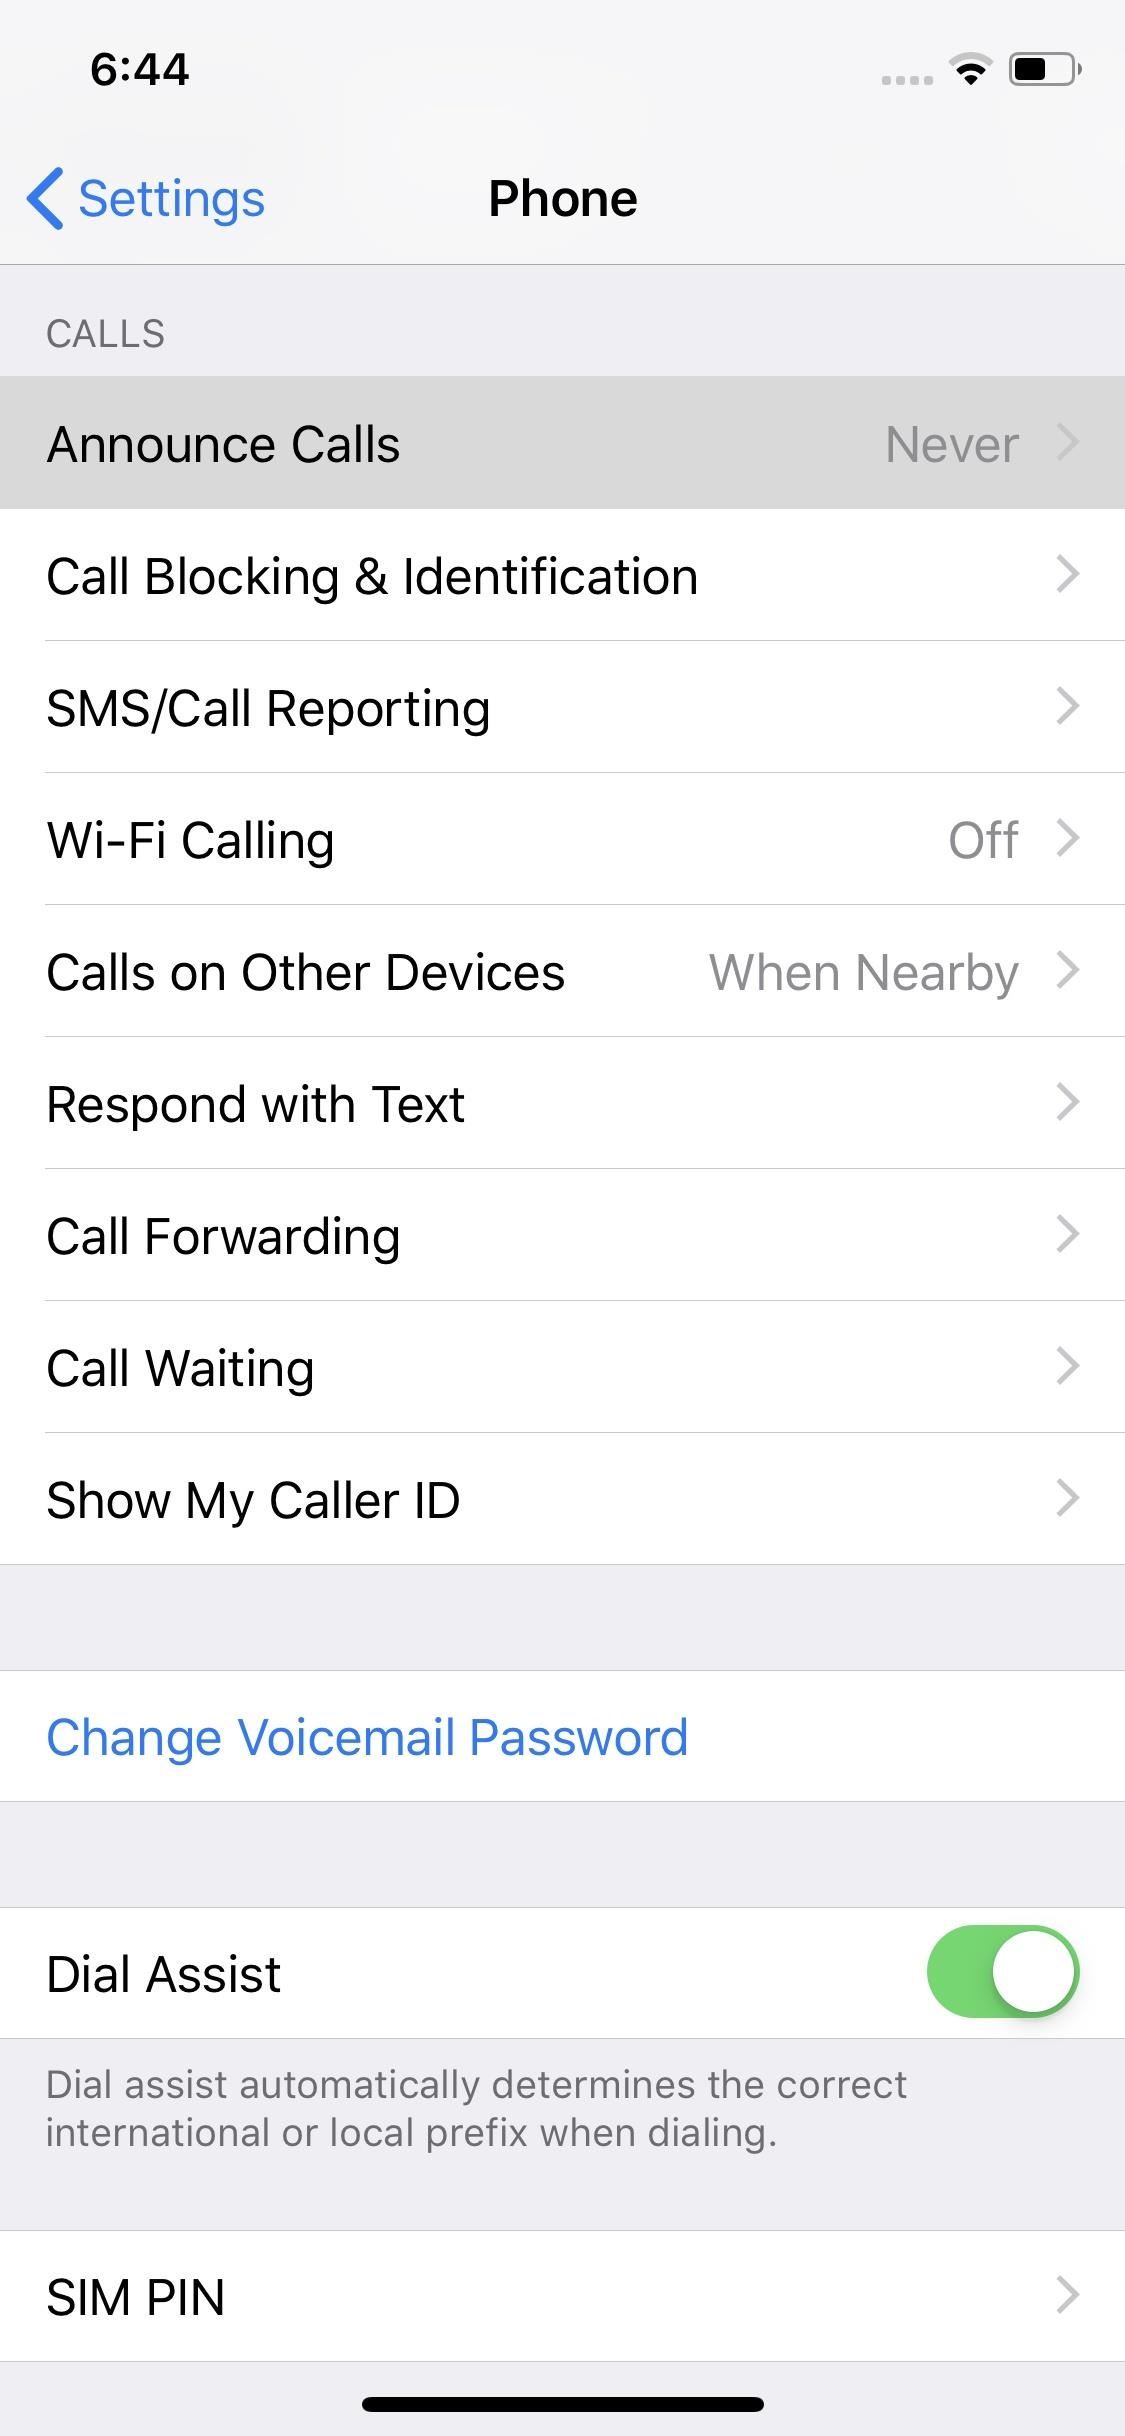
3. Announce CallsWant to know who's calling you up without having to look at your iPhone? Enable "Announce Calls." This feature will audibly speak the name of the incoming caller, so you'll always know who's trying to get your attention.You'll find this option in the Phone settings. Once there, you'll have the choice between "Always," which will always speak the contact name; "Headphones & Car," which will only speak the contact name when you're wearing headphones on connected via Bluetooth in the car; "Headphones Only," which will only speak when connected to headphones; and "Never," which is the default. Choose what works best for you, and the people typically around you!
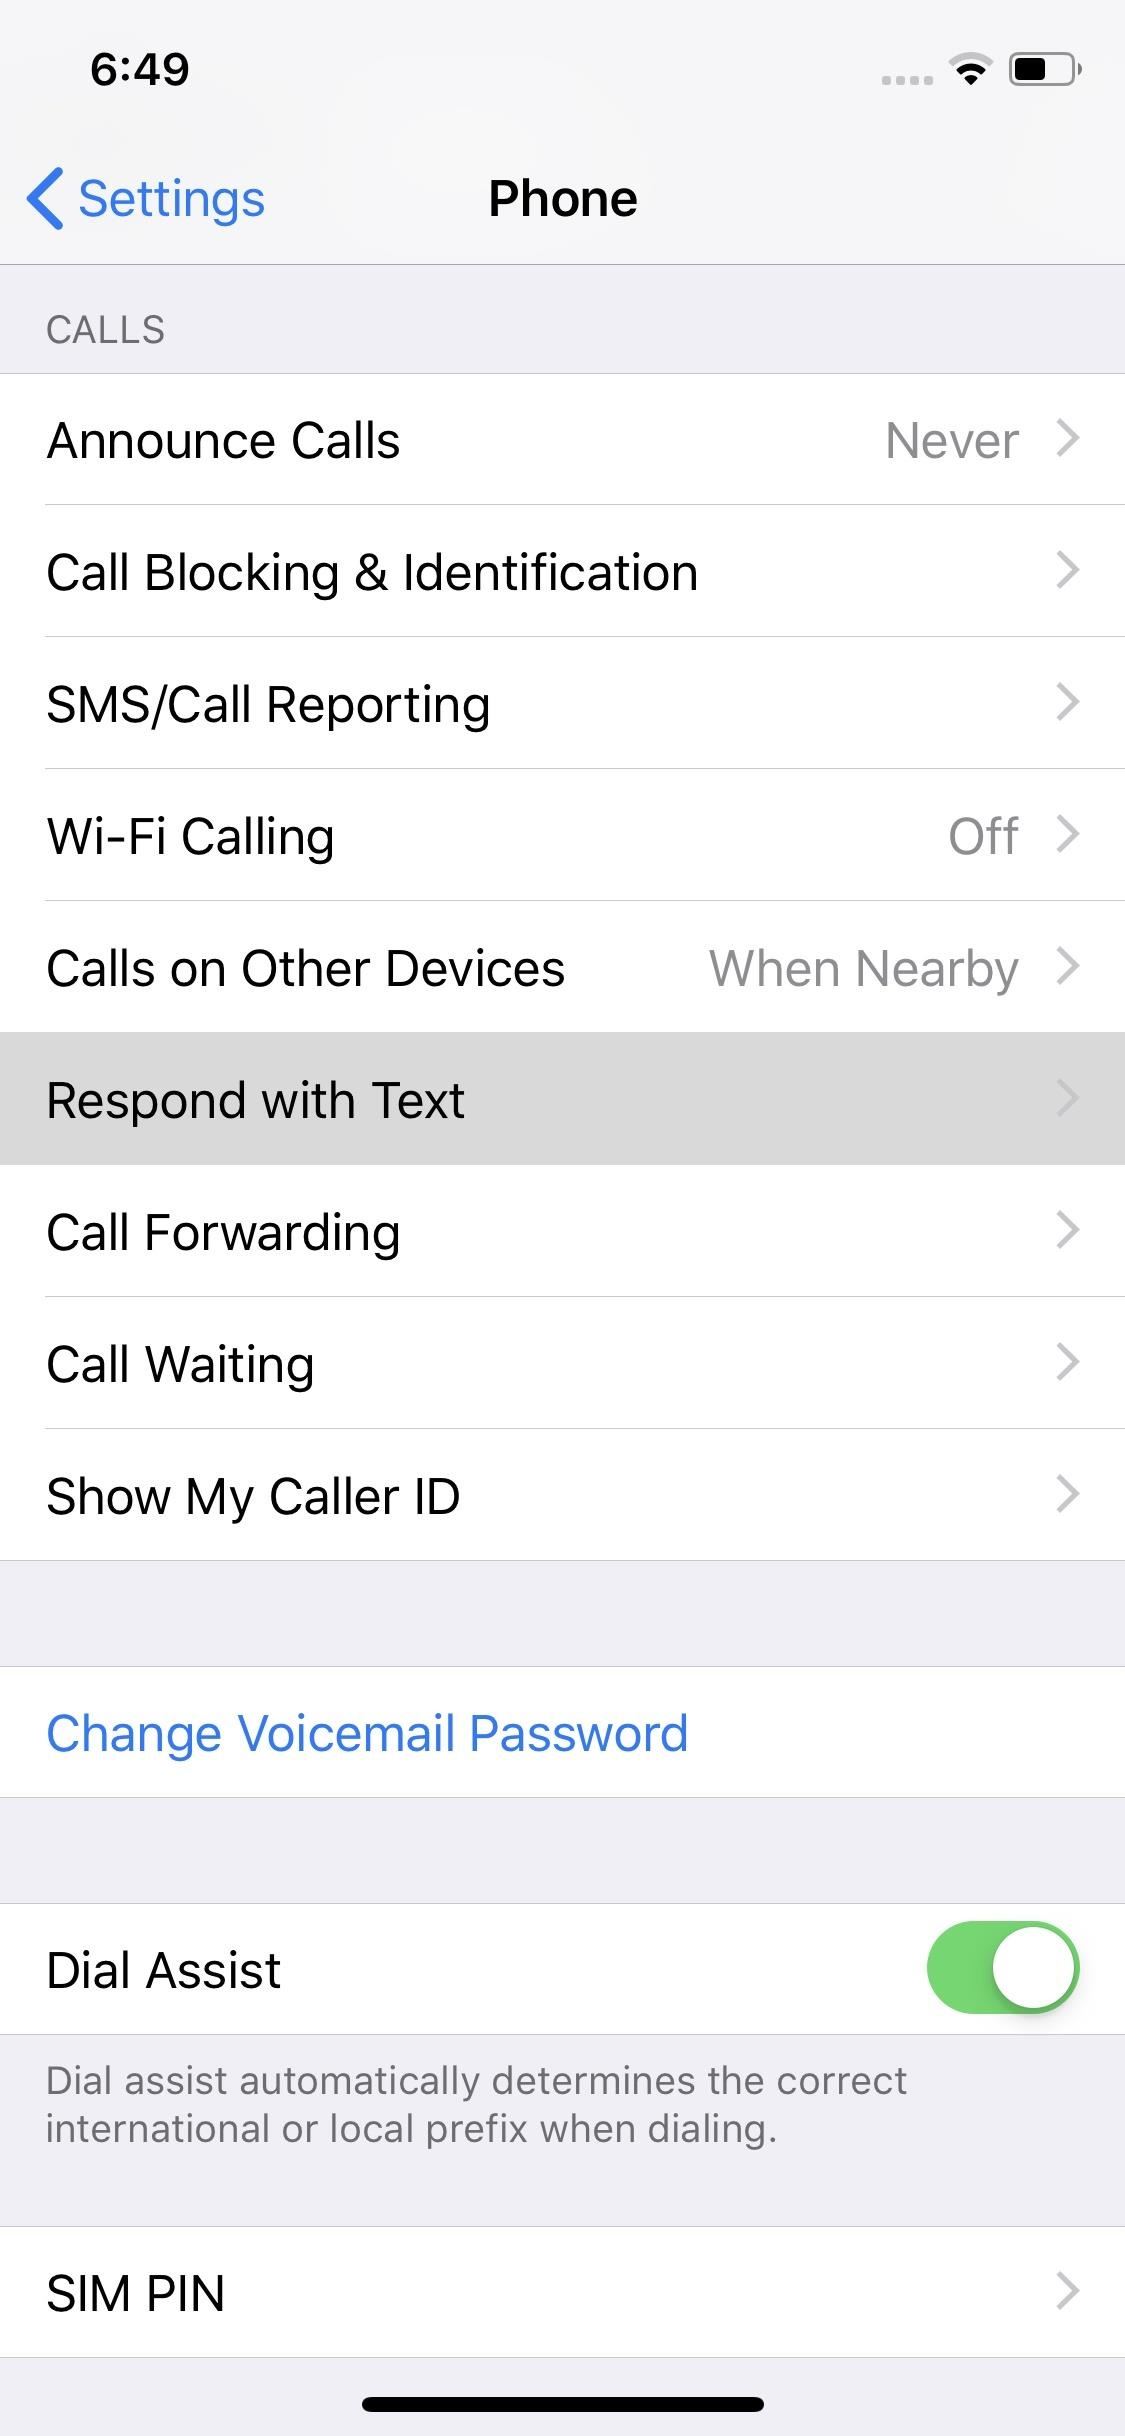
4. Set Custom Text Responses for Phone Calls You Can't AnswerWhen you get a phone call, you can send one of three text responses to let the caller known you can't chat that moment. However, you aren't confined to the stock responses iOS provides. You can go into the settings and change these options to whatever you'd like. When you get a call you can't answer, your personality comes through their Messages app.In the Phone settings, tap "Respond with Text." Here, you can tap on each of the pre-written boxes to type responses of your own. Now, just tap the "Message" option when receiving a call, and choose one of your custom replies.

5. Disable Vibration for Calls (& Texts!)Setting your ring switch to "silent" is intended to make receiving calls and texts more peaceful. However, sometimes the vibrations alone can still get your blood boiling. To disable vibrations across the board for all alerts, head to Settings –> General –> Accessibility –> Vibration, and ensure the toggle is disabled for "Vibration."
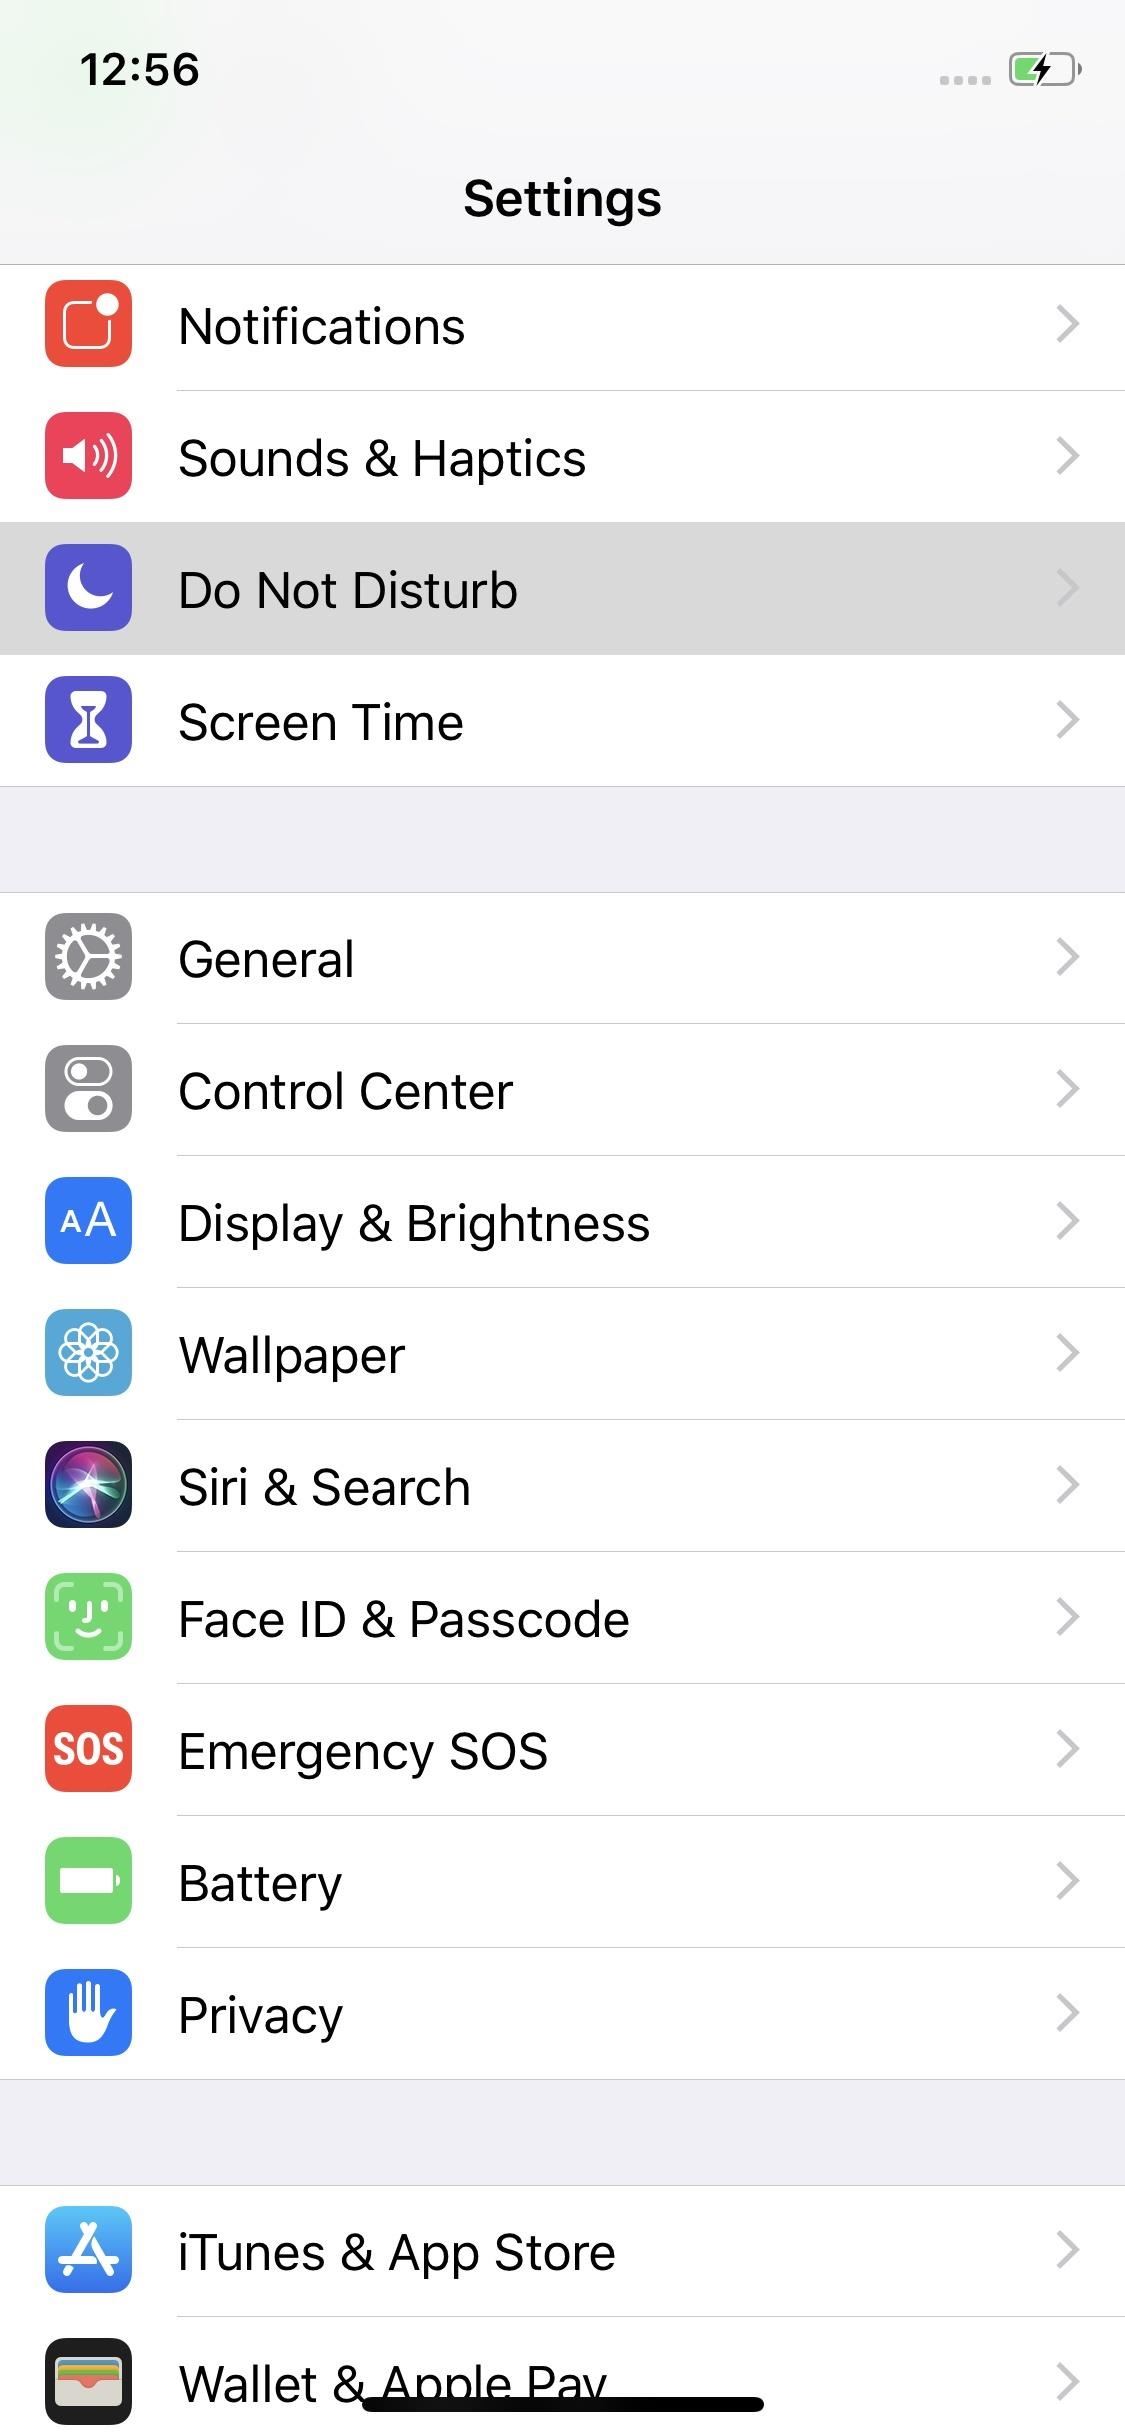
6. Block All Incoming Calls During Do Not DisturbBy default, iOS allows incoming calls from contacts listed in "Favorites" to break through Do Not Disturb. If you'd rather no one get through during your beauty sleep, you can disable this feature entirely. Just head to Do Not Disturb in the Settings, then tap "Allow Calls From." Finally, choose "No One" to ensure your rest remains restful.
MessagesTexting — it's not just for the kids. No matter how young or old, you probably use Messages quite frequently throughout your day. As such, it's an area of your iPhone that you should tweak to your liking.
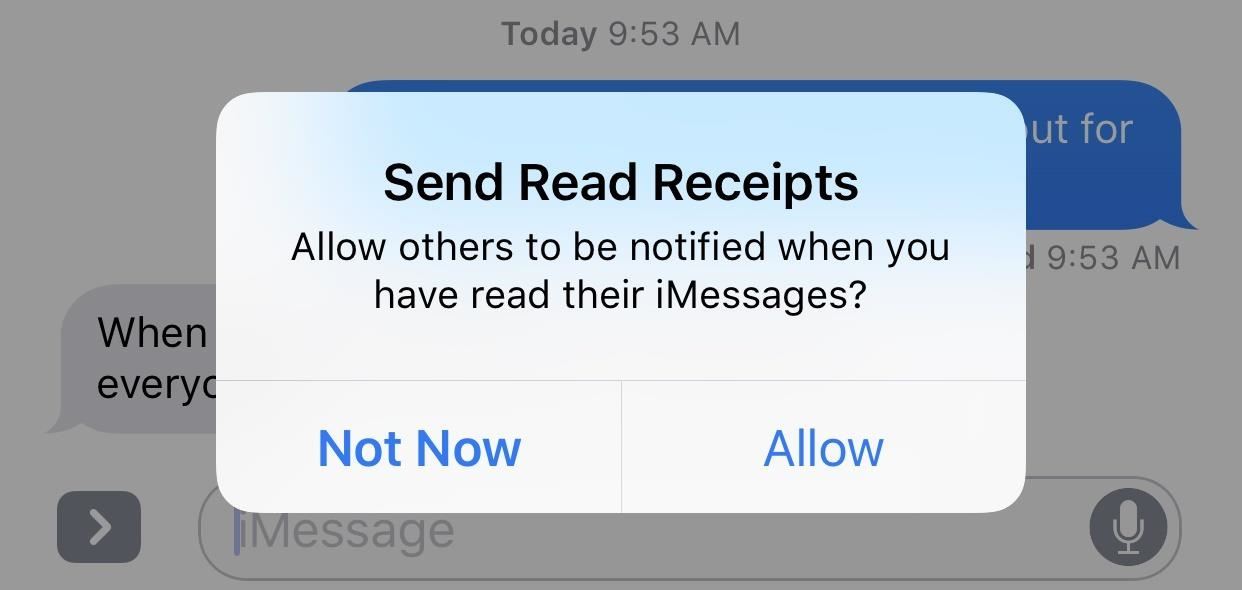
1. Disable 'Send Read Receipts'Unlike Facebook Messenger, you have total control over whether iOS informs your friends that you've opened their messages. You can even choose specific contacts to enable Read Receipts for.Full Guide: How to Enable or Disable Read Receipts for iMessages Image by Justin Meyers/Gadget Hacks

2. Show the Character CountCharacter counts typically don't matter for iMessages, but standard text messages still "cap-out" at 160 characters. If you want to keep a closer eye on the character count for your texts, head to "Settings," then "Messages" and under SMS/MMS, enable "Character Count." You won't see the counter when typing an iMessage, but you also won't see it until you start a new line on an SMS message. Once you do, however, you'll see the number of characters you've written out of 160. First line, no counter. Second line, counter.
3. Show the Subject FieldWant to get a little formal? You can add a subject field to your iMessages and texts, so your colleagues, friends, and family know what you're there to discuss. To enable this field, jump to your Messages settings, then tap the toggle next to "Show Subject Field."
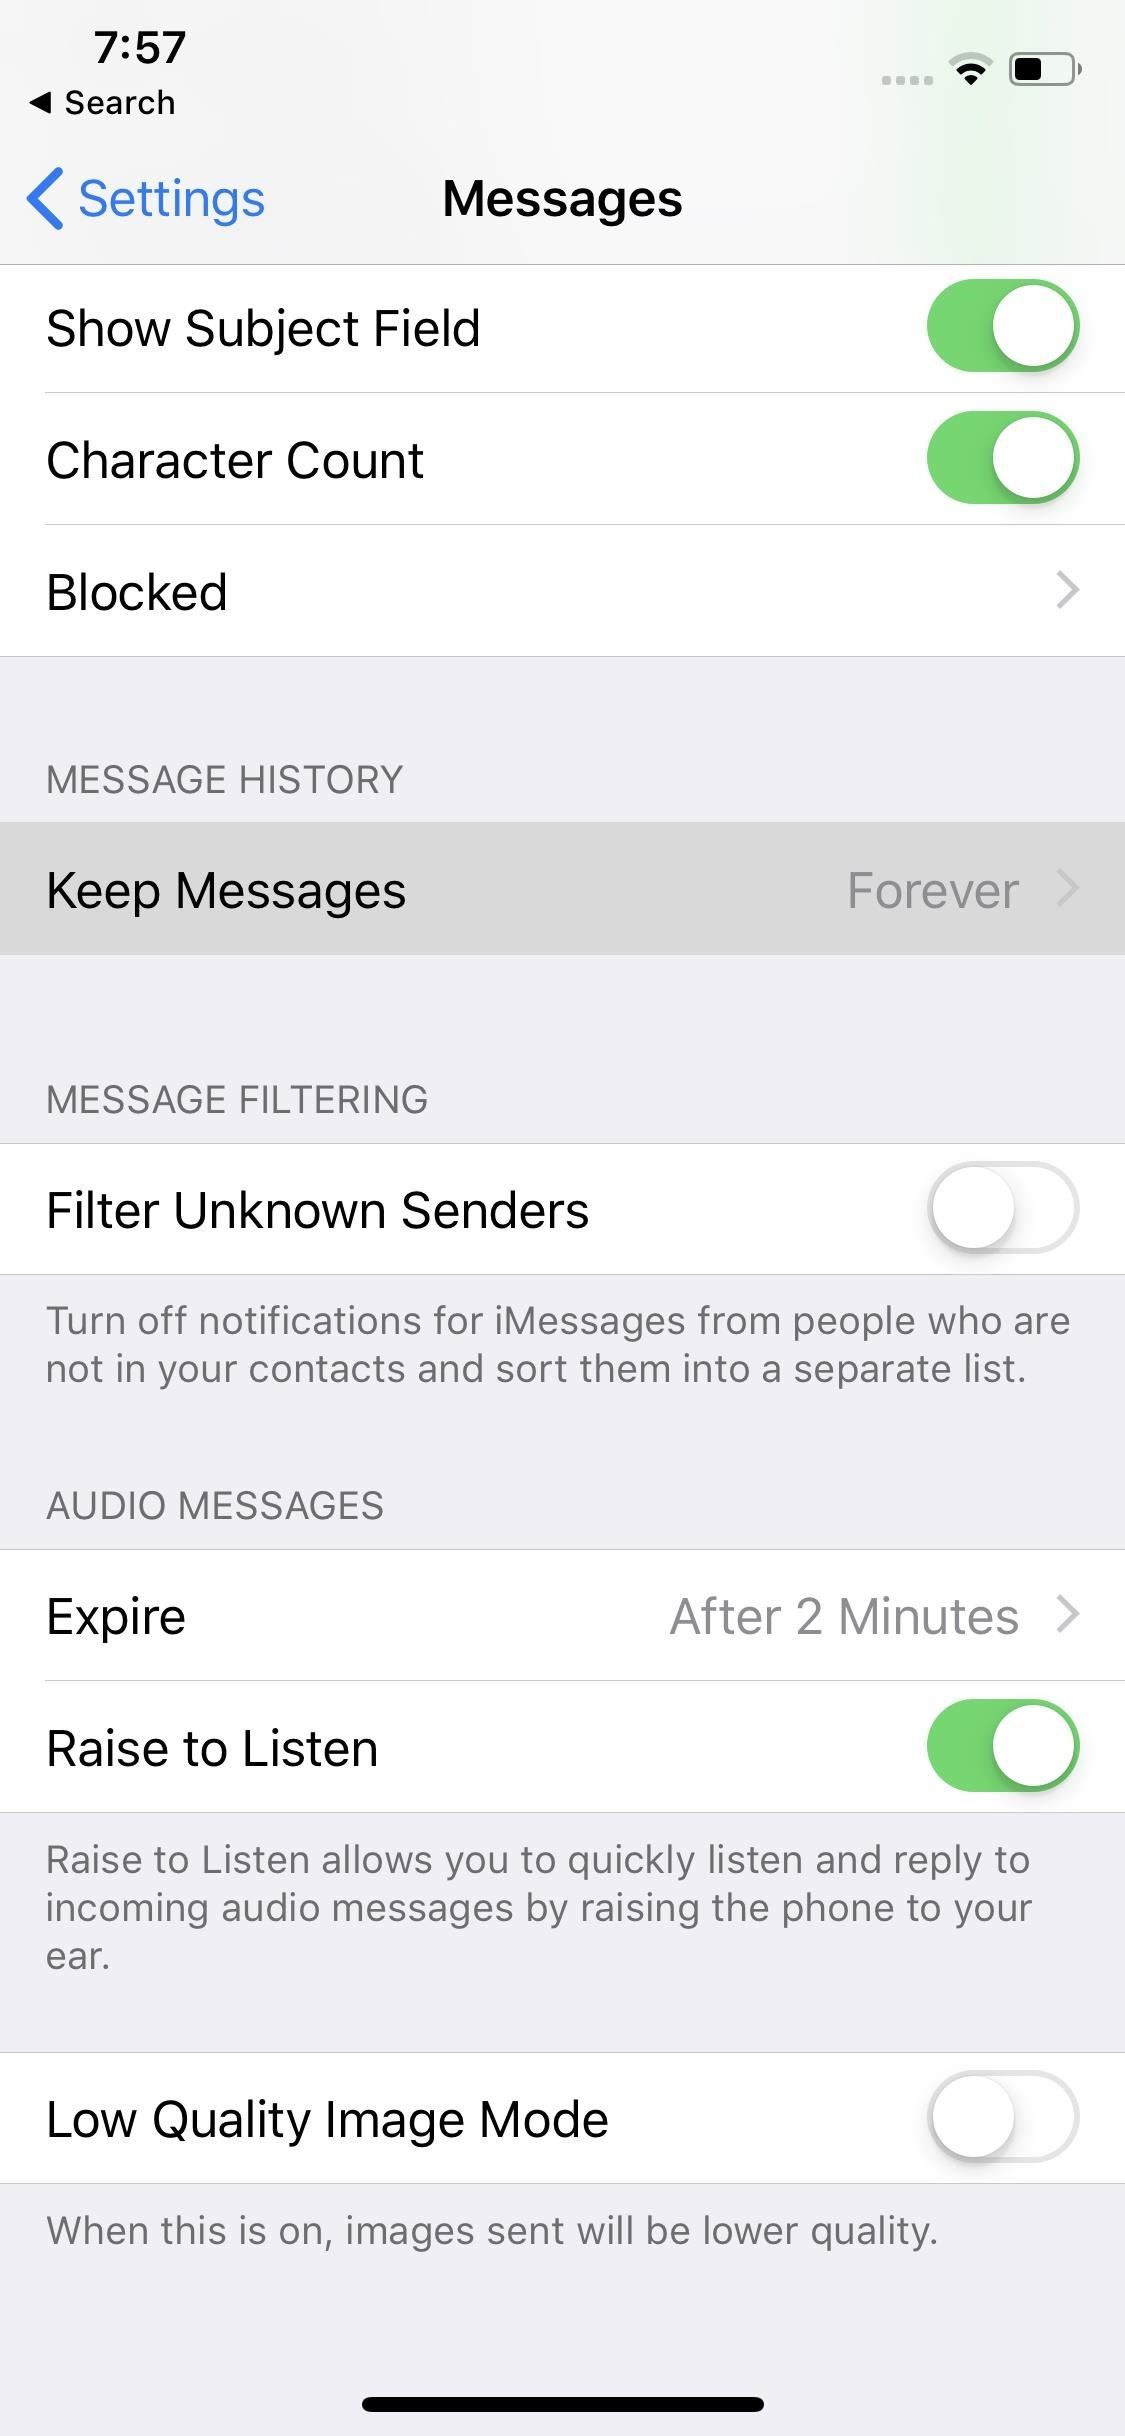
4. Auto-Delete MessagesYou might enjoy keeping messages on your iPhone, but that data adds up. Fast. If you're running out of space on your iPhone, and don't mind losing some conversations, you can set up iOS to auto-delete your messages after either 30 days or one year. It'd be nice if Apple were to offer more options than just these, but, hey, it's better than nothing.Full Guide: How to Delete Your Messages History Automatically

5. Hide the App DrawerDoes the App Drawer in Messages drive you crazy? Would you rather look at a clean window while texting than look at a bunch of Messages apps you don't care about? Don't let your frustration get to you — hide the App Drawer.Full Guide: How to Remove the Bottom App Drawer in Messages Not Hidden (Left) vs. Hidden (Right). Images by Justin Meyers/Gadget Hacks
KeyboardYour iPhone's keyboard is how you communicate with friends, family, colleagues, even your iPhone! It's an essential component of your iOS experience, but just because the keyboard is so integral to every iPhone doesn't mean there isn't room for personal customization. On the contrary, Apple affords you a wide variety of options to make your keyboard your keyboard.
1. Download a Third-Party Keyboard for More OptionsApple's stock iOS keyboard has plenty of perks to keep you typing. But there are other keyboards out there, with additional features that might be worth your time (swipe-typing, anyone?). If you want to see what else is out there — and why Gboard is by far the best option — make sure to branch out and try some new keyboards for yourself.Don't Miss: The 6 Best Third-Party Keyboards Available Right Now
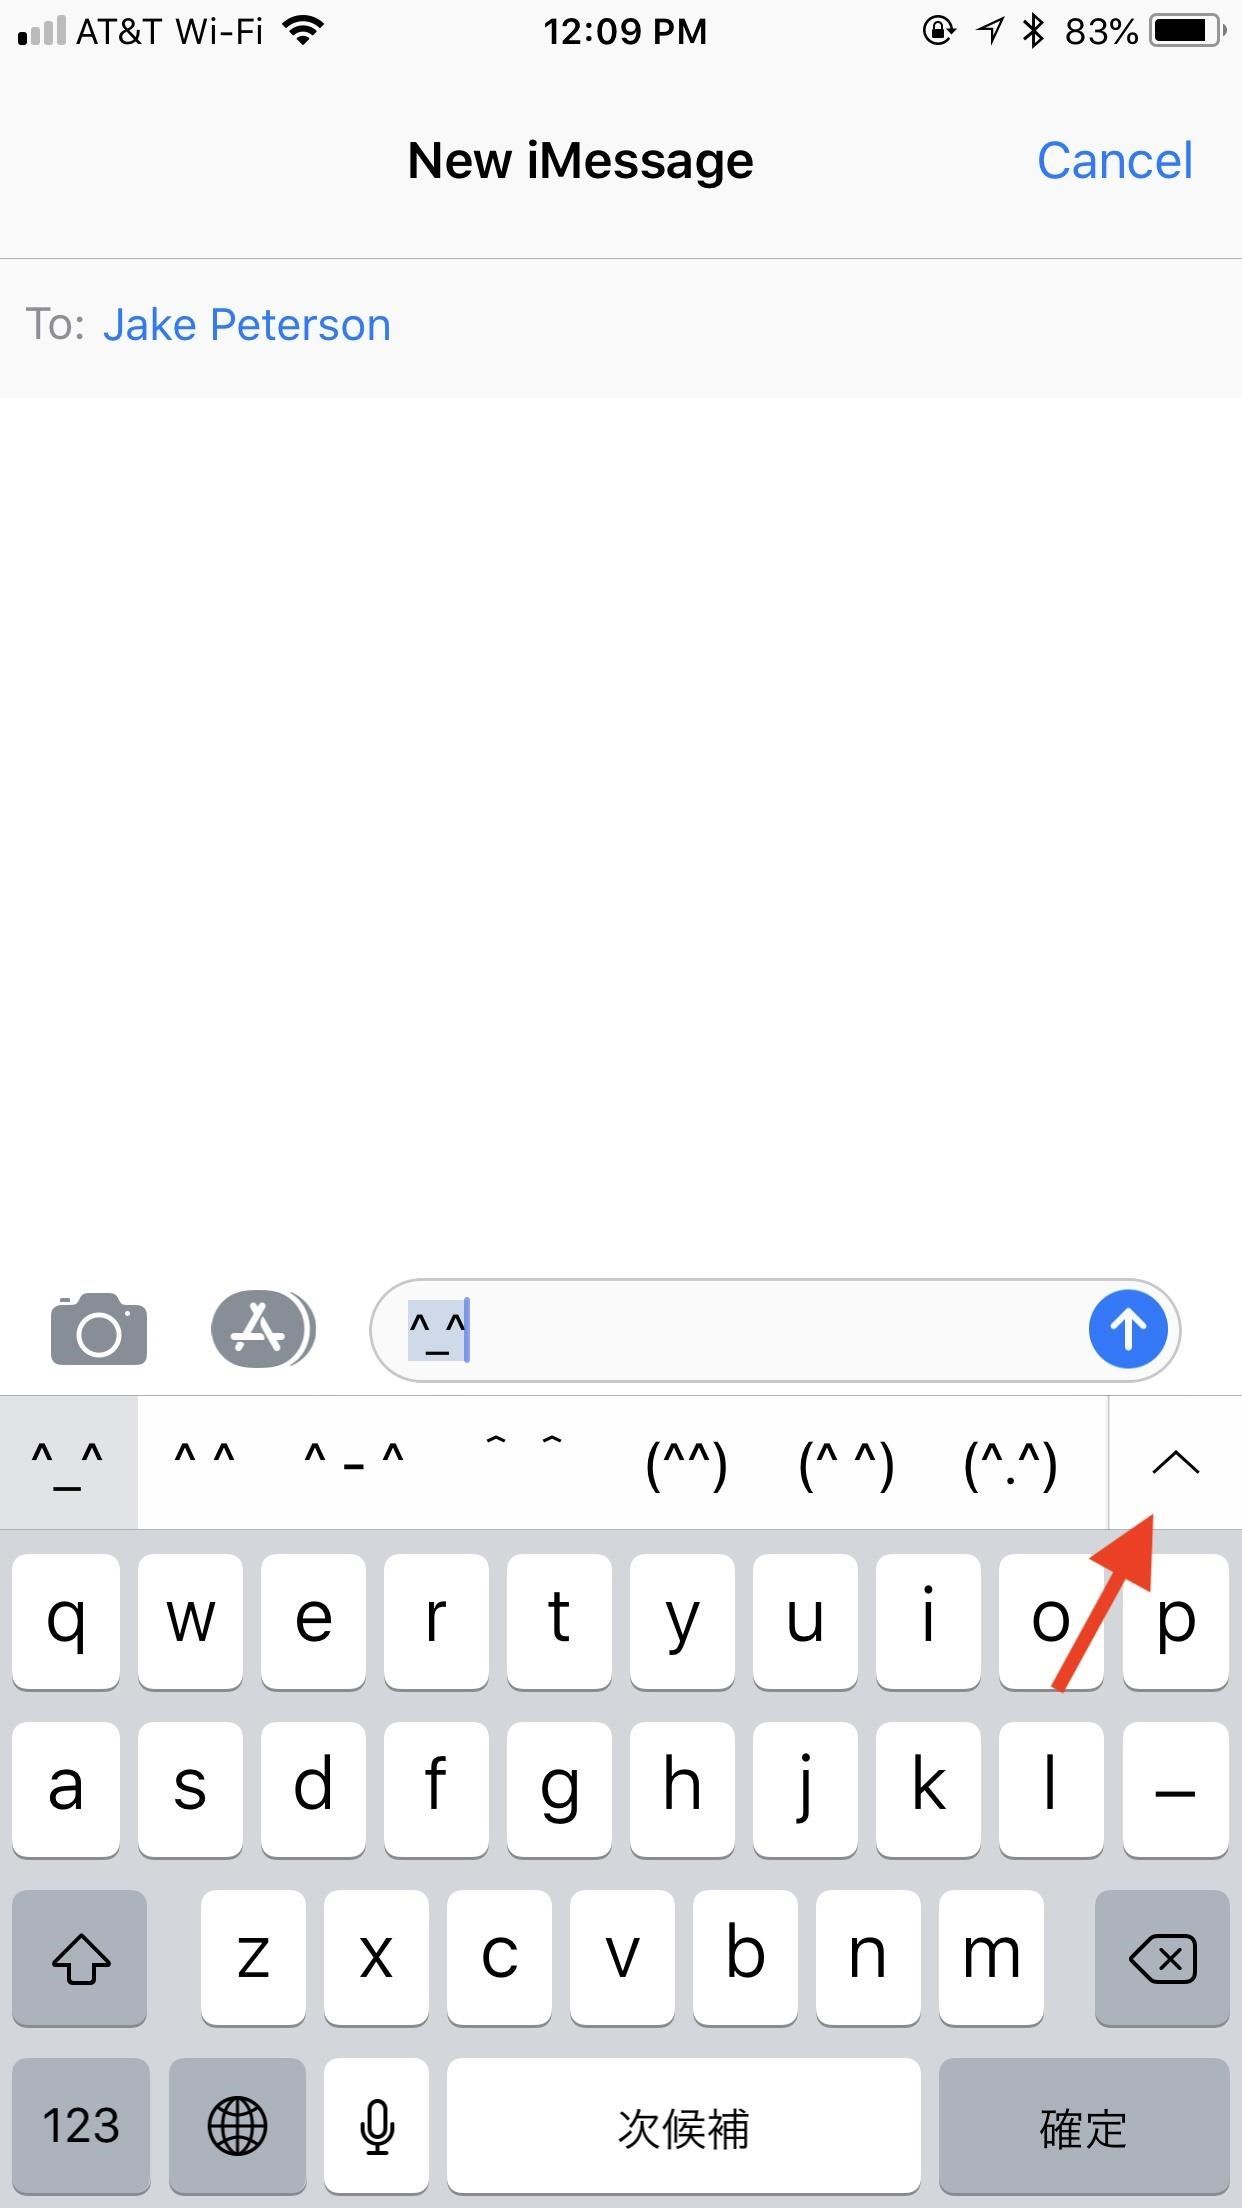
2. Enable the Secret Emoticon KeyboardHere's a keyboard you won't have to download — iOS contains a secret Emoticon keyboard, which allows you to send friends a variety of cute emoticons you'd typically need to copy and paste from the internet.Full Guide: How to Unlock the Secret Emoticon Keyboard in iOS
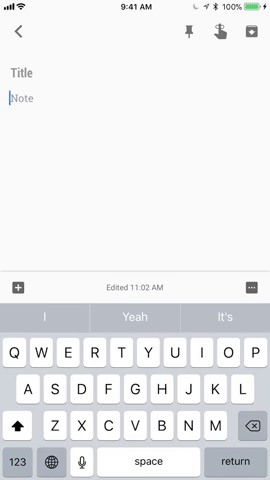
3. Create Keyboard Shortcuts for Personalized TypingKeyboard shortcuts are fantastic tools to type long words or phrases with just a couple of letters. If you find yourself meticulously typing the same, lengthy phrases over and over again, you might want to let your iPhone handle the hard work for you.Full Guide: Use Keyboard Shortcuts to Type Long Words & Phrases Faster Images by Brian Lang/Gadget Hacks
4. Use One-Handed TypingOur iPhones continue to get bigger and bigger, but our hands remain the same size. Apple knows this, which is why iOS now comes with a one-handed mode for typing. When enabled, your keyboard shrinks to the size of what you'd expect on an iPhone 5 display size, harkening back to the days when you could effortlessly go one-handed on an iPhone.Full Guide: How to Enable One-Handed Typing on Your iPhone's Stock Keyboard Images by Justin Meyers/Gadget Hacks
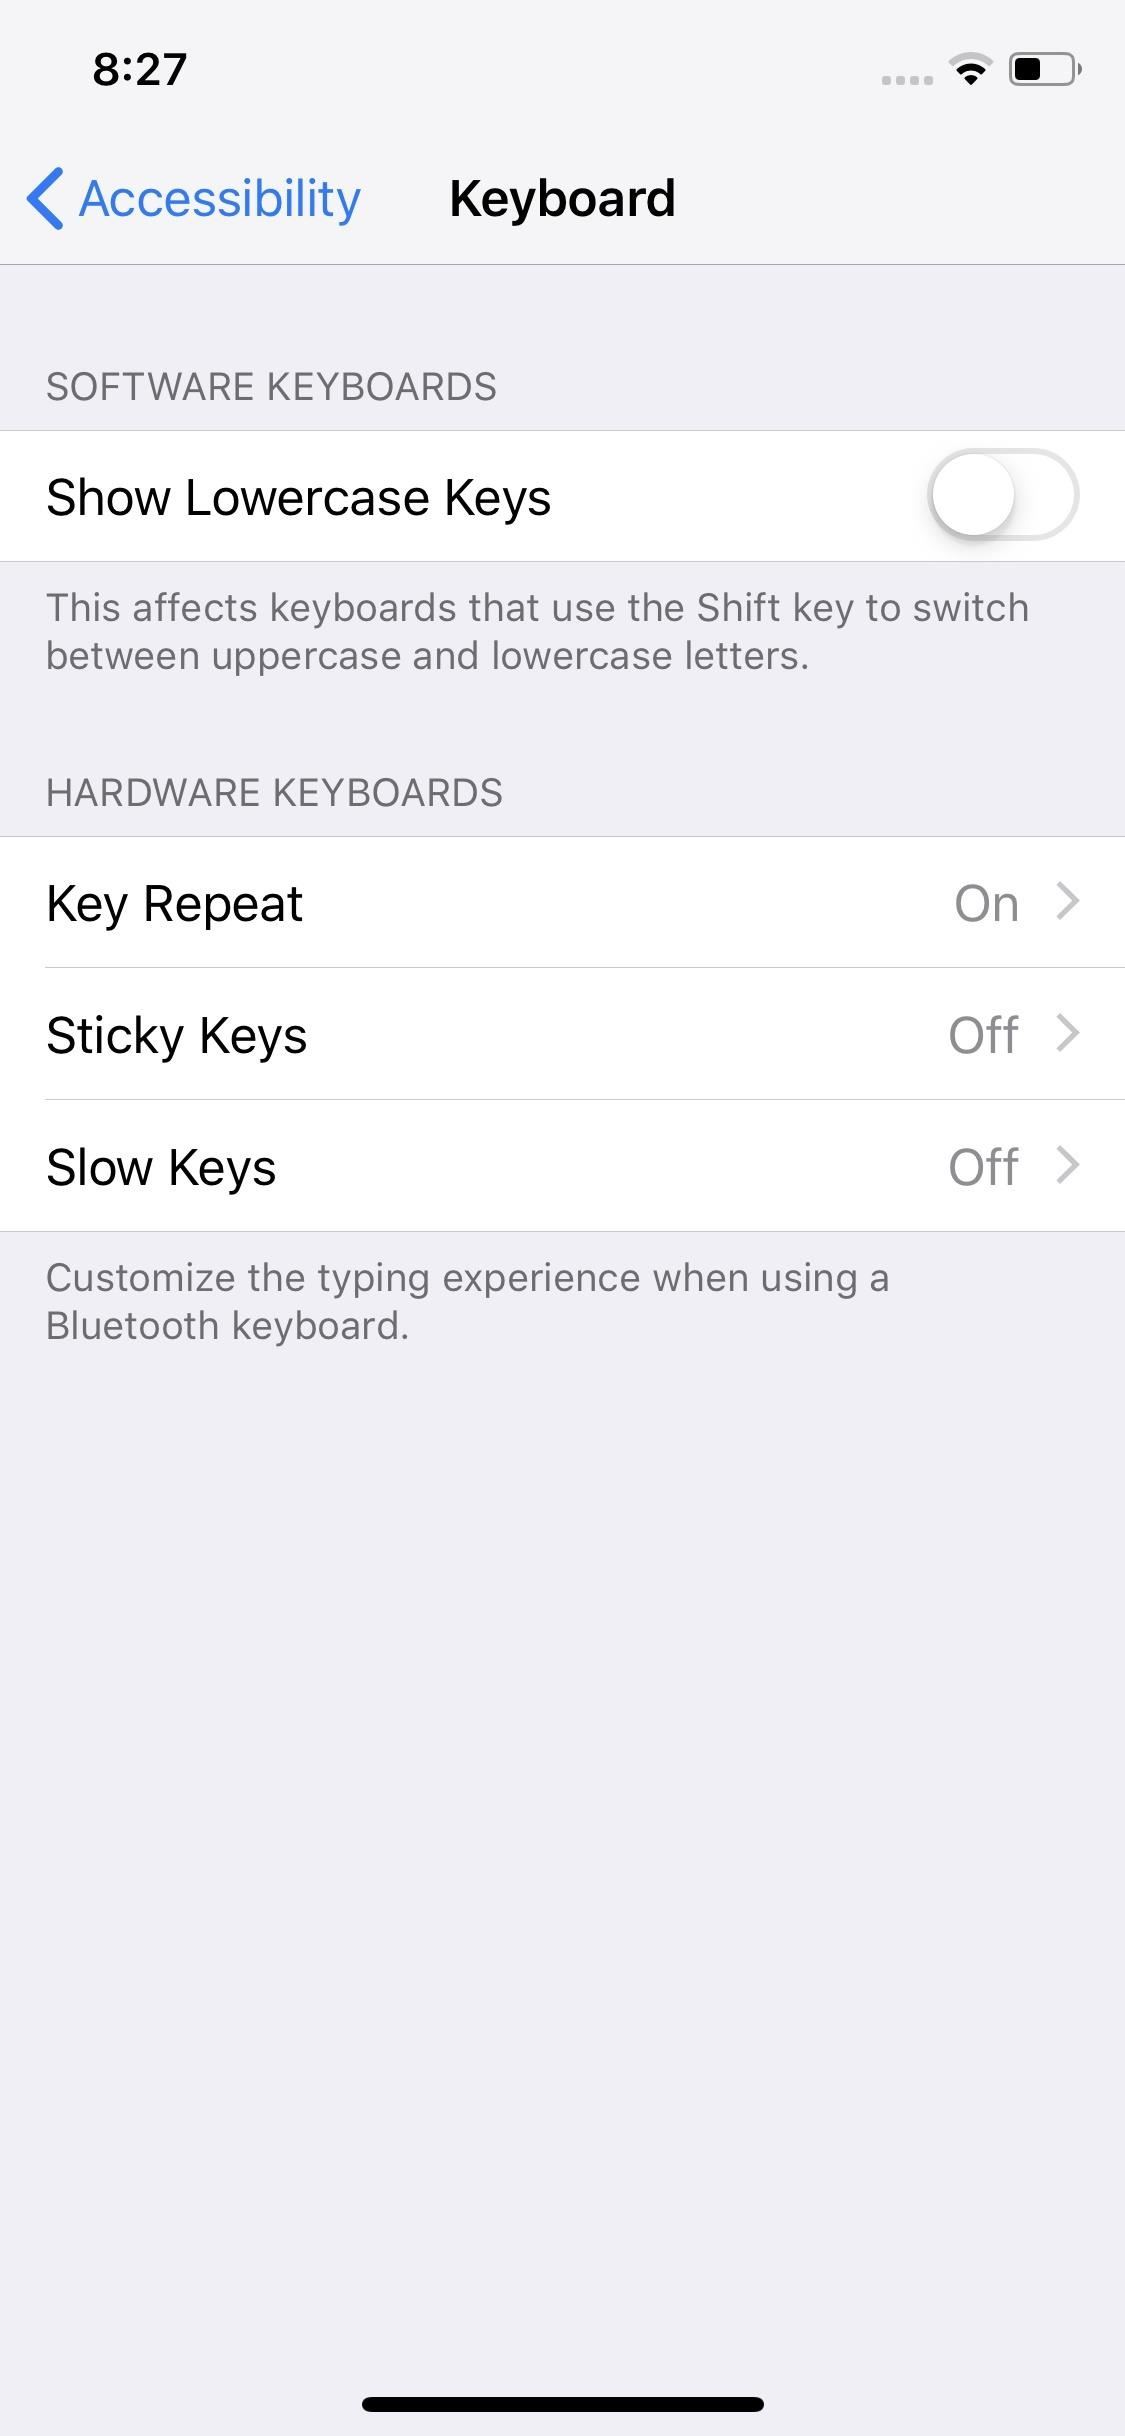
5. Hide Lowercase KeysWhen not using Shift or while in Caps Lock, your iPhone displays lowercase keys on the keyboard. Makes sense. However, if you want to throw it back to a time when iOS didn't make the switch to a lowercase keyboard, you can always disable this feature in Settings.Head to General –> Accessibility–> Keyboard, then make sure "Show Lowercase Keys" is disabled. Now, when you start typing on your keyboard, the keys will remain capital, even when typing lowercase. Show Lowercase Keys Enabled (Middle) vs. Disabled (Right)

6. Add a DictionaryIf you want to look up the definition of a word you come across on your iPhone, but it's not in the language of the dictionary installed on your device, you won't have any luck using the "Look Up" feature. However, if you add the proper dictionary to your iPhone, presto — iOS will pull up a definition.Full Guide: How to Add Foreign Language Dictionaries in iOS Images by Justin Meyers/Gadget Hacks
7. Add a ThesaurusWhy stop at dictionaries? Once you add iOS' secret thesaurus to your iPhone, you'll be able to look up synonymous to words you find in a heartbeat. In a flash. In an instant. (You get the idea.)Full Guide: How to Use the Hidden Thesaurus in iOS 12 Images by Justin Meyers/Gadget Hacks
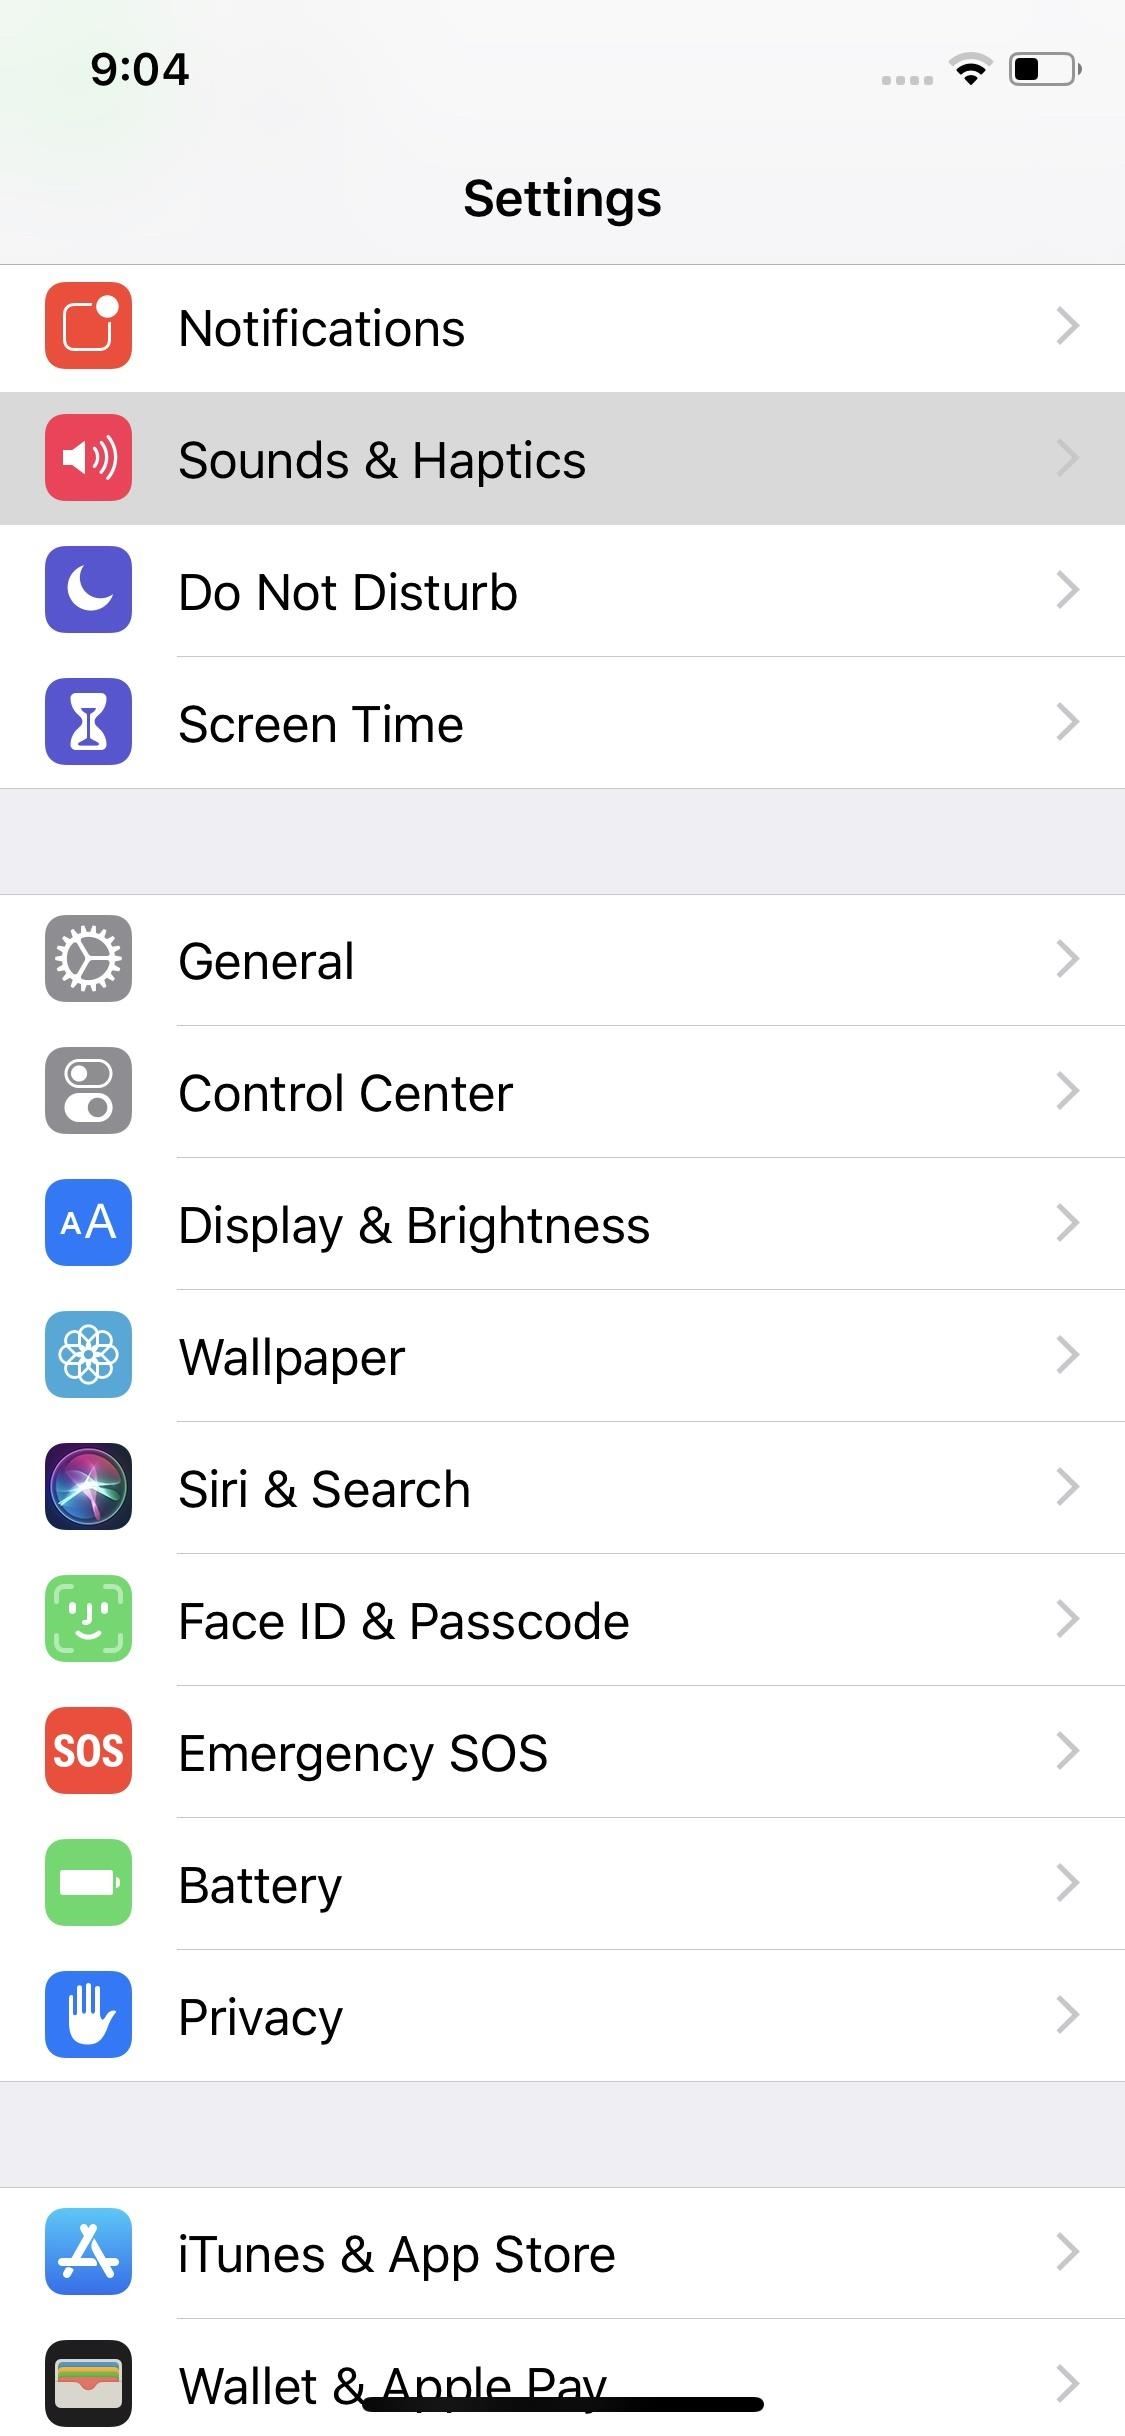
8. Disable Keyboard ClicksDon't like the fake clicks your keyboard makes? Neither do many iOS users. It's a common dislike, but luckily, you can disable the sound entirely, not just when you ring switch is set to mute. Just dive into "Sounds & Haptics" in Settings, then, towards the bottom of the page, ensure the slider next to "Keyboard Clicks" is disabled.
9. Disable 'Shake to Undo'"Shake to Undo" is a way for Apple to include an undo tool without needing an on-screen button to get the job done. That being said, you might have accidentally activated the feature one too many times to see it as useful. If you're sick of worrying about shaking your iPhone while writing anything, here's how to disable the setting:Full Guide: How to Disable Shake to Undo to Stop Accidentally Changing Things You Just Did
Photos & CameraYour iPhone has an excellent camera — why not take full advantage of it? From framing your shot to editing your masterpiece, you'll find more than enough to tweak in Camera and Photos.
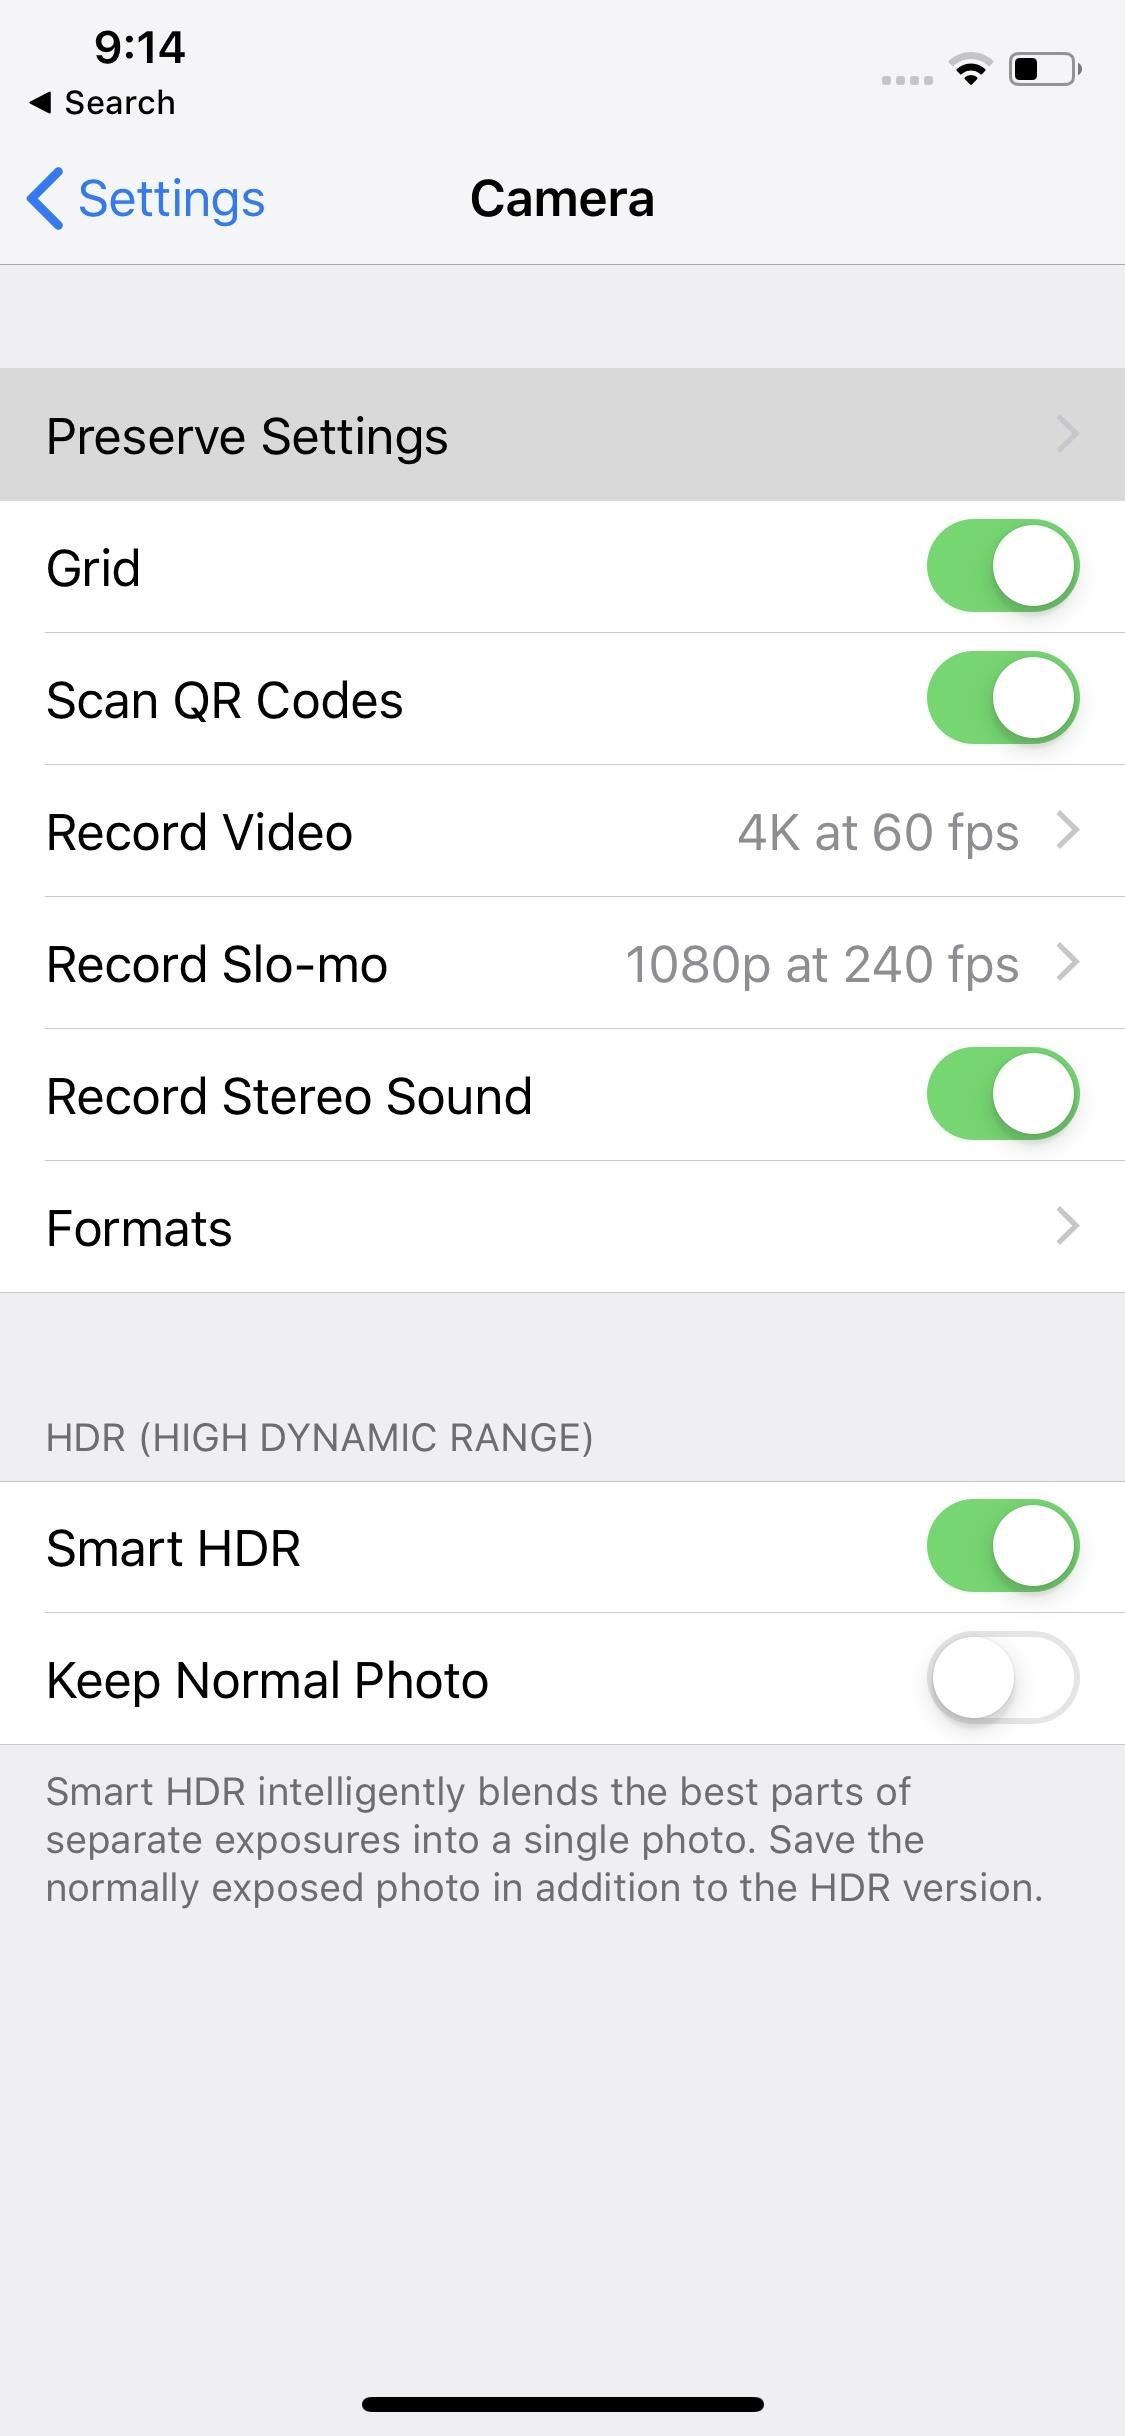
1. Preserve Your Camera SettingsBy default, iOS will reset the camera to "Photo" with stock settings, even if you were on a different camera mode with different filters, settings, etc. If you want to see your camera as it was when last used, you can do so via the Settings.In the Camera settings, tap "Preserve Settings." Here, you have some options. "Camera Mode" preserves the last camera mode used, such as Video or Panoramic, rather than resetting to Photo each time. "Creative Controls," when enabled, preserves your last used creative settings, such as filters, lighting, or depth setting. Finally "Live Photo" lets you decide whether to preserve your Live Photo setting, rather than see iOS reset Live Photo to "On" every time.
2. Use Third-Party Editors Right in PhotosIf you've done some digging on the App Store, you'll know there are plenty of third-party photo editors out there for you to use instead of Photos. However, with the right apps, you won't even need to leave Photos to use them.Some editors allow you to access their tools directly from the Photos app itself, simplifying the editing experience. You can shoot a photo with your iPhone's camera, then hop right into Photos to begin editing, rather than export your photo to a third-party editor.Full Guide: How to Edit Your Pictures Using Third-Party Editors
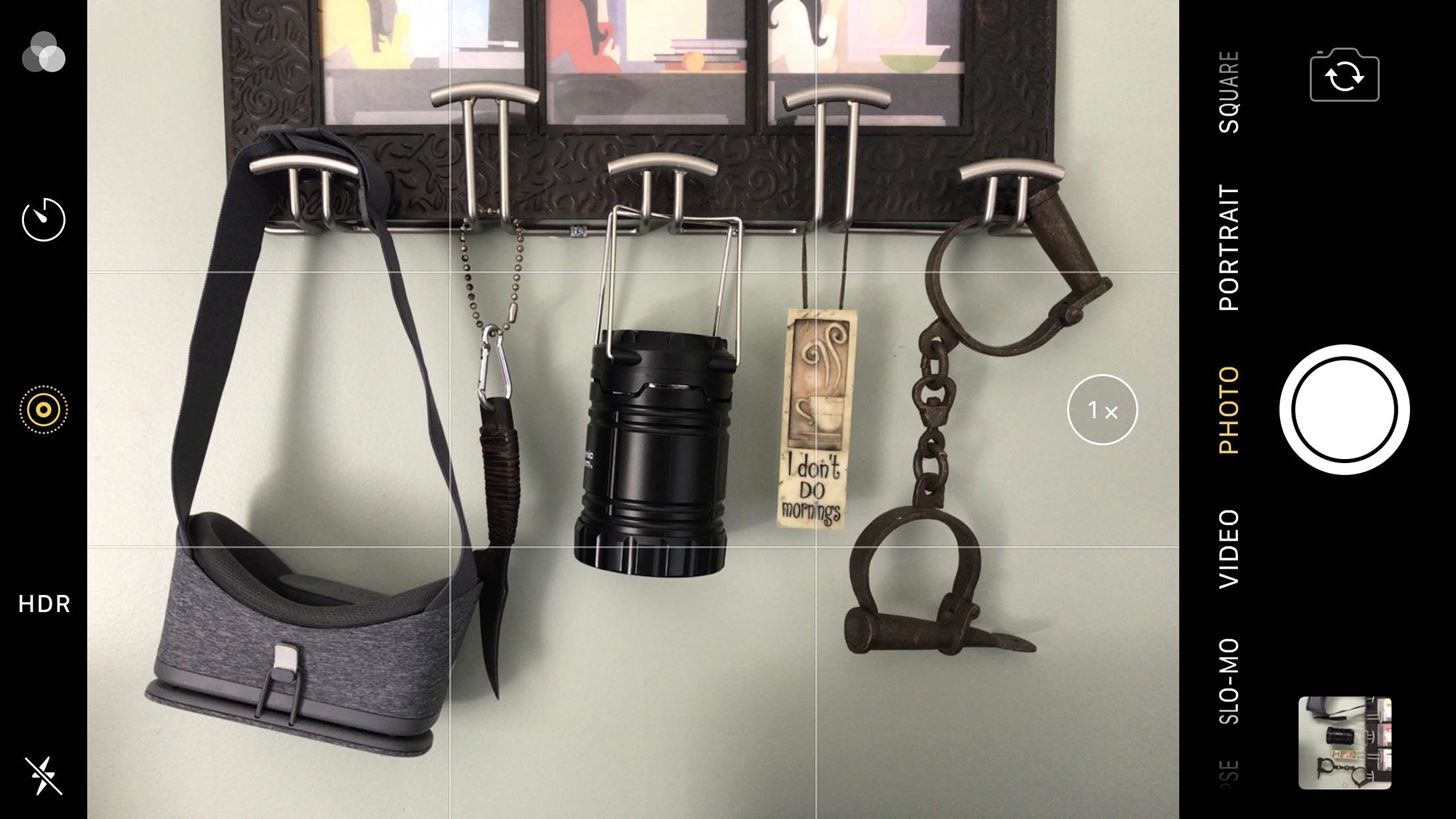
3. Enable the GridIf you want help setting up the perfect frame for your shot, enable the grid! With it, you'll have an excellent guide to line up your shot with.Full Guide: Enable the Grid for the Camera to Compose Photos More Easily Image by Justin Meyers/Gadget Hacks
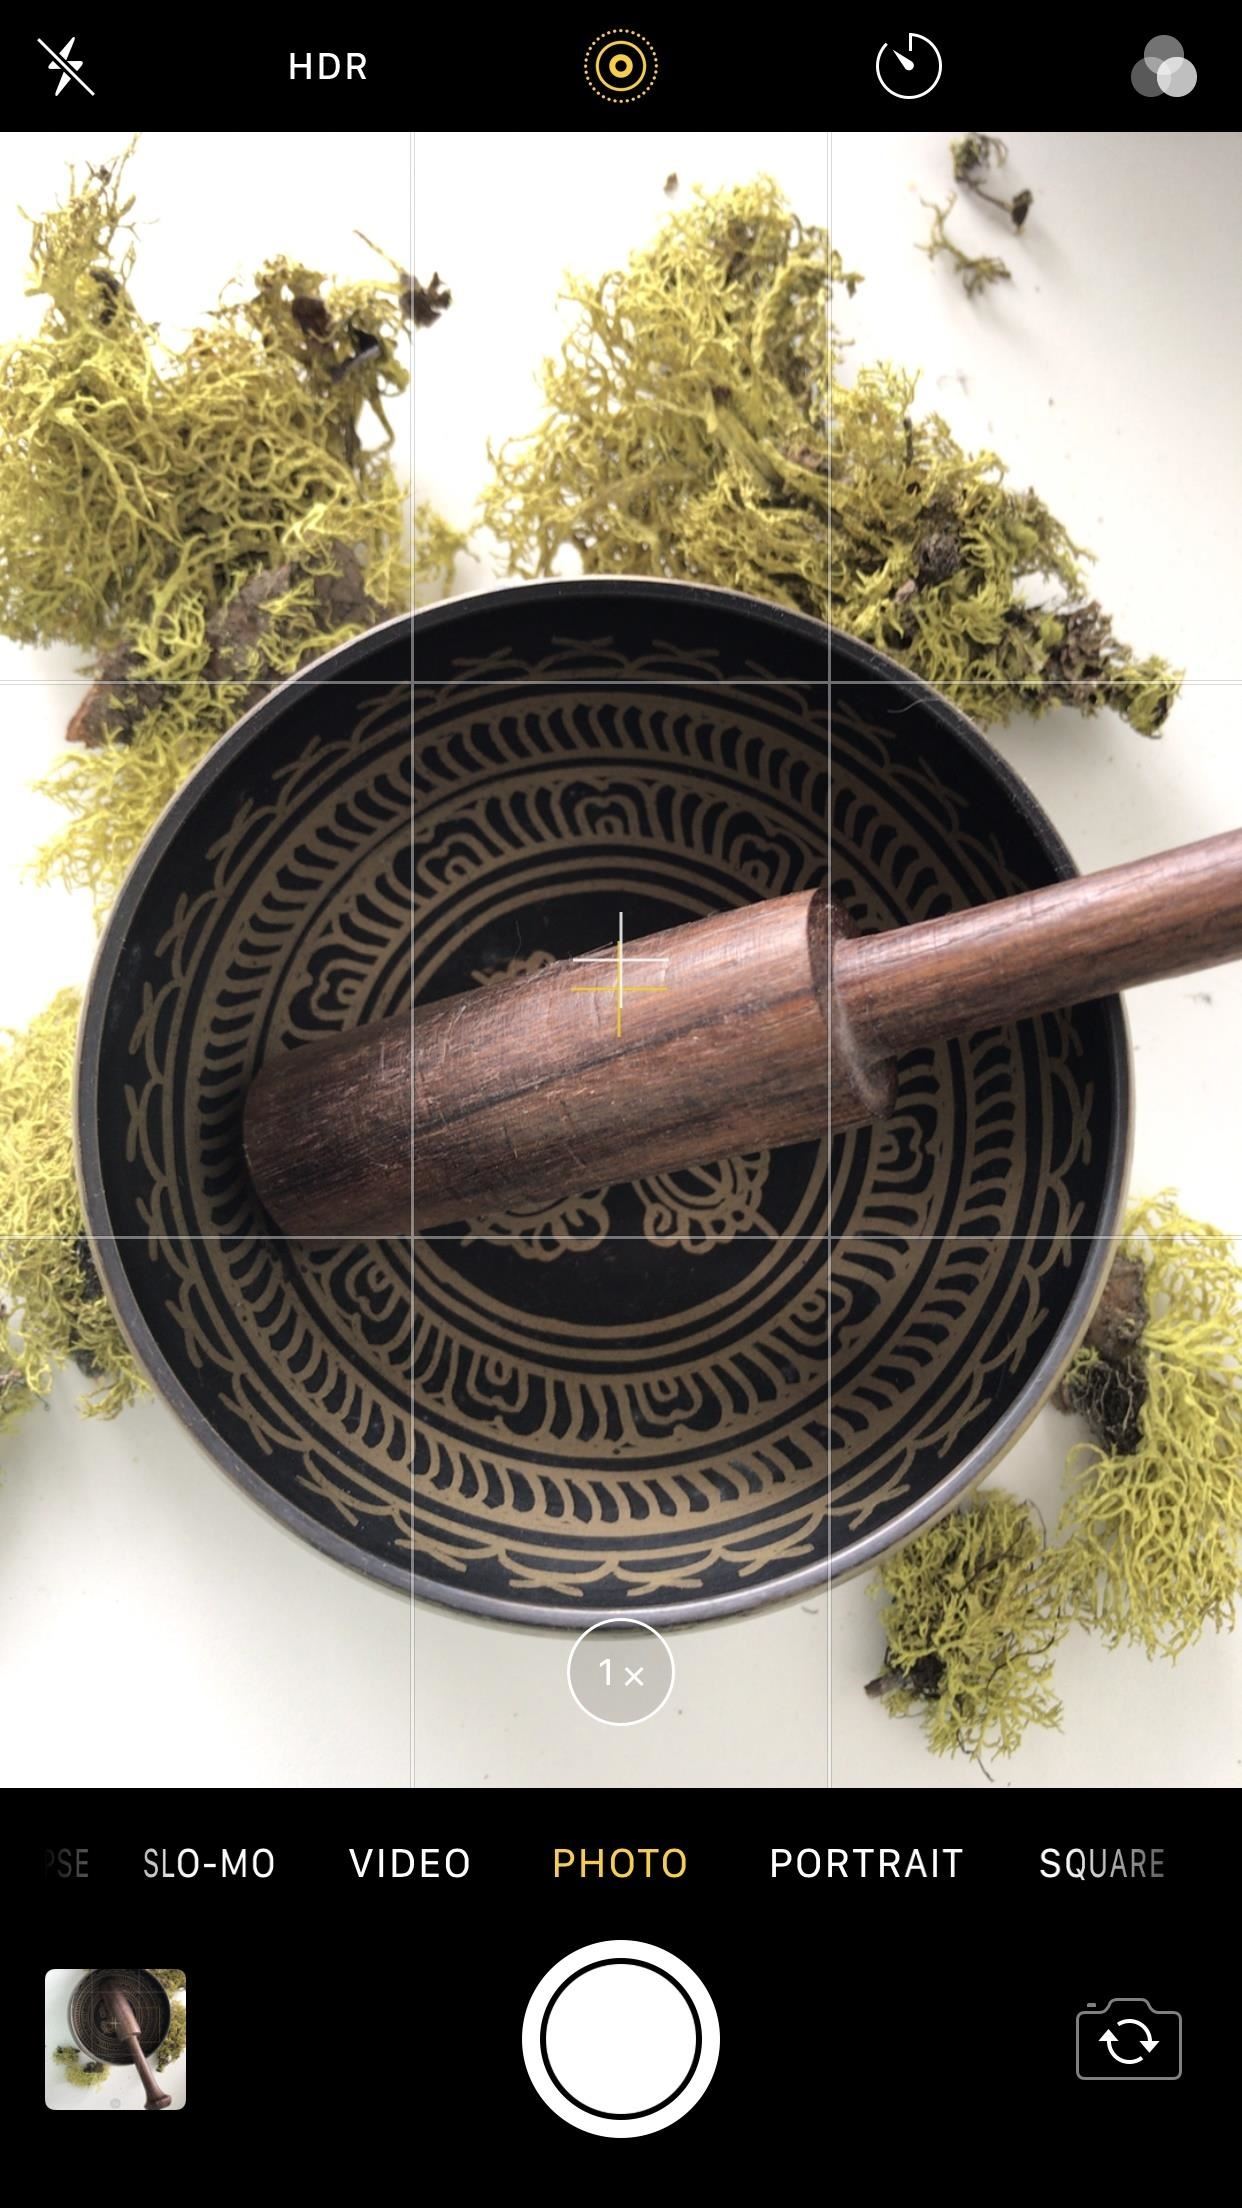
4. Enable the LevelOnce you enable the grid, iOS' secret camera level also becomes available to you. Use this to make sure your photos are perfectly balanced, without needing to use a tripod or stabilizer. Just line up the yellow and white crosshairs in the middle of the display, and you'll know your photo is correctly aligned.Full Guide: Enable the Hidden Camera Level for Better Overhead Shots Images by Justin Meyers/Gadget Hacks

5. Change Your Frame Rate & ResolutionWant to make sure you're shooting video in 4K on your iPhone? How about film-like 24 fps? Maybe you're tight on space and need to shoot in the lowest quality possible. No matter the situation, you can adapt, just by changing your camera's frame rate and resolution settings.Full Guide: How to Change Your Camera's Frame Rate & Resolution
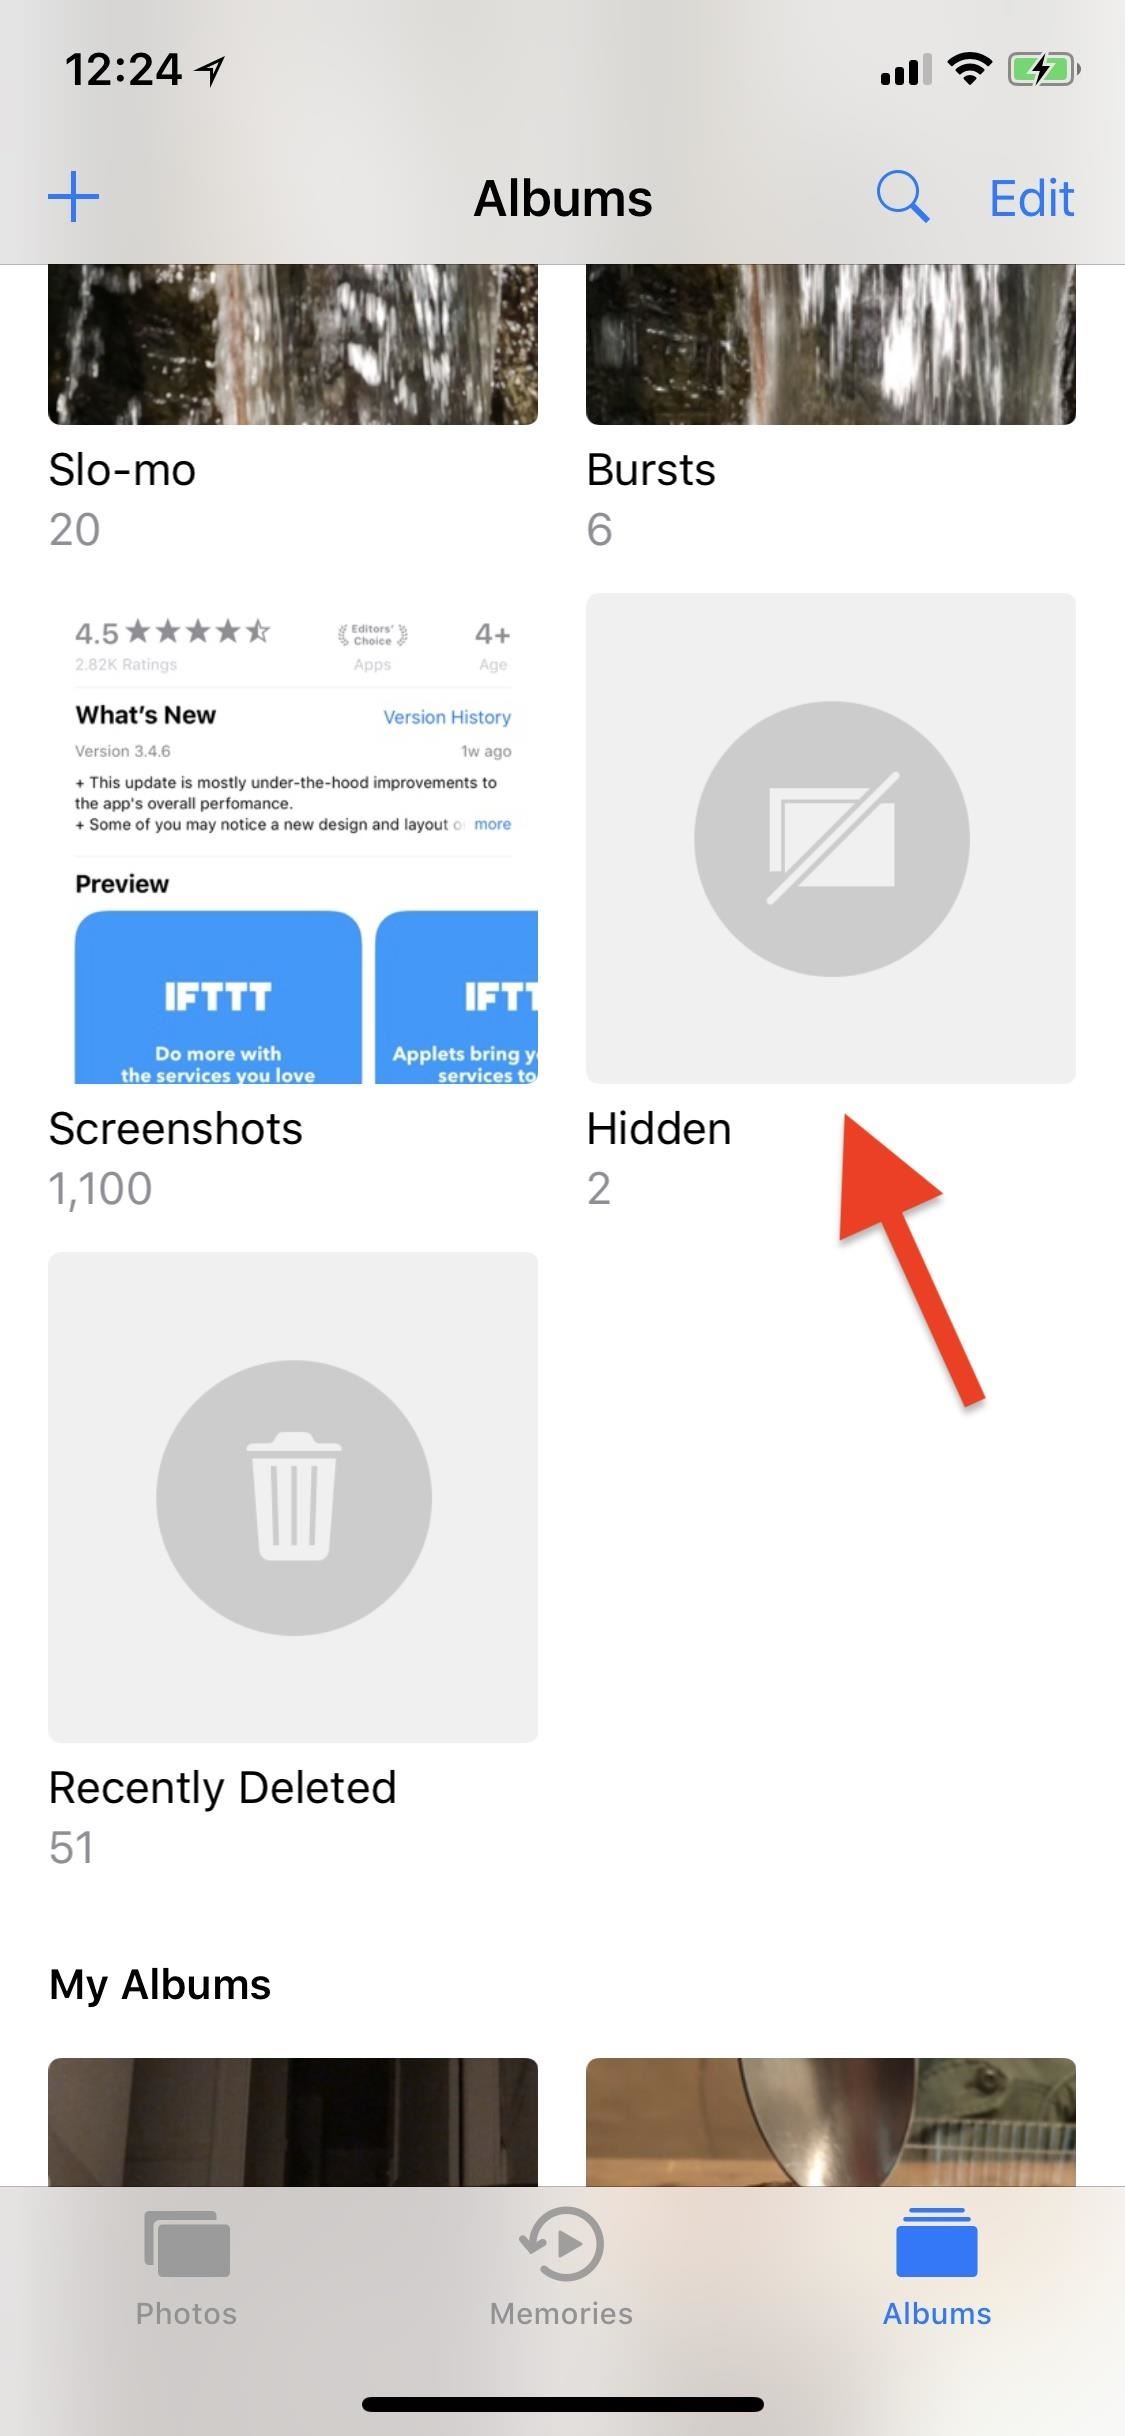
6. Hide Private PhotosFor one reason or another, you might want to hide photos on your iPhone from your friends and family. Once you know how, iOS makes it easy, using the "Hidden" folder option.Full Guide: How to Hide Private Photos So No One Else Can See Them Images by Justin Meyers/Gadget Hacks
SafariAs iOS' portal to the internet, you probably spend a lot of time using Safari. So why not tailor the experience more to your needs? From UI tweaks to powerful search tools, iOS' iteration of Safari offers you plenty to customize.
1. Enable FaviconsFavicons are the little icons you see in your web browser's tabs. Firefox and Chrome on iOS have both had this feature for some time now, but as of iOS 12, Safari now has it as well. It isn't forced on you, though — you can choose whether to display these icons or not.Full Guide: How to Show Website Icons in Safari Tabs Favicons (left) vs. no favicons (right). Images by Dallas Thomas/Gadget Hacks
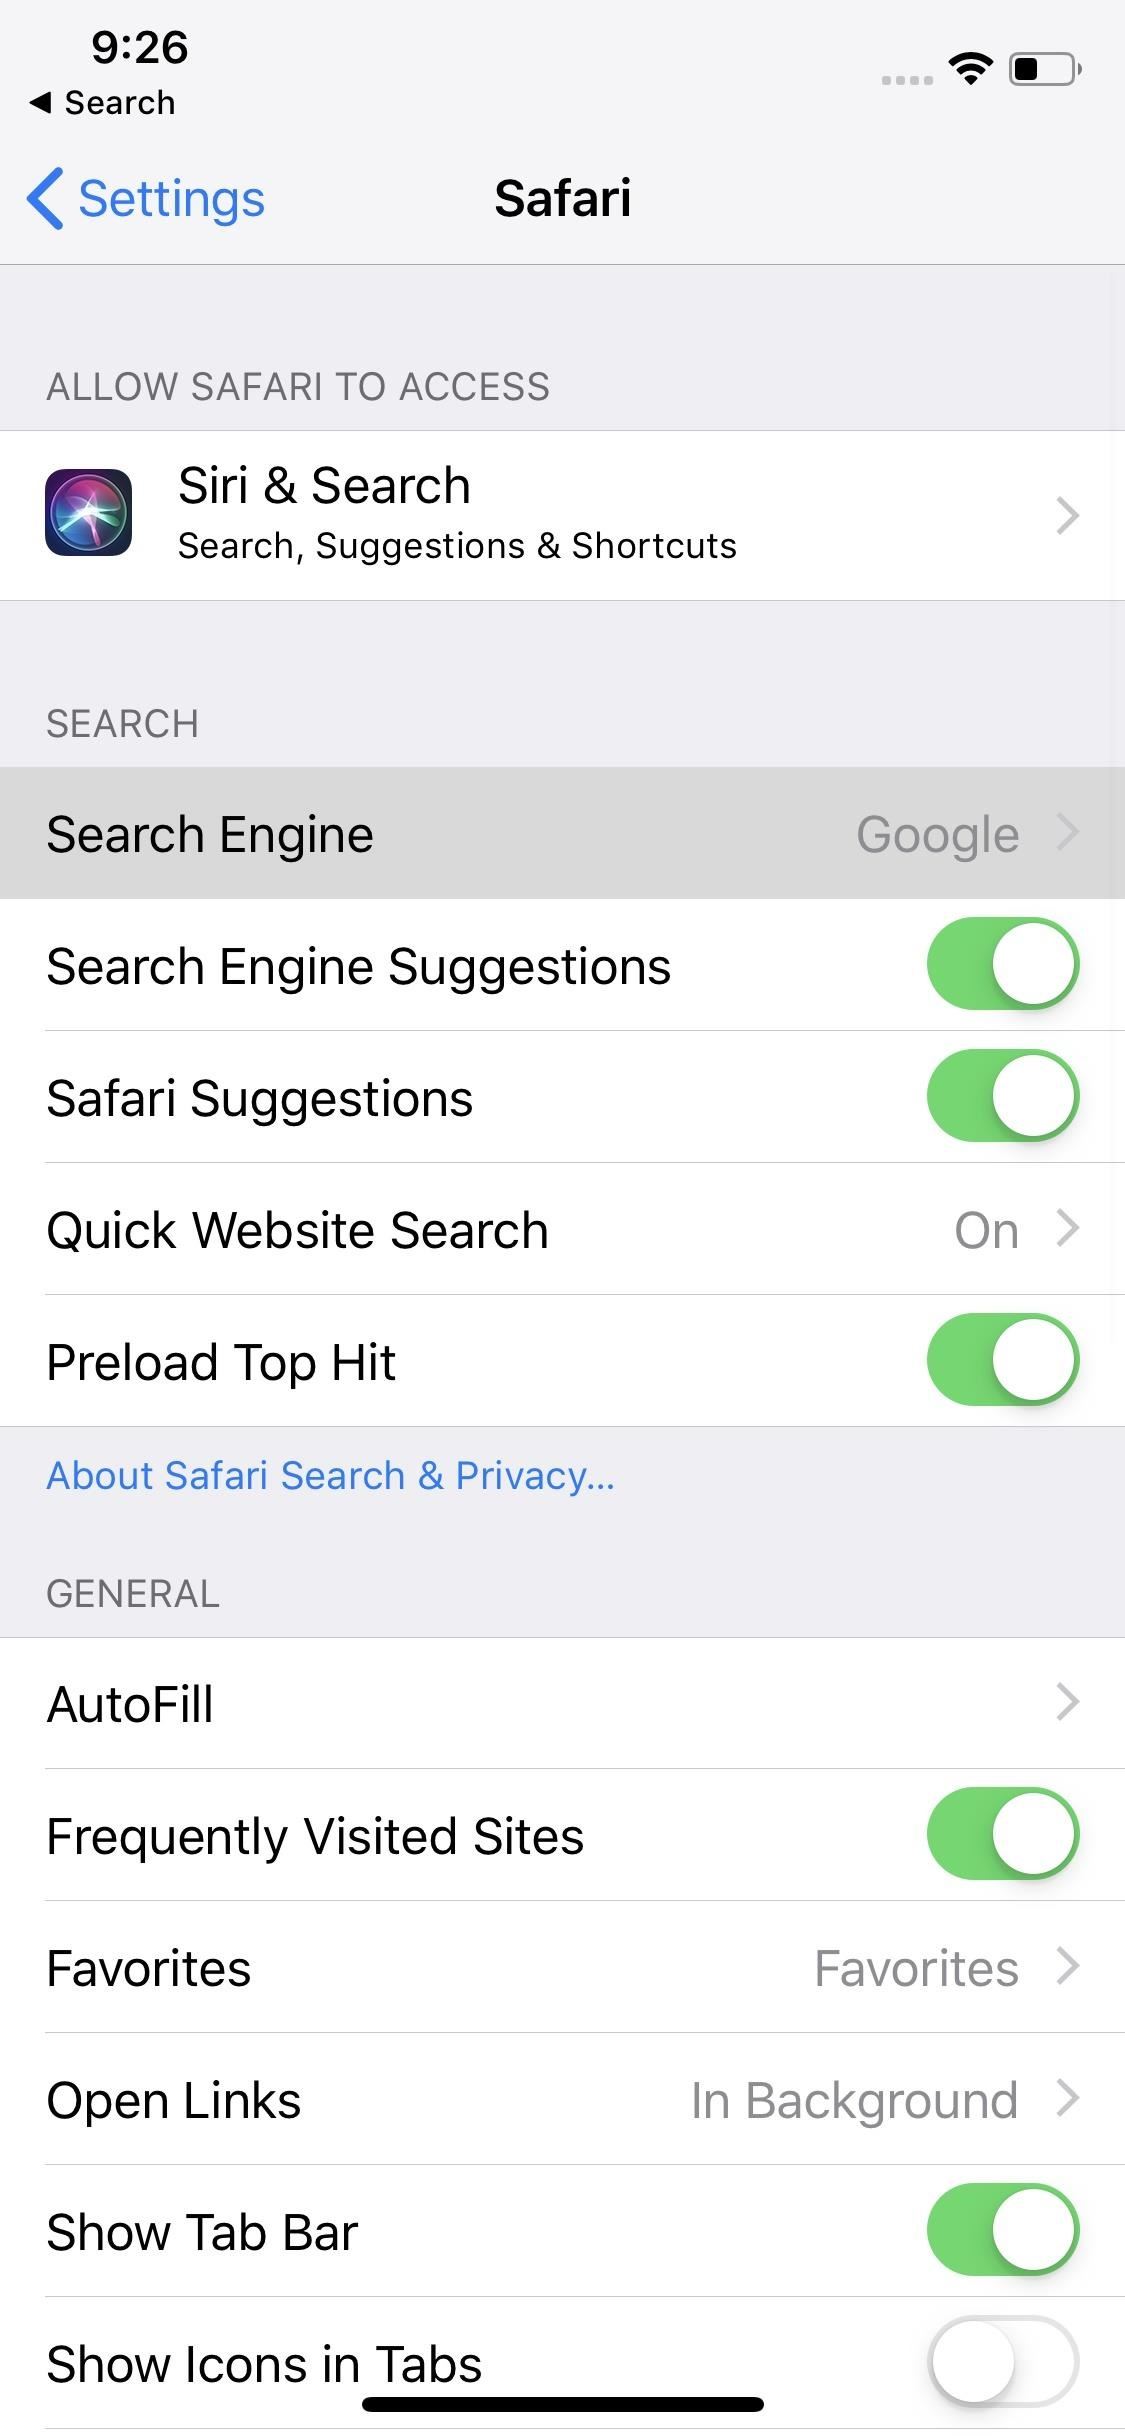
2. Customize Default Search EngineWant to browse the web with something other than Google? Head to your Safari settings, then tap "Search Engine." Select one of the four options from the list. Now, that search engine becomes the default whenever you search with the URL bar in Safari.

3. Disable 'Preload Top Hit'"Preload Top Hit" is a default feature in Safari that automatically loads the "top hit" site for your search query. While this action cuts down the time it takes to load the site in question, it does preemptively use your data. If you're trying to be conservative with your internet use on mobile, consider disabling this feature.
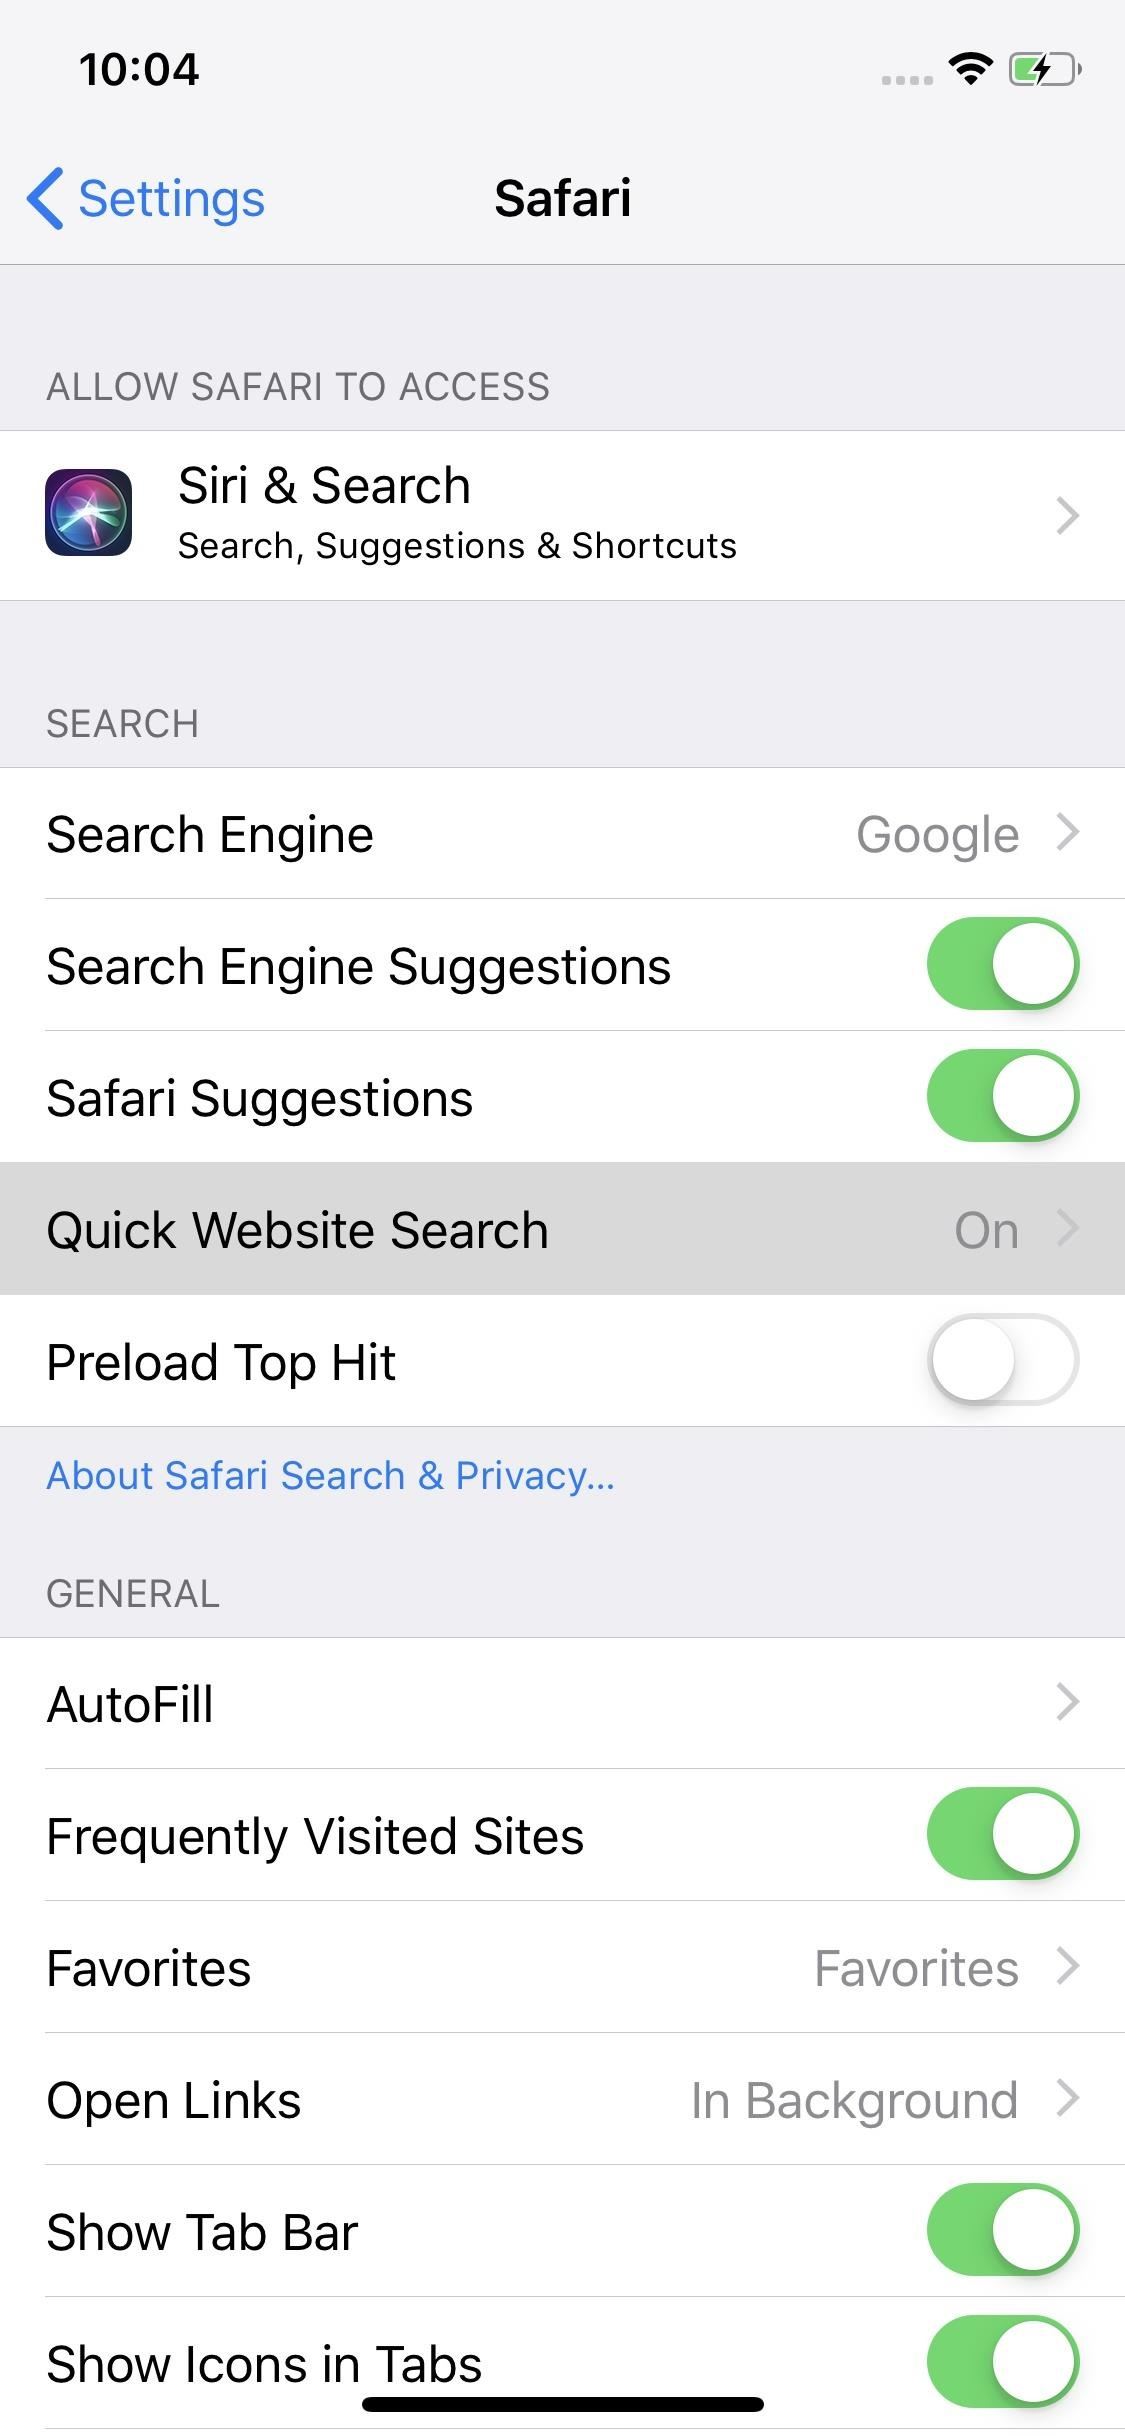
4. Add Quick Website SearchesQuick Website Searches allow you to enter a search in your web browser contained to just one site. For example, by typing "ios.gadgethacks.com" and "iPhone," your web browser will search only ios.gadgethacks.com for the term "iPhone."You'll find this option in Safari's settings page. Just tap "Quick Website Search," then make sure the toggle next to "Quick Website Search" is engaged. Shortcuts are added automatically to this page when you search them, but you can delete them by swiping left on each.
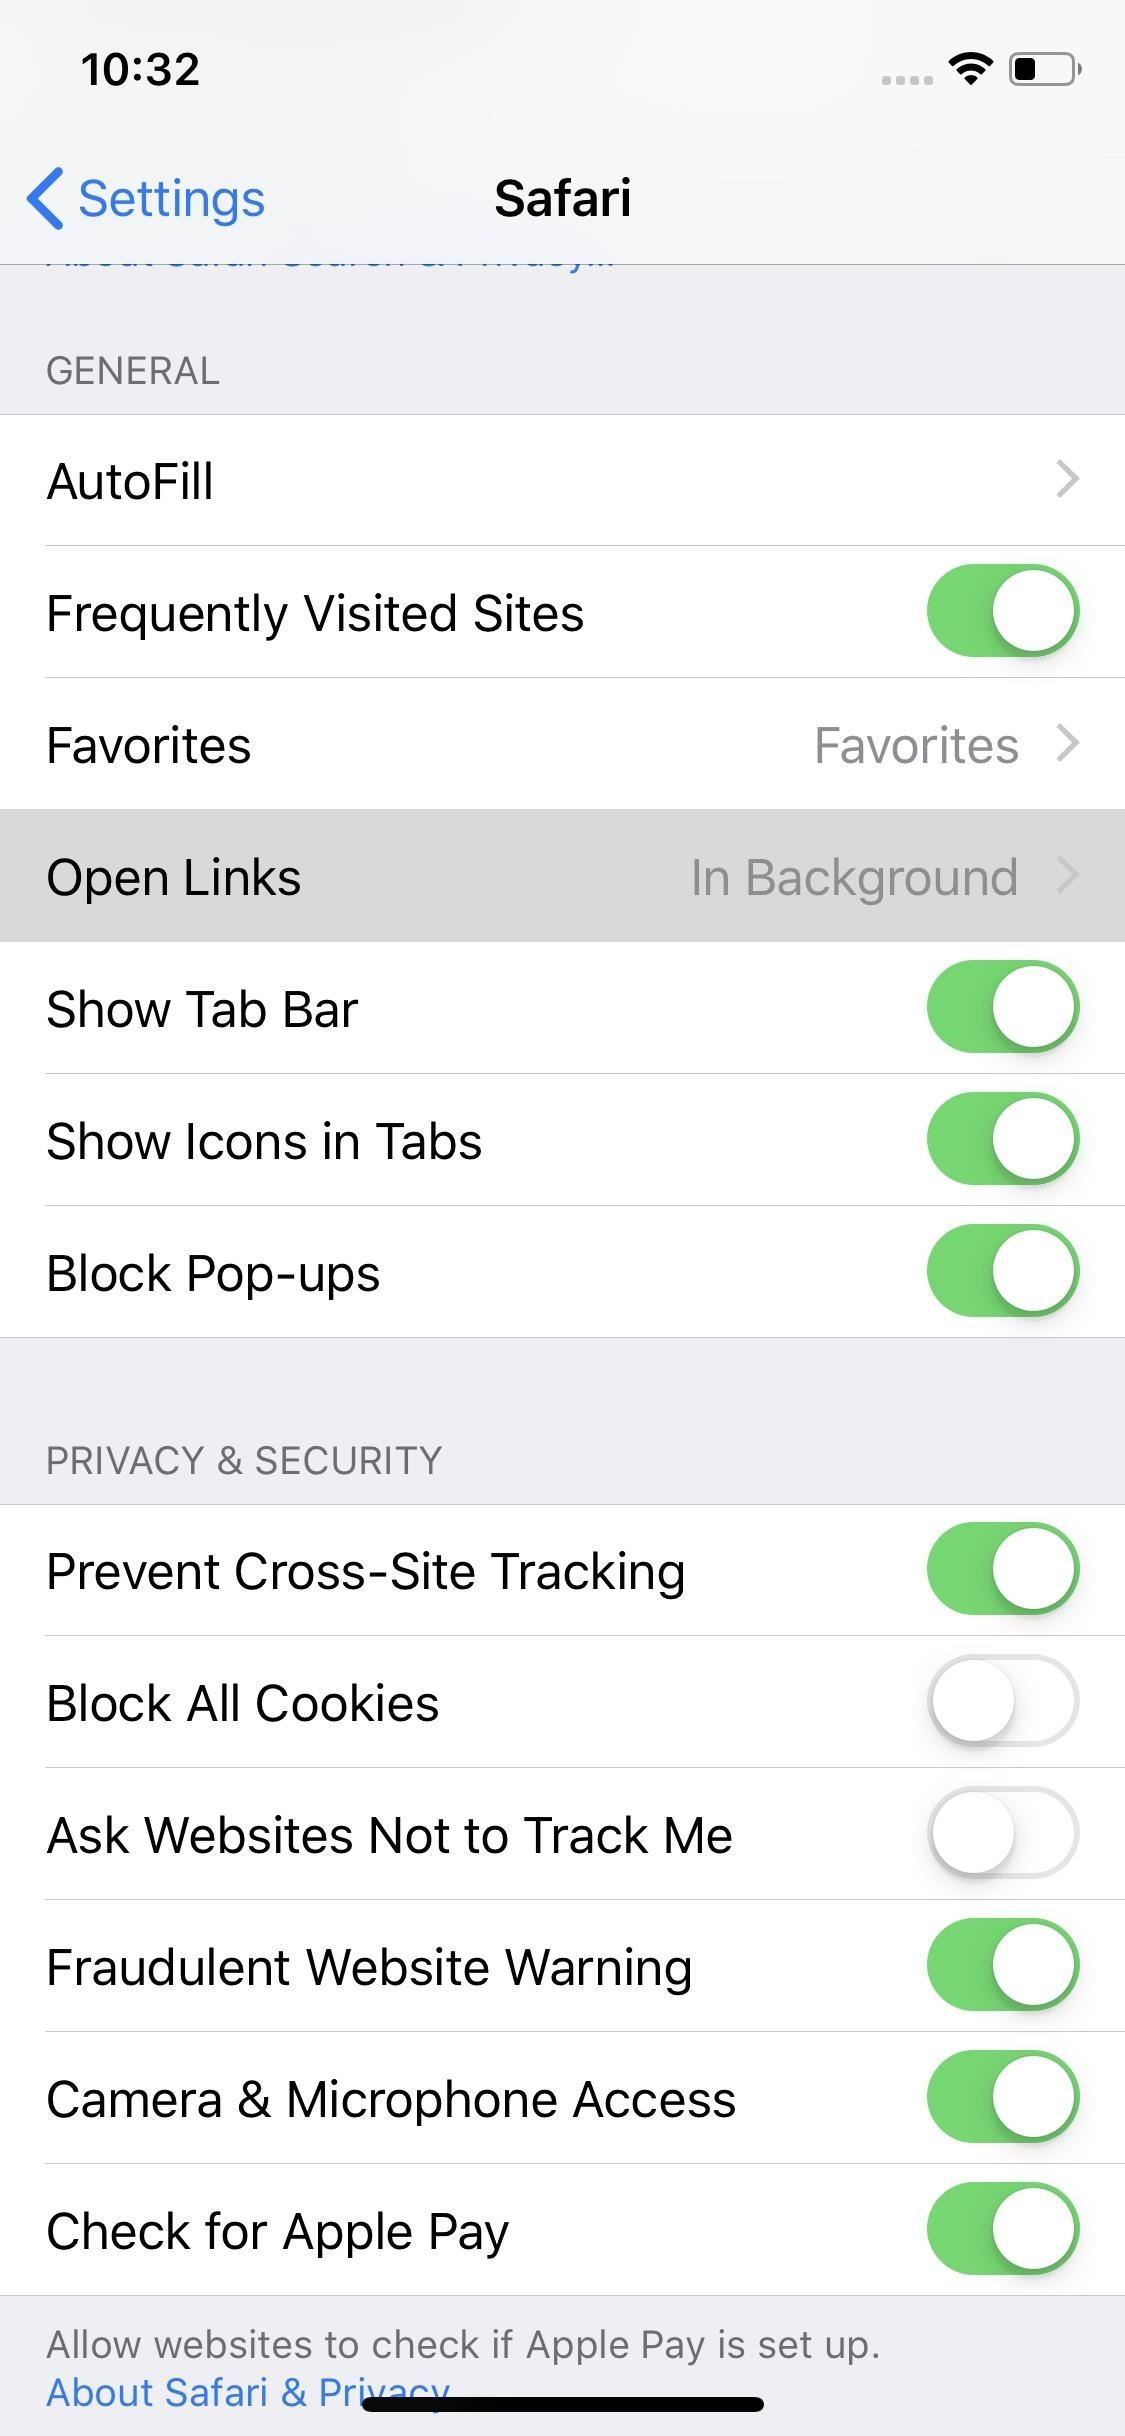
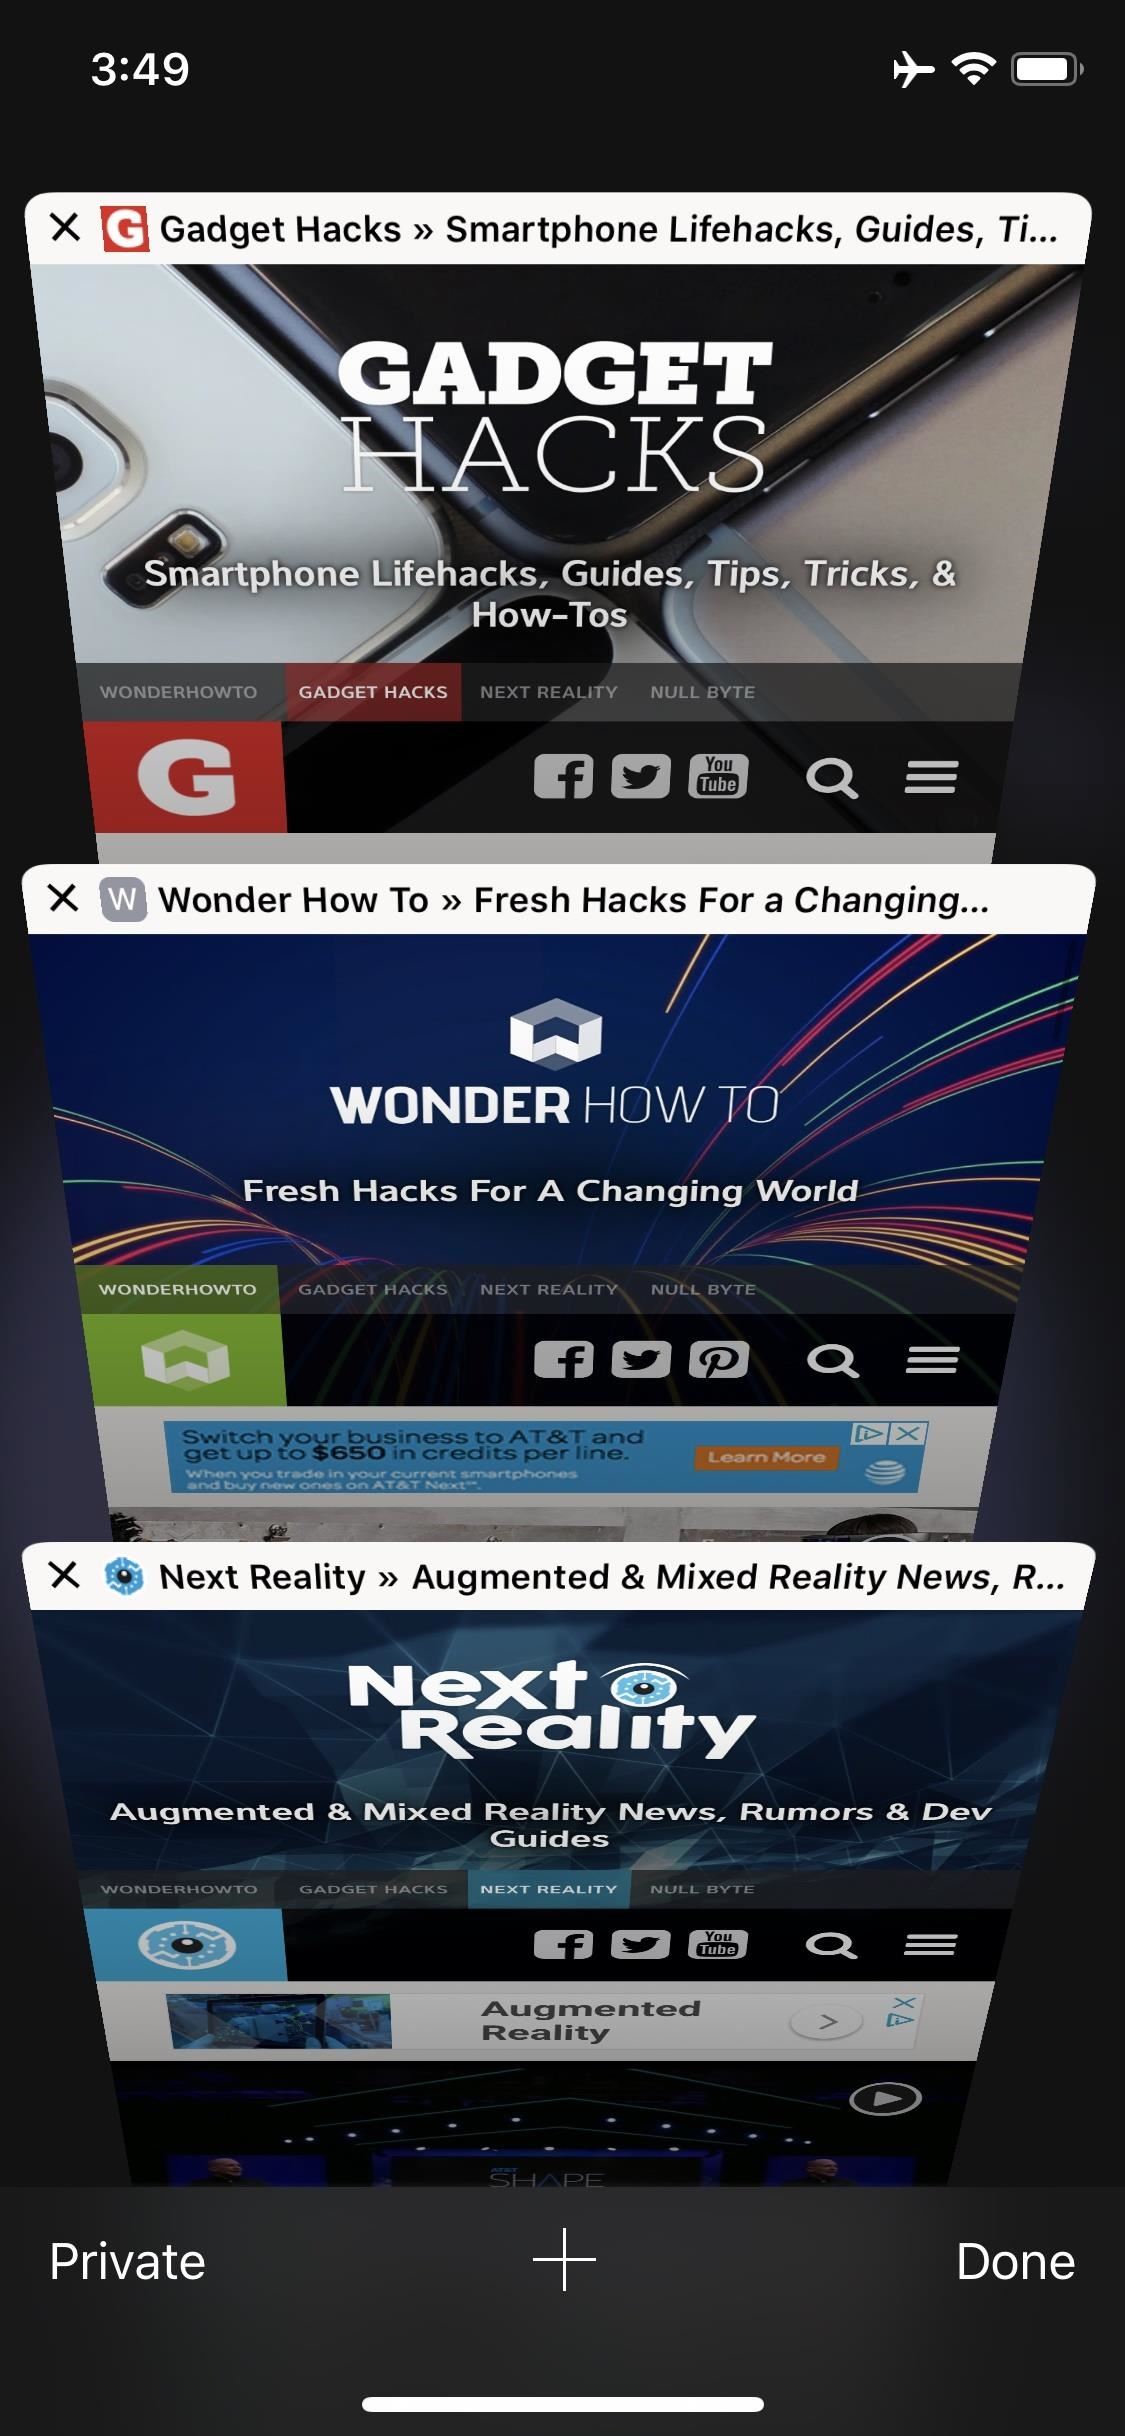
5. Open Links in BackgroundBy default, iOS requires you to leave your current tab to opens new tabs. With "Open Links in Background," however, you can quietly open a new link as a tab in Safari without interrupting your browsing. This article was produced during Gadget Hacks' annual Tweaks & Hacks Celebration week. Read all of the Tweaks & Hacks Celebration stories.Don't Miss: iPhone XR vs. iPhone XS vs. iPhone XS Max — Comparing Key SpecsFollow Gadget Hacks on Pinterest, Reddit, Twitter, YouTube, and Flipboard Sign up for Gadget Hacks' daily newsletter or weekly Android and iOS updates Follow WonderHowTo on Facebook, Twitter, Pinterest, and Flipboard
Cover image, screenshots, and GIFs by Jake Peterson/Gadget Hacks (unless otherwise noted)
- My Music: Selecting this option after you sync a playlist to your Apple Watch, you can browse your music by Albums, Artists, and Songs. Playlists: Use the steps described below to sync a playlist to your Apple Watch. Make a Music Playlist. Note that you can keep one music playlist on your Apple Watch at a time.
The Trick to Listening to YouTube in the Background on Your
News: Apple's Ditching the 'Do Not Track' Option for Safari in iOS 12.2 How To: Auto-Fill Credit Card Forms Using Your iPhone's Camera in iOS 8 News: Top 9 New Safari Features in iOS 12 for iPhone News: Safari Security Breach Fixed in iOS 10.3 Update
Apple Kills Off "Do Not Track - news.softpedia.com
How To: Install Ubuntu on your Samsung Galaxy Tab 10.1 Android tablet How To: Install Adobe Flash Player on a Samsung Galaxy S4 to Watch Amazon Instant Videos & More How To: Share Your Samsung Galaxy S3's Screen with Other Devices
How to Install Flash on Any Kindle Fire « Amazon Fire
Il progetto generale di Reddit è rimasto relativamente invariato per tutto il tempo che posso ricordare. È facile da usare ed è più popolare che mai, quindi perché pasticciare con una buona cosa, giusto? Beh, tutti sono diversi e se stai cercando dei modi per migliorare la tua esperienza con Reddit, prova l'estensione di Chrome SHINE.
introducing reddit themes - change the appearance of reddit
The Notification dots are one of the remarkable features coming with the Android 8.0 Oreo update. Apple iOS got them a long time back, now they have arrived to Android with Oreo. After updating to Android 8.0, on the home screen of Galaxy S6, apps will show small blobs on the corner of the icons when any new notifications arrived for them.
Here's what changed in the new Android Oreo update for the
This is why iPhone owners should NEVER swipe-up to close apps IF YOU own an iPhone, you're probably closing your iOS apps all wrong. Here's why experts have warned against swiping-up to close
The Best Running Apps for iOS and Android | Digital Trends
Apple Releases 'Second' iOS 12.4 Public Beta for iPhone to
With Auto-Correction off, your iPhone or iPad will stop automatically changing the spellings of words it thinks you've mistyped. How to Auto-Correct With Auto-Correction Turned Off The Check Spelling option in this menu looks for unfamiliar words and spellings, but it puts you in control of whether the iPad changes them.
Until Google and co add some tab search tools to their browsers, these extensions will certainly come in handy. With them you can now quickly find the pages you're looking for when you've got loads of tabs open in Chrome, Opera or Firefox. Hugo Search All Tabs and All Tabs Helper also enable you to search page content in Firefox.
How to Reopen Closed Tabs in Browsers? » WebNots
ALERT: Content in our deals section may not be visible when ad-blocking is enabled. How to see if the exact iPhone 7 model you want is in stock at your local Apple store. Zach Just as the
Find the iPhone 7 in Stock at Apple Stores with iStockNow
fortune.com/2016/09/20/iphone-7-apple-store/
Since Apple's iPhone 7 is hard to come by, some are undoubtedly looking for tools to help them find out what's in stock. And one site does that well. The site, which has been around for years
About emergency and government alerts on iPhone and Apple
Cut Off Your Phone Addiction with Android P's 'Wind Down' Mode on Any Device By admin On 28 maggio 2018 · Thanks in large part to our phones, many of us don't get the recommended eight hours of sleep.
Android 9.0 Pie Makes It Way Easier to Take Screenshots
We've already detailed the 15 best new iOS 13 features coming to your iPhone and iPad later this year, and it's a fantastic list.Highlights include the new system-wide Dark Mode users have
Every important new thing iOS 13 will bring your iPhone this
To download the pictures from your phone to your computer you need to connect your computer and the mobile device using USB or Bluetooth connection. To transfer pictures from Mobile to your PC you may first install the software provided by your mobile phone manufacturer and try to download the pictures.
How To Stop WhatsApp From Saving Pictures To Gallery/Camera
How to stop that boarding pass from hogging your lock screen. it's easy to get rid of — if you know where to look. but it will no longer show up as a persistent annoyance on throughout
How to Get Rid of Microsoft's Annoying Ads on the Windows 10
You may come across your favorite eBook in PDF format, in which case you will need a PDF to eBook converter which allows you to convert and read unlimited eBooks. For your convenience, this article shows you an easy way to convert PDF to eBook compatible file types. Best PDF to eBook Converter
Website Recommendations: Where can I download free e-books in