How To: Everything You Need to Know About Adding & Editing Audio for Videos in Enlight Videoleap for iPhone
The music and sound effects that play in the background of any videos you edit helps set the tone, so it's essential to get it right. Enlight Videoleap, an extremely powerful and popular mobile video editing tool for iOS, lets you quickly and easily add audio from your iPhone and the cloud, but things can still get a little confusing when you have a timeline full of clips.There's actually a lot you can do with audio in Videoleap for iPhone. You can separate audio from a video clip, add songs from your Music app, add sound effects, and import audio files from cloud storage. When it comes to editing, you can move tracks around, trim them, adjust volume levels, fade them in or out, change the speed and pitch, reverse them, add more bass, split them, and more.Don't Miss: Replace Video Backgrounds with the Green Tool in Videoleap
Step 1: Add Audio Files to Your VideoAlready have a video project open with tons of video clips in it? Great. If not, add your videos and photos to a new project timeline and add transitions, animations, and text if need be to build a cohesive story. Songs and sound effects are usually the last things you add when editing clips together, so for the rest of this guide, I'll assume you have a project completely ready aside from music and sound effects.To add music or sound effects on top of other audio already in the video clips, if any, make sure no clips are selected in the timeline, position the playhead where you want the audio to begin in the timeline, then hit "Audio" in the toolbar. From here, you have three options for adding new audio tracks. (There is a fourth option as well that I'll cover, which is accessed a different way.)If you want, you could also use Videoleap to edit audio only, where you wouldn't have any videos or photos, but when you export it will be a blank video screen with your audio on top — you can't export to just an audio file.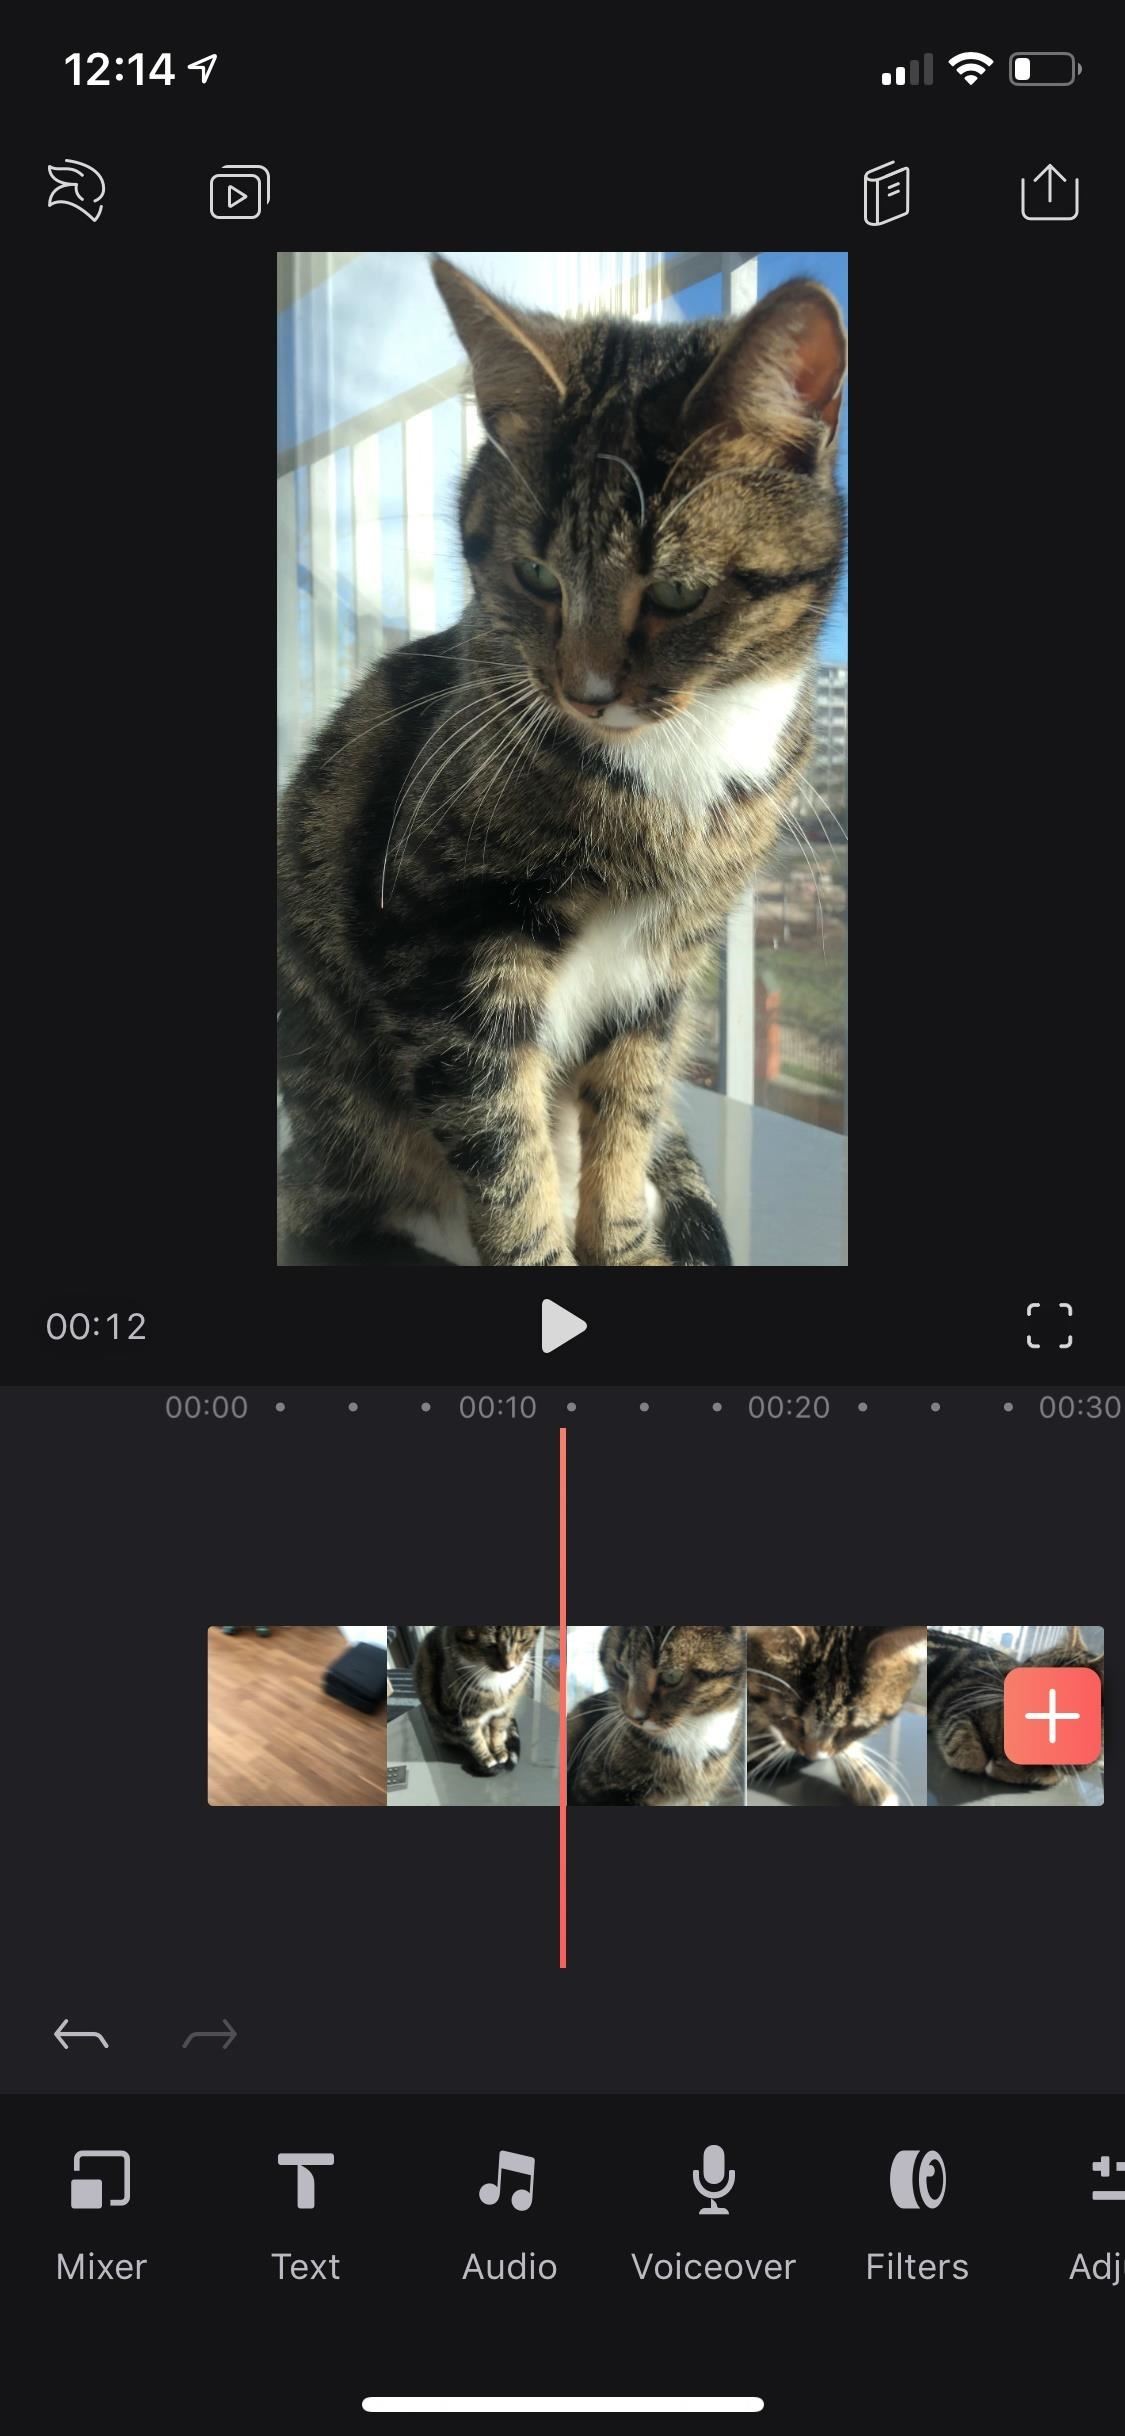
Option 1: Add Song from Your Music AppYou can add any song or audio clip from your Music library, whether it's from the music you synced via iTunes or from Apple Music (with a paid subscription). On the Add screen, it's the first tab in the bottom left. If it's your first time adding music, you will be prompted to give Videoleap access to your Apple Music, your music and video activity, and your media library — select "OK."If you see "Whoops! Something went wrong" in the first tab instead, you had at some point hit "Don't Allow" on the necessary permissions prompt. You may also have manually disabled access after granting it. Either way, you'll need to give Videoleap permission to access audio content. You can do this via "Videoleap" in the Settings app. Toggle on "Media & Apple Music," and you're ready.The default category that loads should be "Artists," which will show you all the artists you have in your Music library. You can tap on artists to view songs (and how long they are) and listen to a preview by tapping the play button on the song's image. You can also categories by tapping on "Artists" in the bottom left and selecting "Albums" or "Songs" (we'll discuss "Files" in the next section).Once you find a song or audio track to include in your video's timeline, tap on its name or the plus (+) sign next to it, and it will be dropped in on a layer above the video layer starting where the playhead is.
Option 2: Add Audio Clips from Your Files App"Files" is Apple's file manager app introduced in iOS 11. It's where all of your iCloud Drive files can be found, and you can also access data stored in other apps on your iPhone, as well as from connected third-party apps such as Adobe Creative Cloud, Adobe Scan, Baidu Cloud, Box, Dropbox, Google Drive, and Microsoft OneDrive.Tap on the bottom right tab on the Add screen, then select "Files." If you have any audio files in the Files app, whether in iCloud or a third-party storage app, you'll find them here. To choose a third-party app or files that other apps have stored, make sure the "Browse" tab is selected, which is for iCloud Drive, then tap "Locations" in the top left.No matter which online storage locker you're in, you won't be able to preview audio clips or songs — you can view small details about them, and tap on them to add them to the layer above the video layer starting where the playhead is.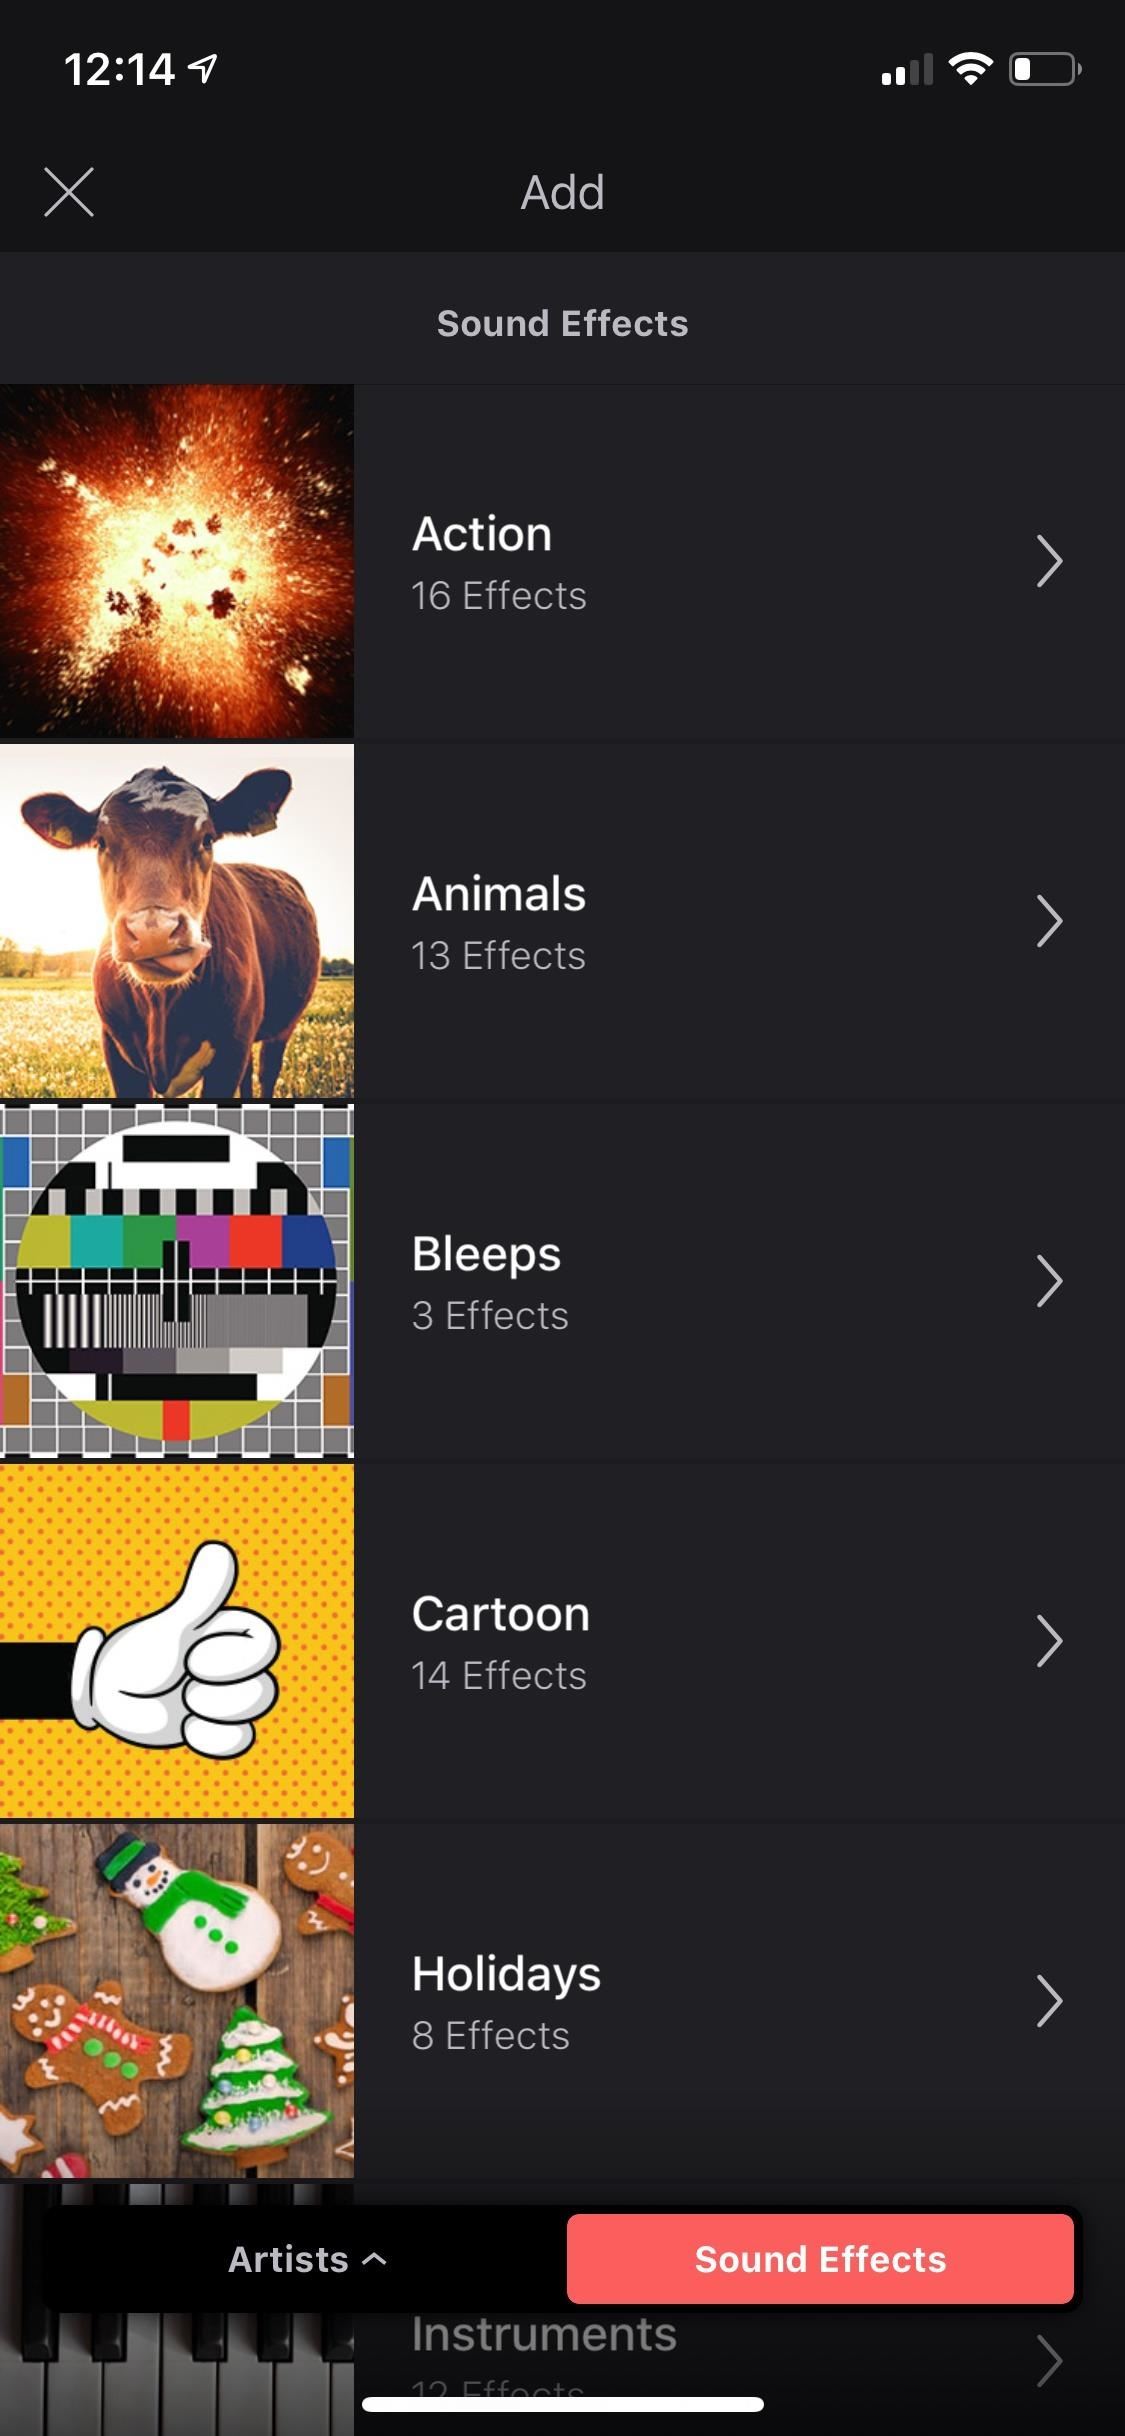
Option 3: Add Sound Effects from VideoleapFinally, you can add in-app sound effects to your videos by tapping on the "Sound Effects" tab in the bottom right of the Add screen. You have 11 categories to choose from: Action, Animals, Bleeps, Cartoon, Holidays, Instruments, Objects, People, Sci-Fi, Trailers, and Video Games. Each category houses from a few sounds effects to over twenty. Most of the sound effects are only a few seconds long.Tap on the play button to hear a preview of the sound effect. If you like it, tap on its name or the plus (+) sign next to it, add it will import to the layer above the video layer starting where the playhead is.
Option 4: Add Audio Tracks from a Video FileIf you have a video file that contains a sound effect you want, or you want the whole audio track in the timeline without the video attached, it's totally possible. In the timeline, tap the red-and-white plus (+) sign to open the Add screen.You can choose from your videos with the bottom left tab. Tap that tab to view more albums to refine your search. Like in Option 2, you can also add videos from the Files app this way. The bottom right tab lets you choose from stock videos, but not all of those videos have audio tracks. Once you find a video you want, tap on it to add it to the timeline.Next, tap on the video in the timeline so that it's selected, then tap on "Audio" in the toolbar. From the next set of tools that appears, you can tap "Unlink" to separate the audio into its own track away from the video. Then, select the video clip again, and tap "Remove" from the toolbar. You can also tap-and-hold on the video and drag it to the trash.
Step 2: Move & Trim Audio on the TimelineBefore we start on editing tools, you should know how to move and trim the audio. To move it around, tap-and-hold on the blue music icon above your audio clip, then drag it either left or right. To clip the audio, tap the music icon to select the track, then touch the left or right arrow on either end and drag inward to where you want to trim it. You can also un-trim audio the same way, only moving it outward.If you want to delete the audio clip, tap on it to select it, then tap "Remove" from the toolbar. Alternatively, you can tap-and-hold on the audio clip and drag it to the trash can.
Step 3: Edit Your Audio ClipsNow that you've selected audio to add to your video, it's time to mess with the tools available in Videoleap. Tap on the music icon above your audio clip to select it and view the audio-editing toolbar. From these tools, you can adjust volume levels, mute the audio, fade the audio, change the speed and pitch, and more.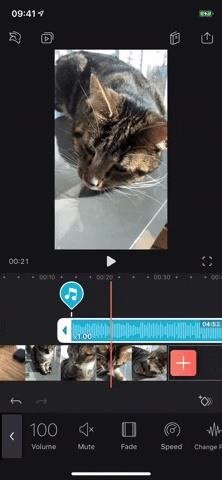
Option 1: Volume & MuteThe "Volume" setting stands at 100 but can be dropped to zero (muted) or increased to 500 (really blown out, distorted audio) by dragging the white bar left or right on the slider that appears. Instead of dropping the volume to zero, you can also tap on "Mute" in the toolbar to shut off the audio.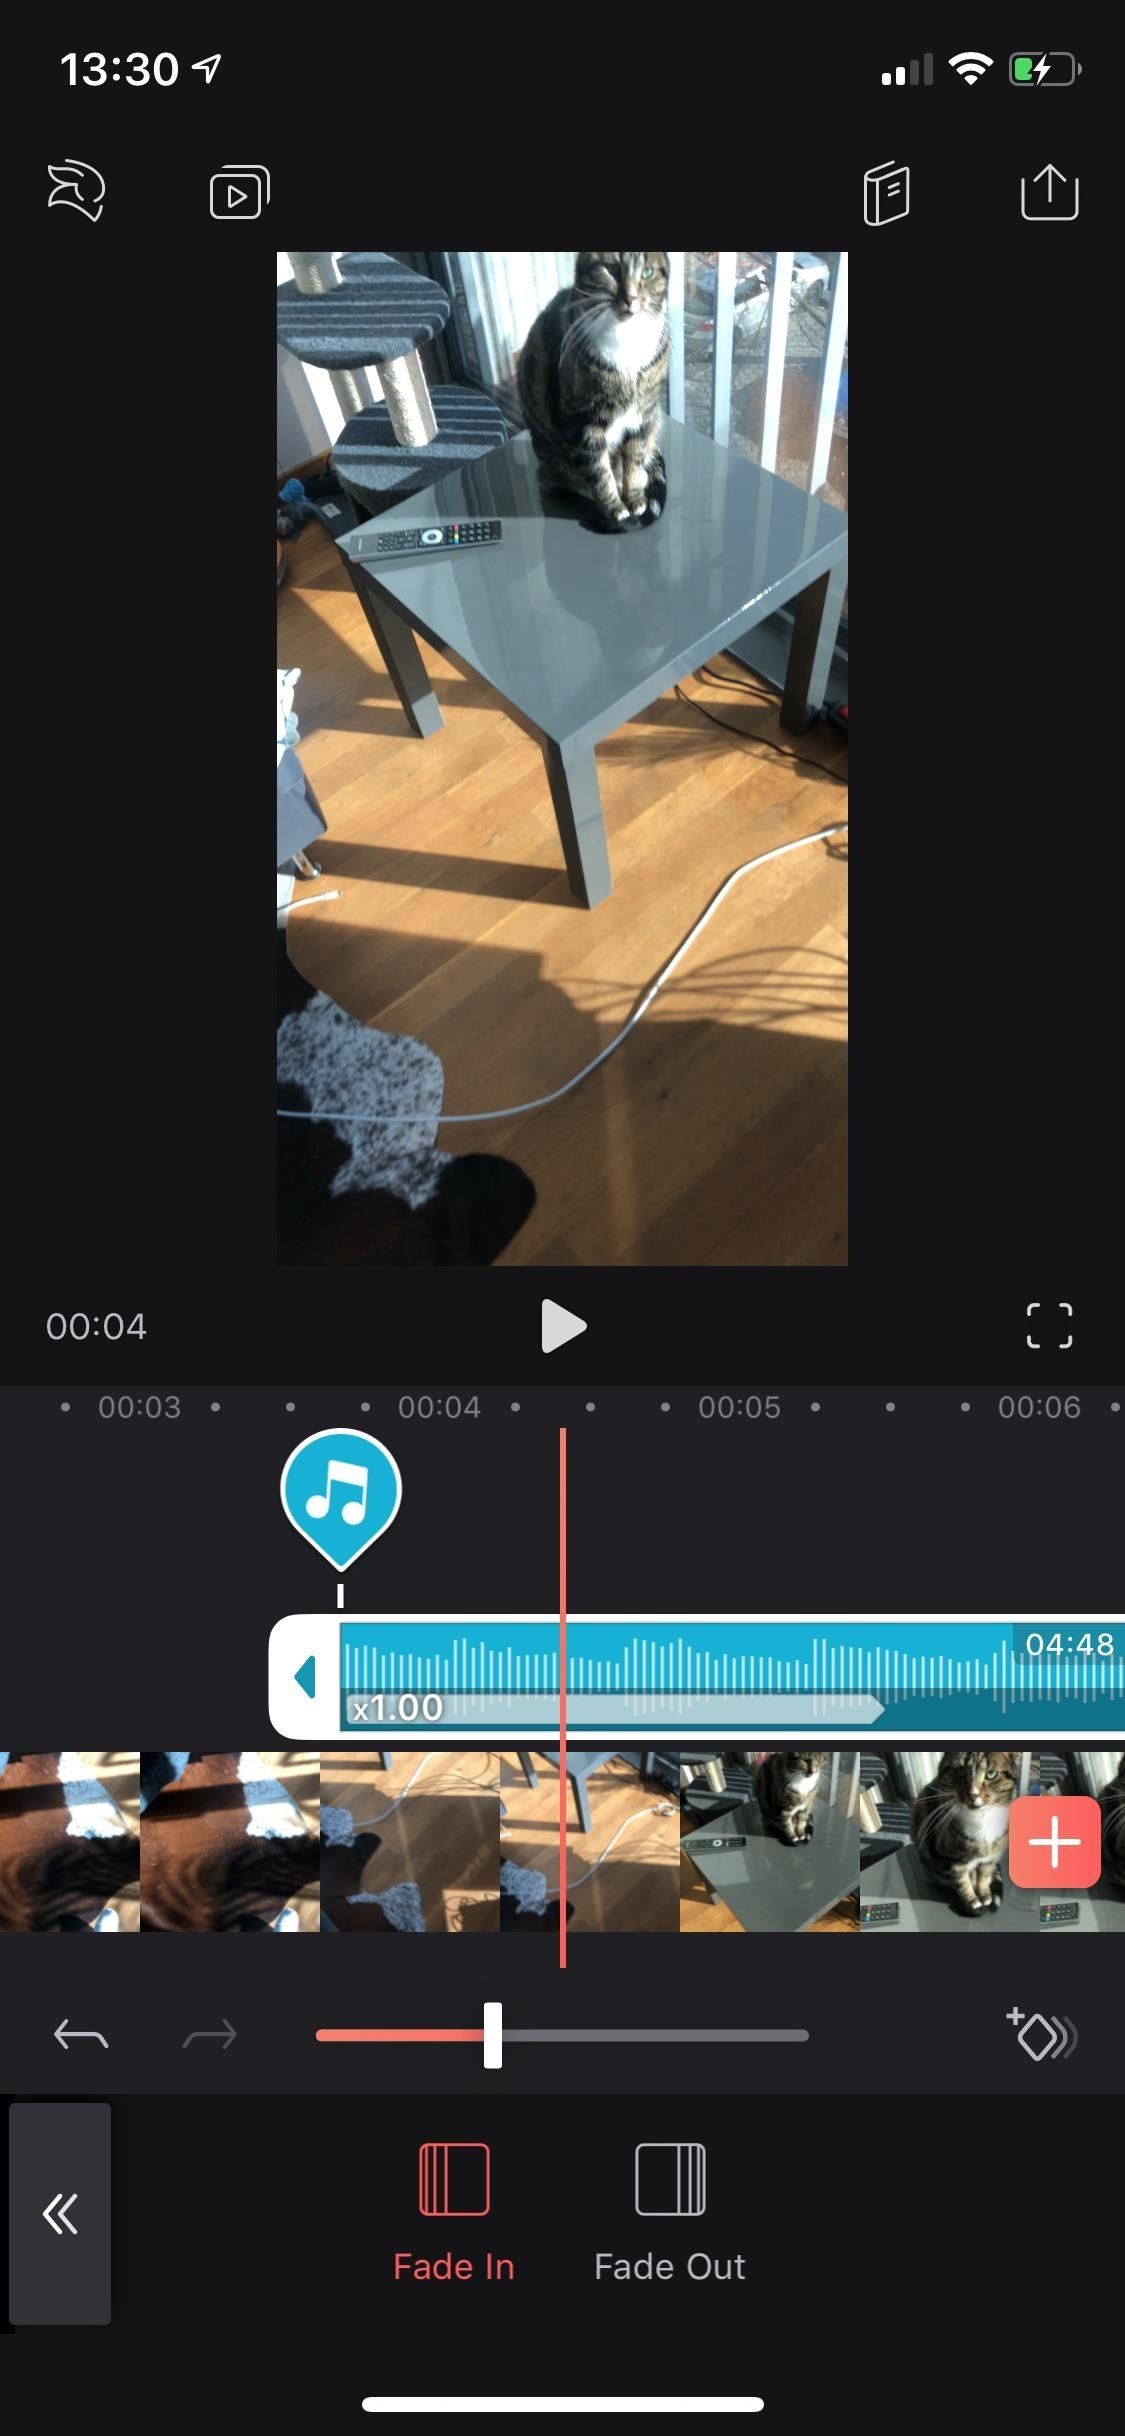
Option 2: Fade"Fade" lets you fade the audio in or out. Audio "Fade Out" causes the end of the audio clip to get softer until it's no longer audible, while "Fade In" makes the beginning of the audio clip progressively get louder until the audio reaches full volume. Move the white bar on the slider to the right to increase the length of the fade, left to decrease. Using fades helps give your audio a more professional sound, cleaner than merely throwing in a song on a video and not editing it.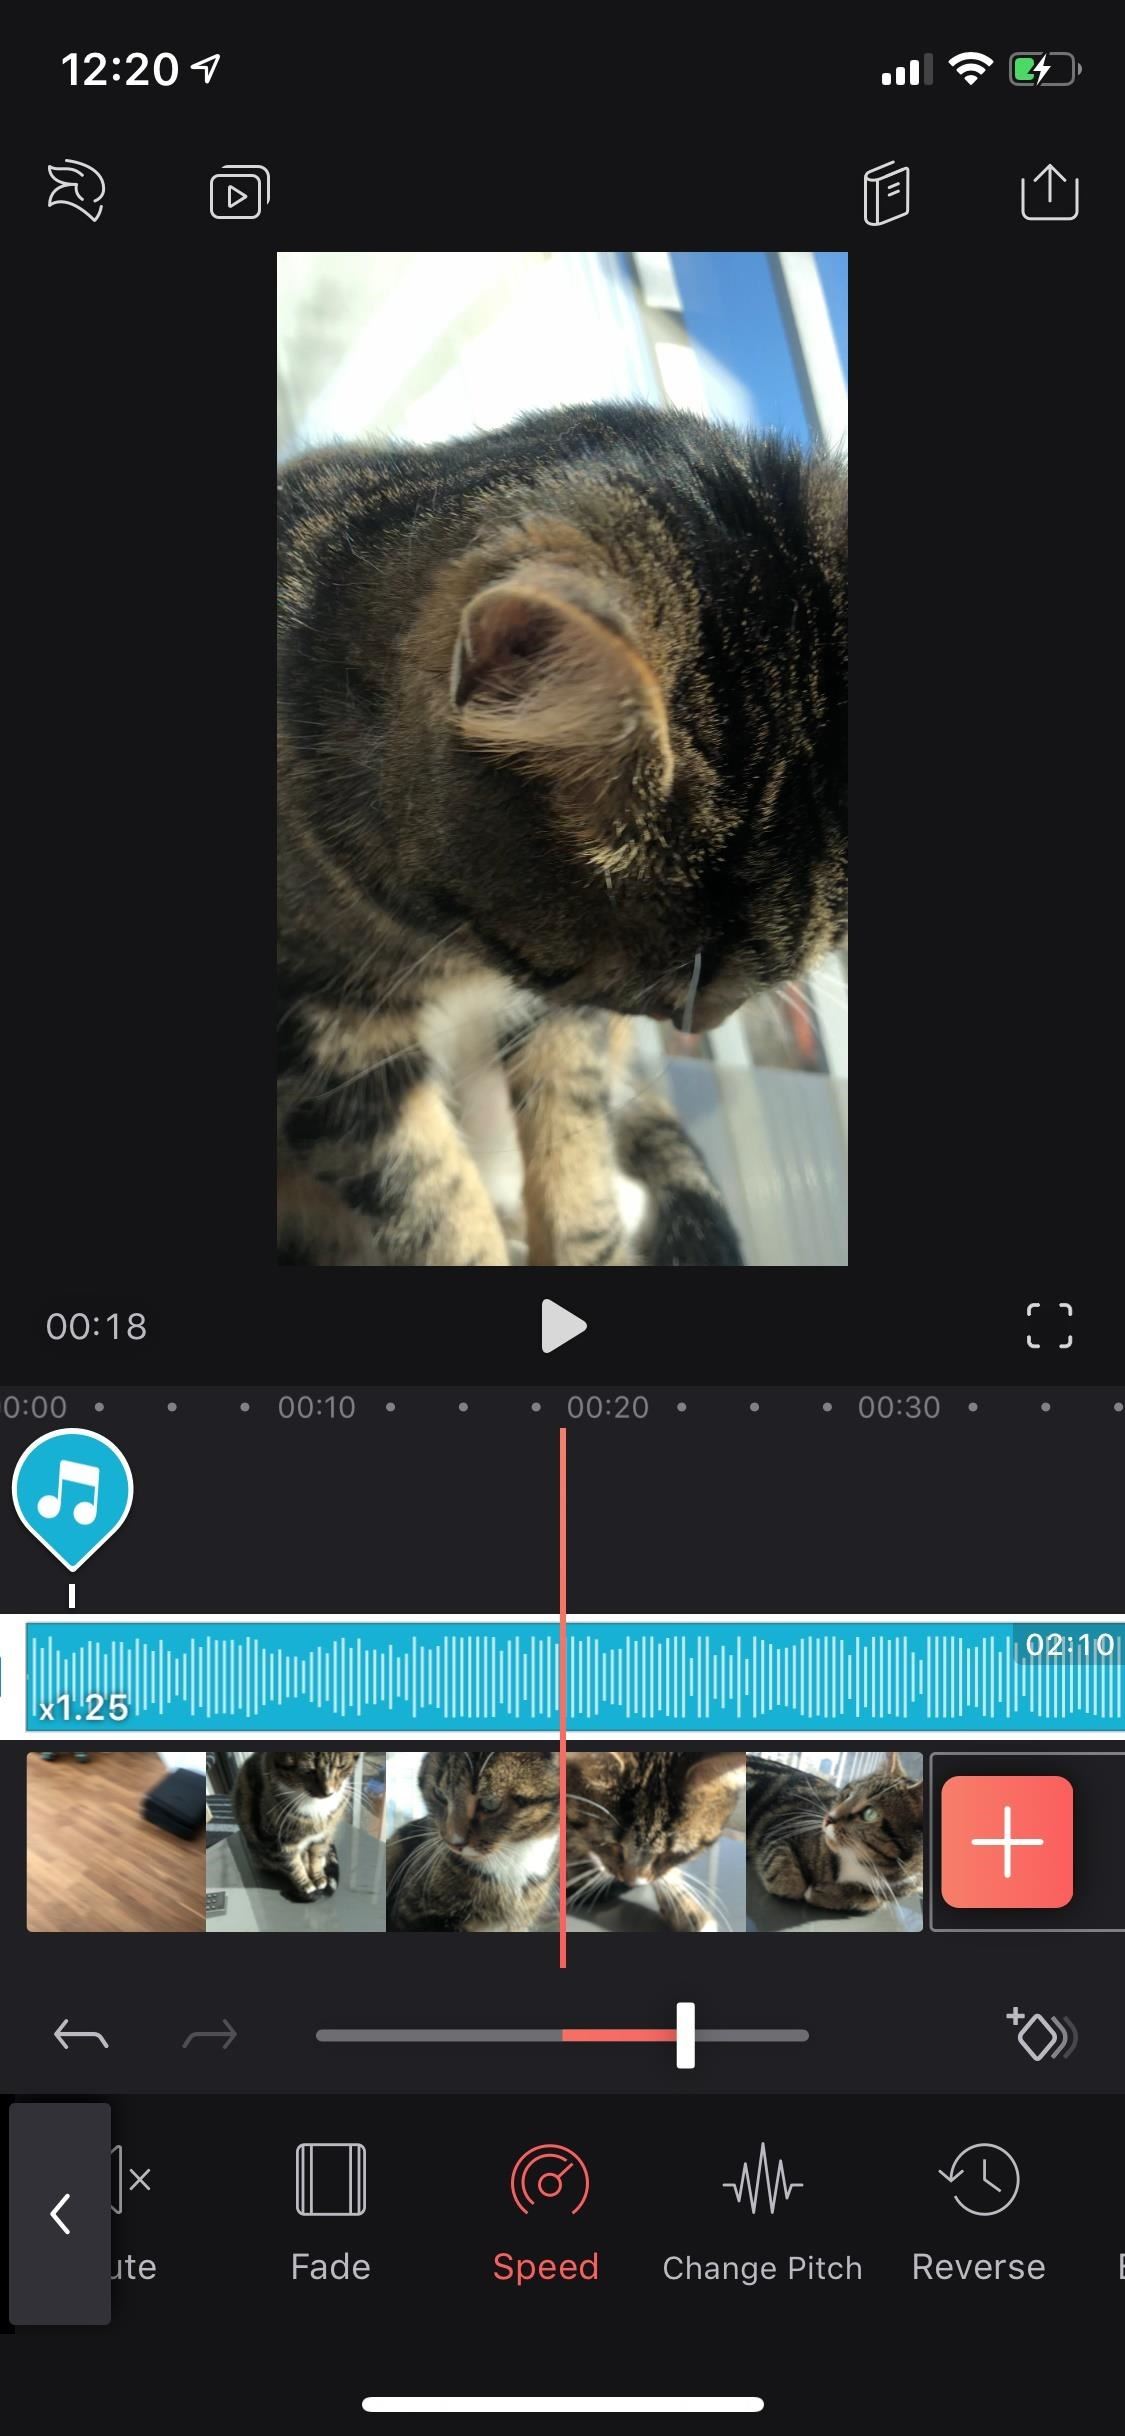
Option 3: Speed & Change the PitchUsing the "Speed" tool's slider, you can increase the speed from its default of "x1" to "x5" (five times as fast) or decrease it to "x0.12" (about a tenth of the normal speed). Doing this will increase or decrease the amount of time the audio clip takes up in the timeline. This can be used to correct audio that has the wrong speed, match the audio closer to the rate of the video, or mess with the tone of the audio.If you do change the speed, you can use the "Change Pitch" tool to keep the speed and the original pitch, the latter which is usually affected when changing speed. For example, if you slow down the speed of your audio, the pitch will also drop. "Change Pitch" normalizes the pitch and brings it back to the original sound, while maintaining the slower speed.When using "Change Pitch" on a song, the instruments will have a changed pitch, but the vocals will revert to the original sound. On its own, "Change Pitch" does nothing; you must change the speed for this feature to work. You can tap "Keep Pitch" to revert the changes.
Option 4: ReverseThe "Reverse" setting does exactly what you think — it reverses your audio. Reversed audio makes an excellent background for a creepy or horror-inspired video. You could also use it to reverse already reversed audio back to normal.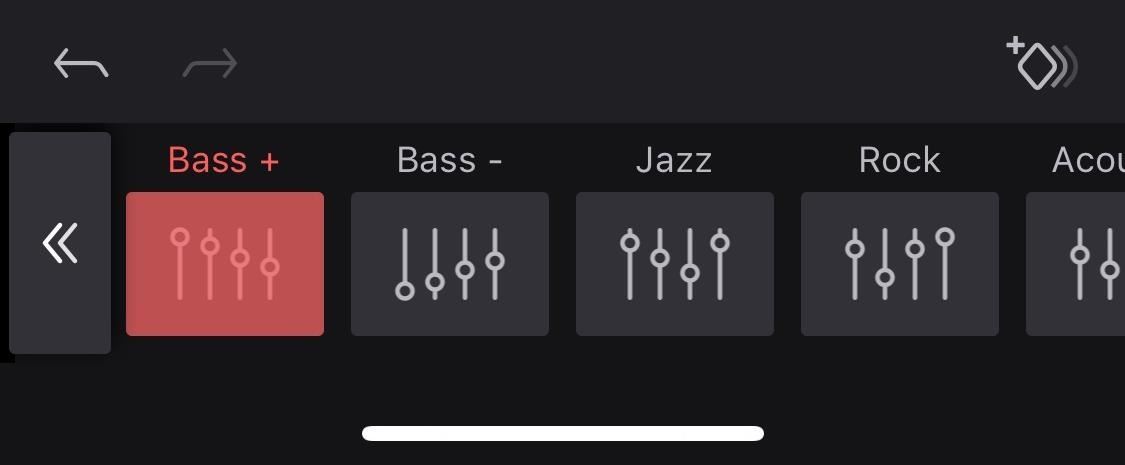
Option 5: EqualizerWith "Equalizer," you can adjust the EQ of your audio using the Bass +, Bass –, Jazz, Rock, Acoustic, Treble +, and Treble – options. Use a preset to accentuate the specific audio, so that it shines more. Adding more bass will rattle your speakers while an acoustic EQ will bring out the warmth in your audio. Play around with the EQs to see what each one brings to your audio. You can only use one.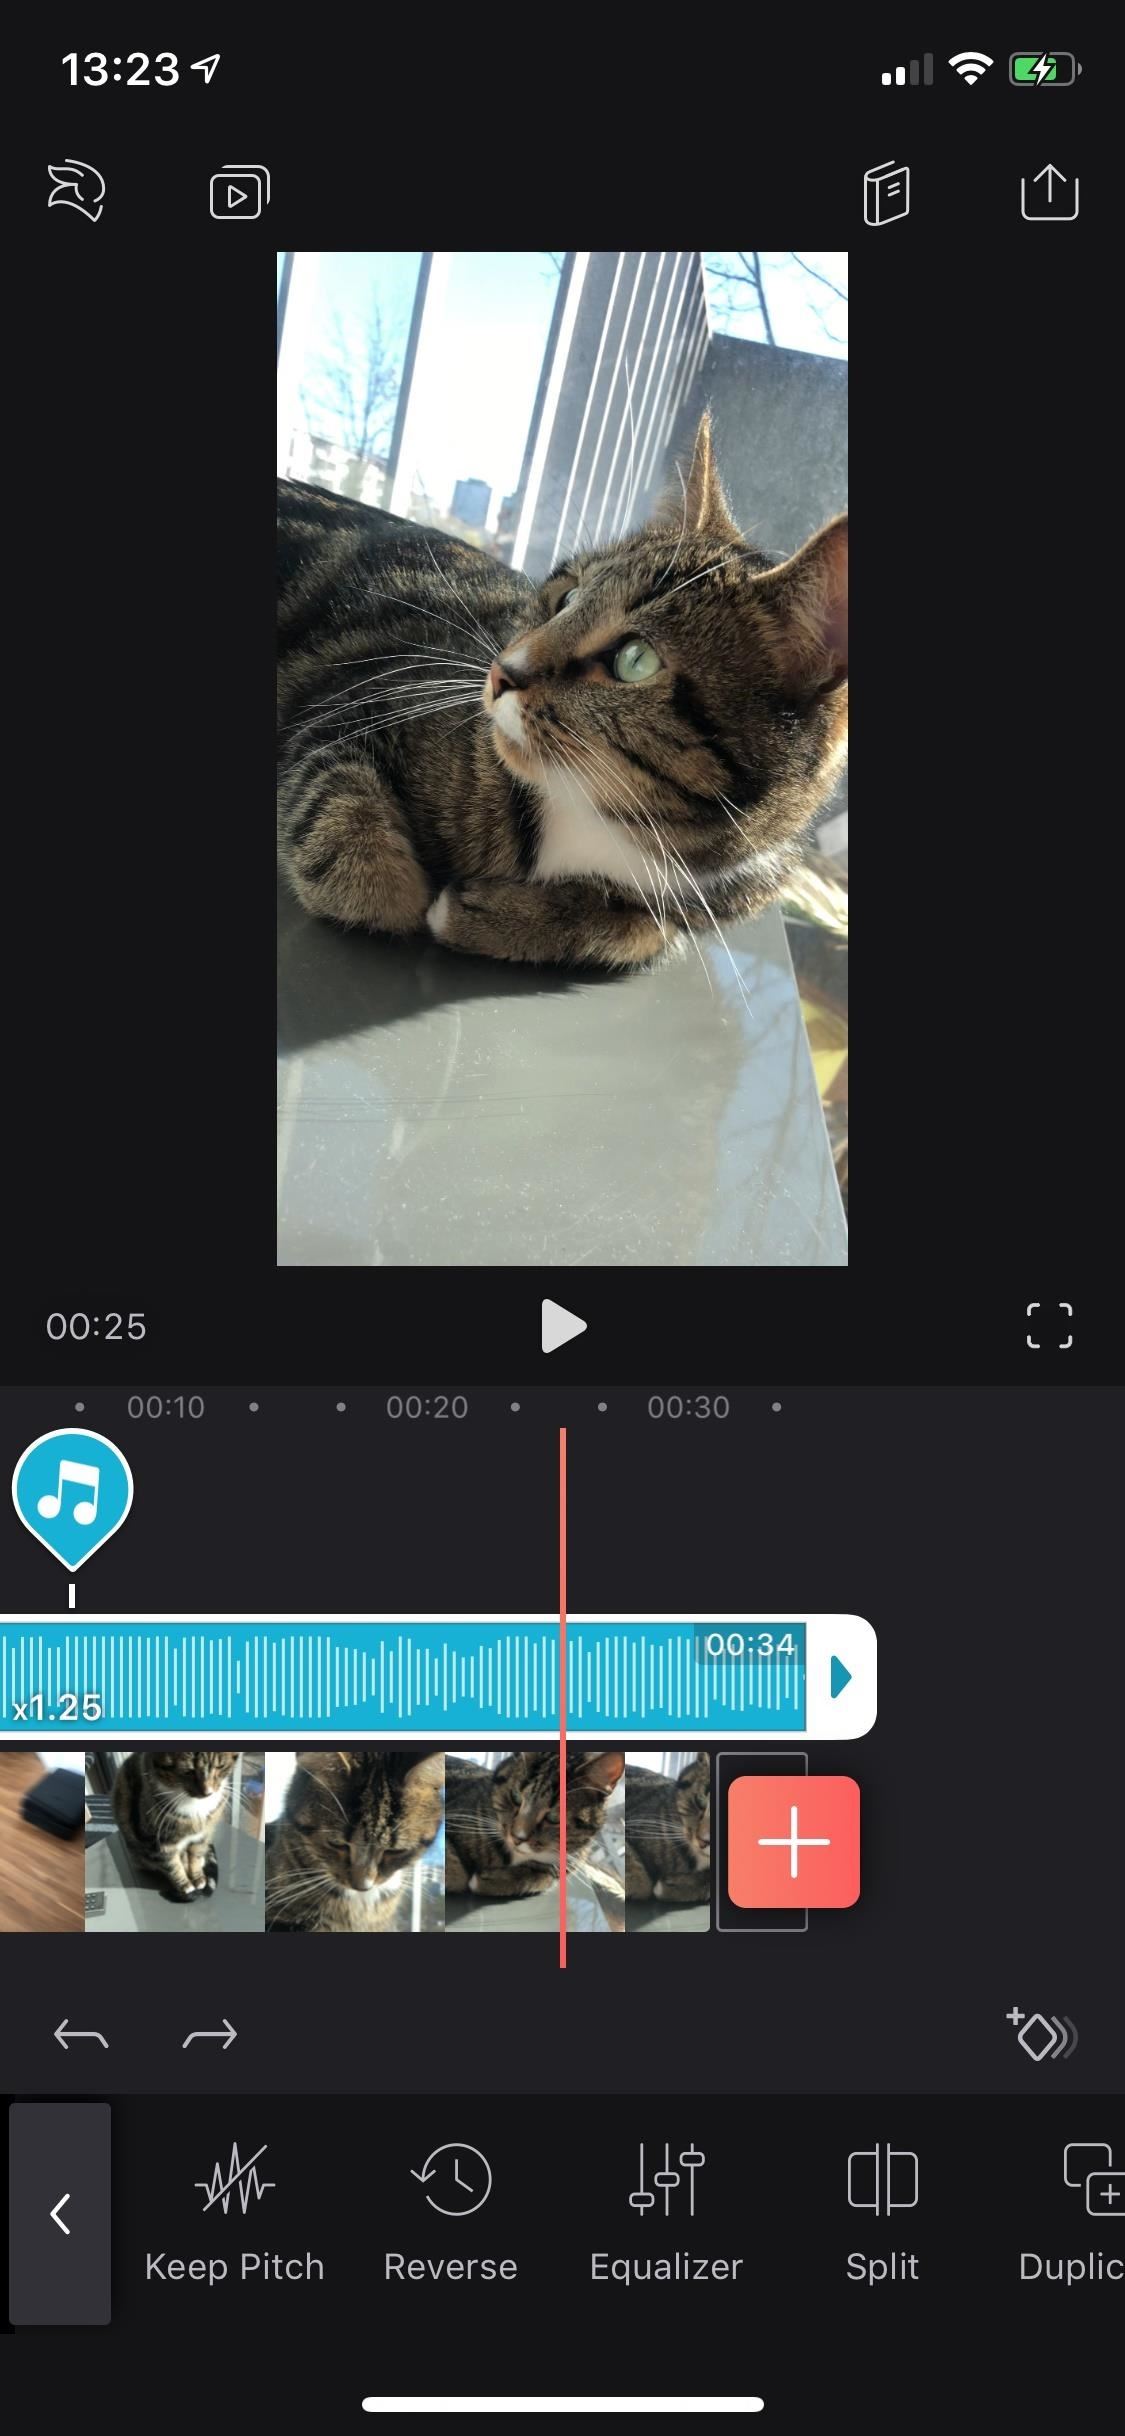
Option 6: SplitThe "Split" tool allows you to cut the track anywhere, giving you two different sections that can be played without interruption if laid next to each other. It's useful if you want to add a transition or animation to only a specific portion of the audio. Also, to delete parts of the audio, especially a section in the middle.To split the track, move the playhead to the section where you want to cut, and tap "Split." If you want to remove a section of the audio in the middle, move the playhead again, and hit "Split" where you need to. Then, you can remove the portion in the middle and combine the two other parts if necessary.
Option 7: DuplicateTo create an exact duplicate of an audio clip, use the "Duplicate" tool. It will create another layer, so only use this if completely necessary, mainly because the free version of Videoleap only allows three layers maximum. Duplicating is useful for overlaying an audio clip with an effect over the original audio clip to get some unusual sounds. It's also helpful if you need the clip again and don't want to re-import it. If you want more layers, you can upgrade to the pro version, which costs $5.99 for 1 month, $35.99 for 12 months, or a one time-time purchase of $69.99.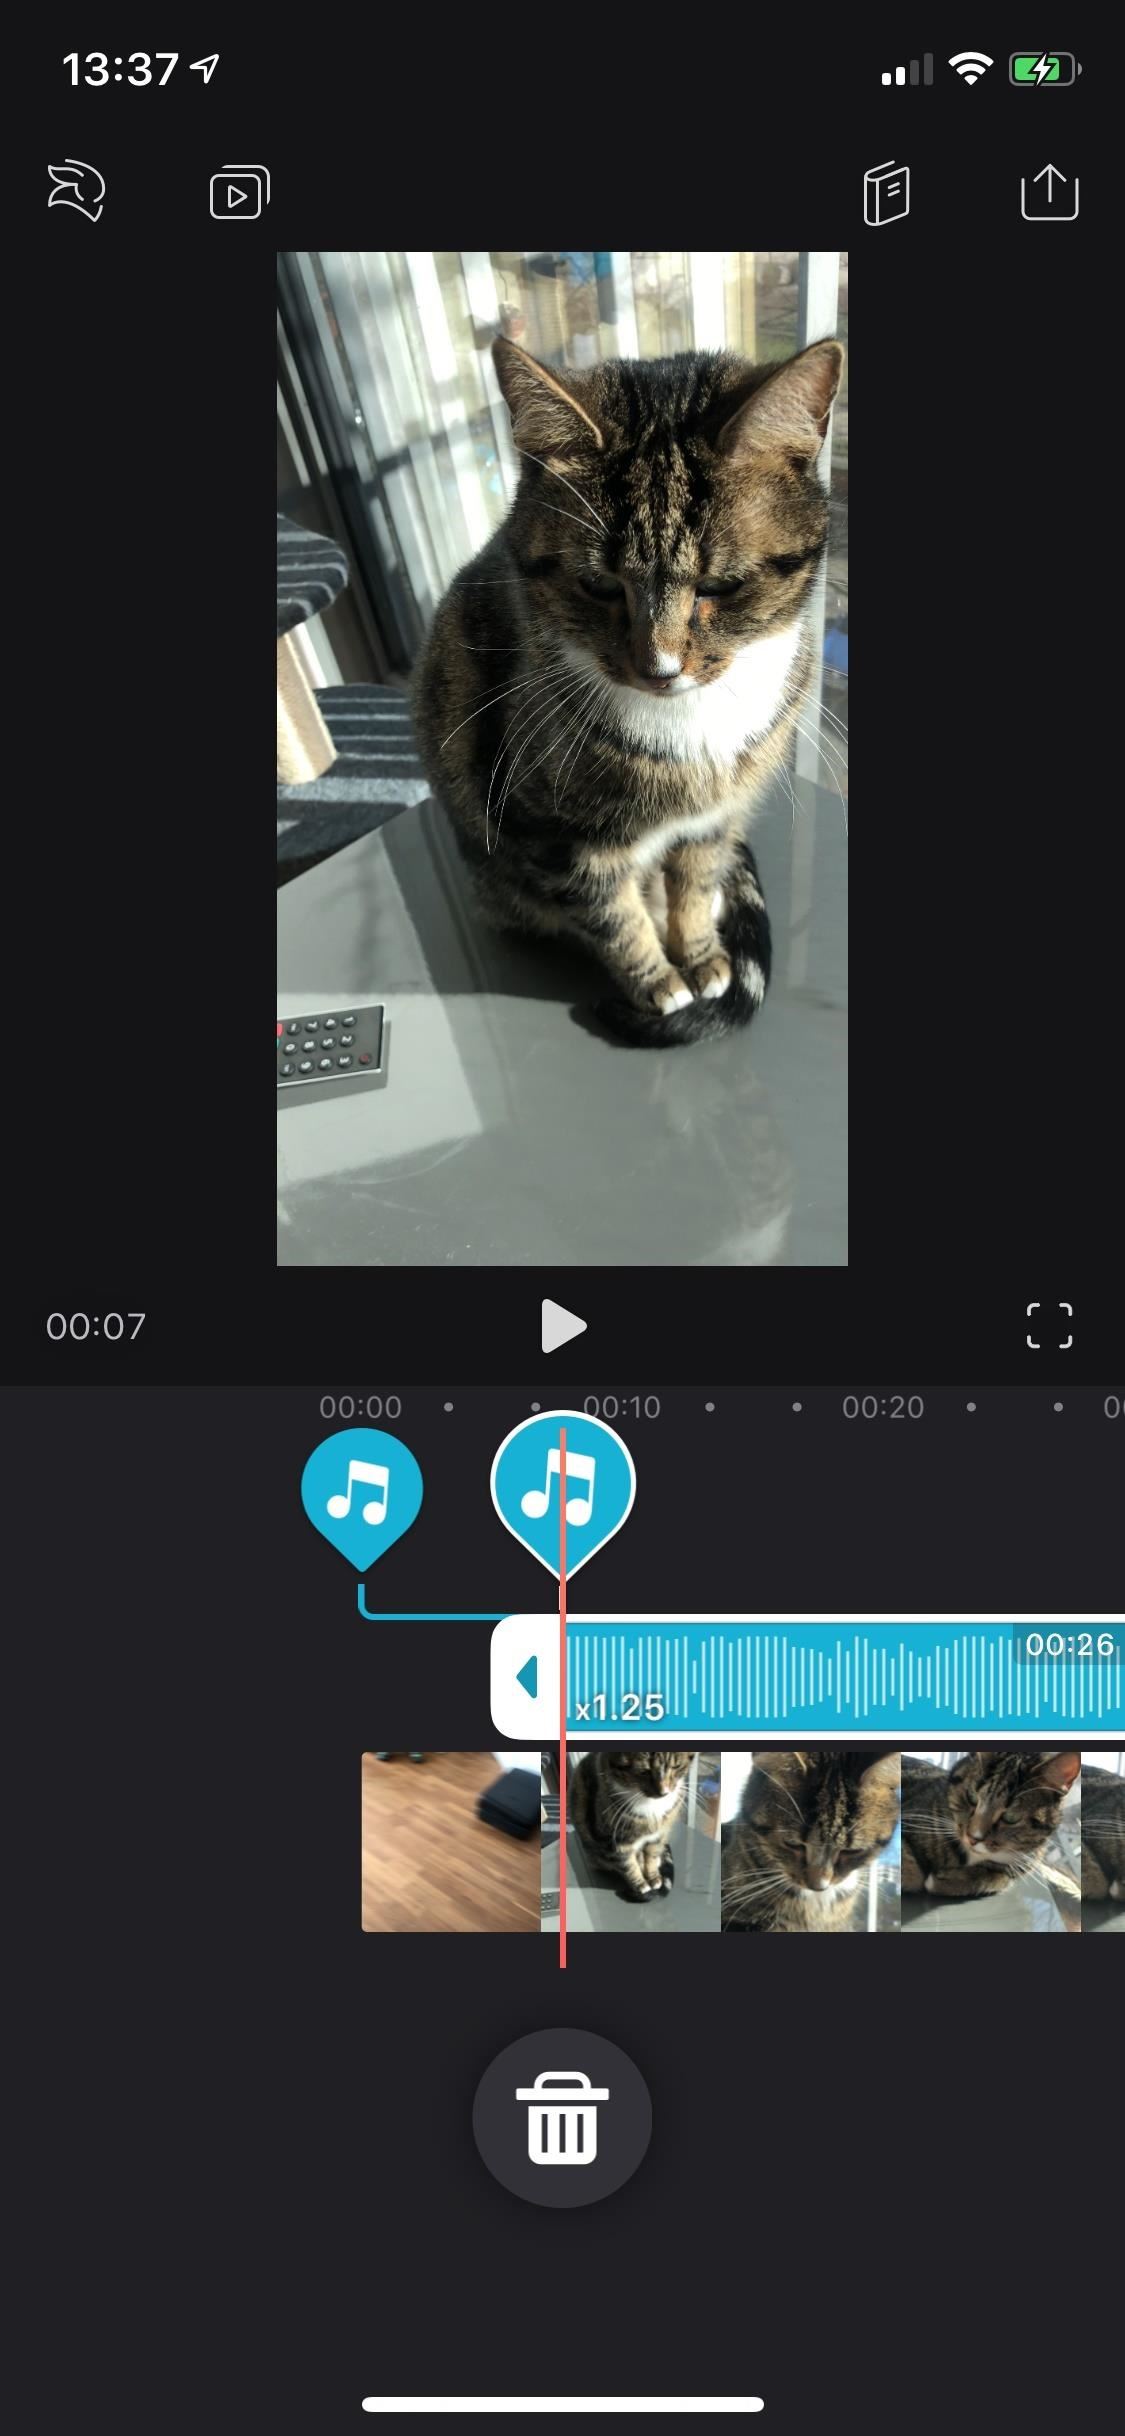
Option 8: RemoveTap on "Remove" to get rid of an audio clip. Alternatively, instead of using the toolbar, you can tap-and-hold the audio clip, then drag it down to the trash. If you've split a clip, you can use this tool to get rid of only a portion of the track and not the entire thing.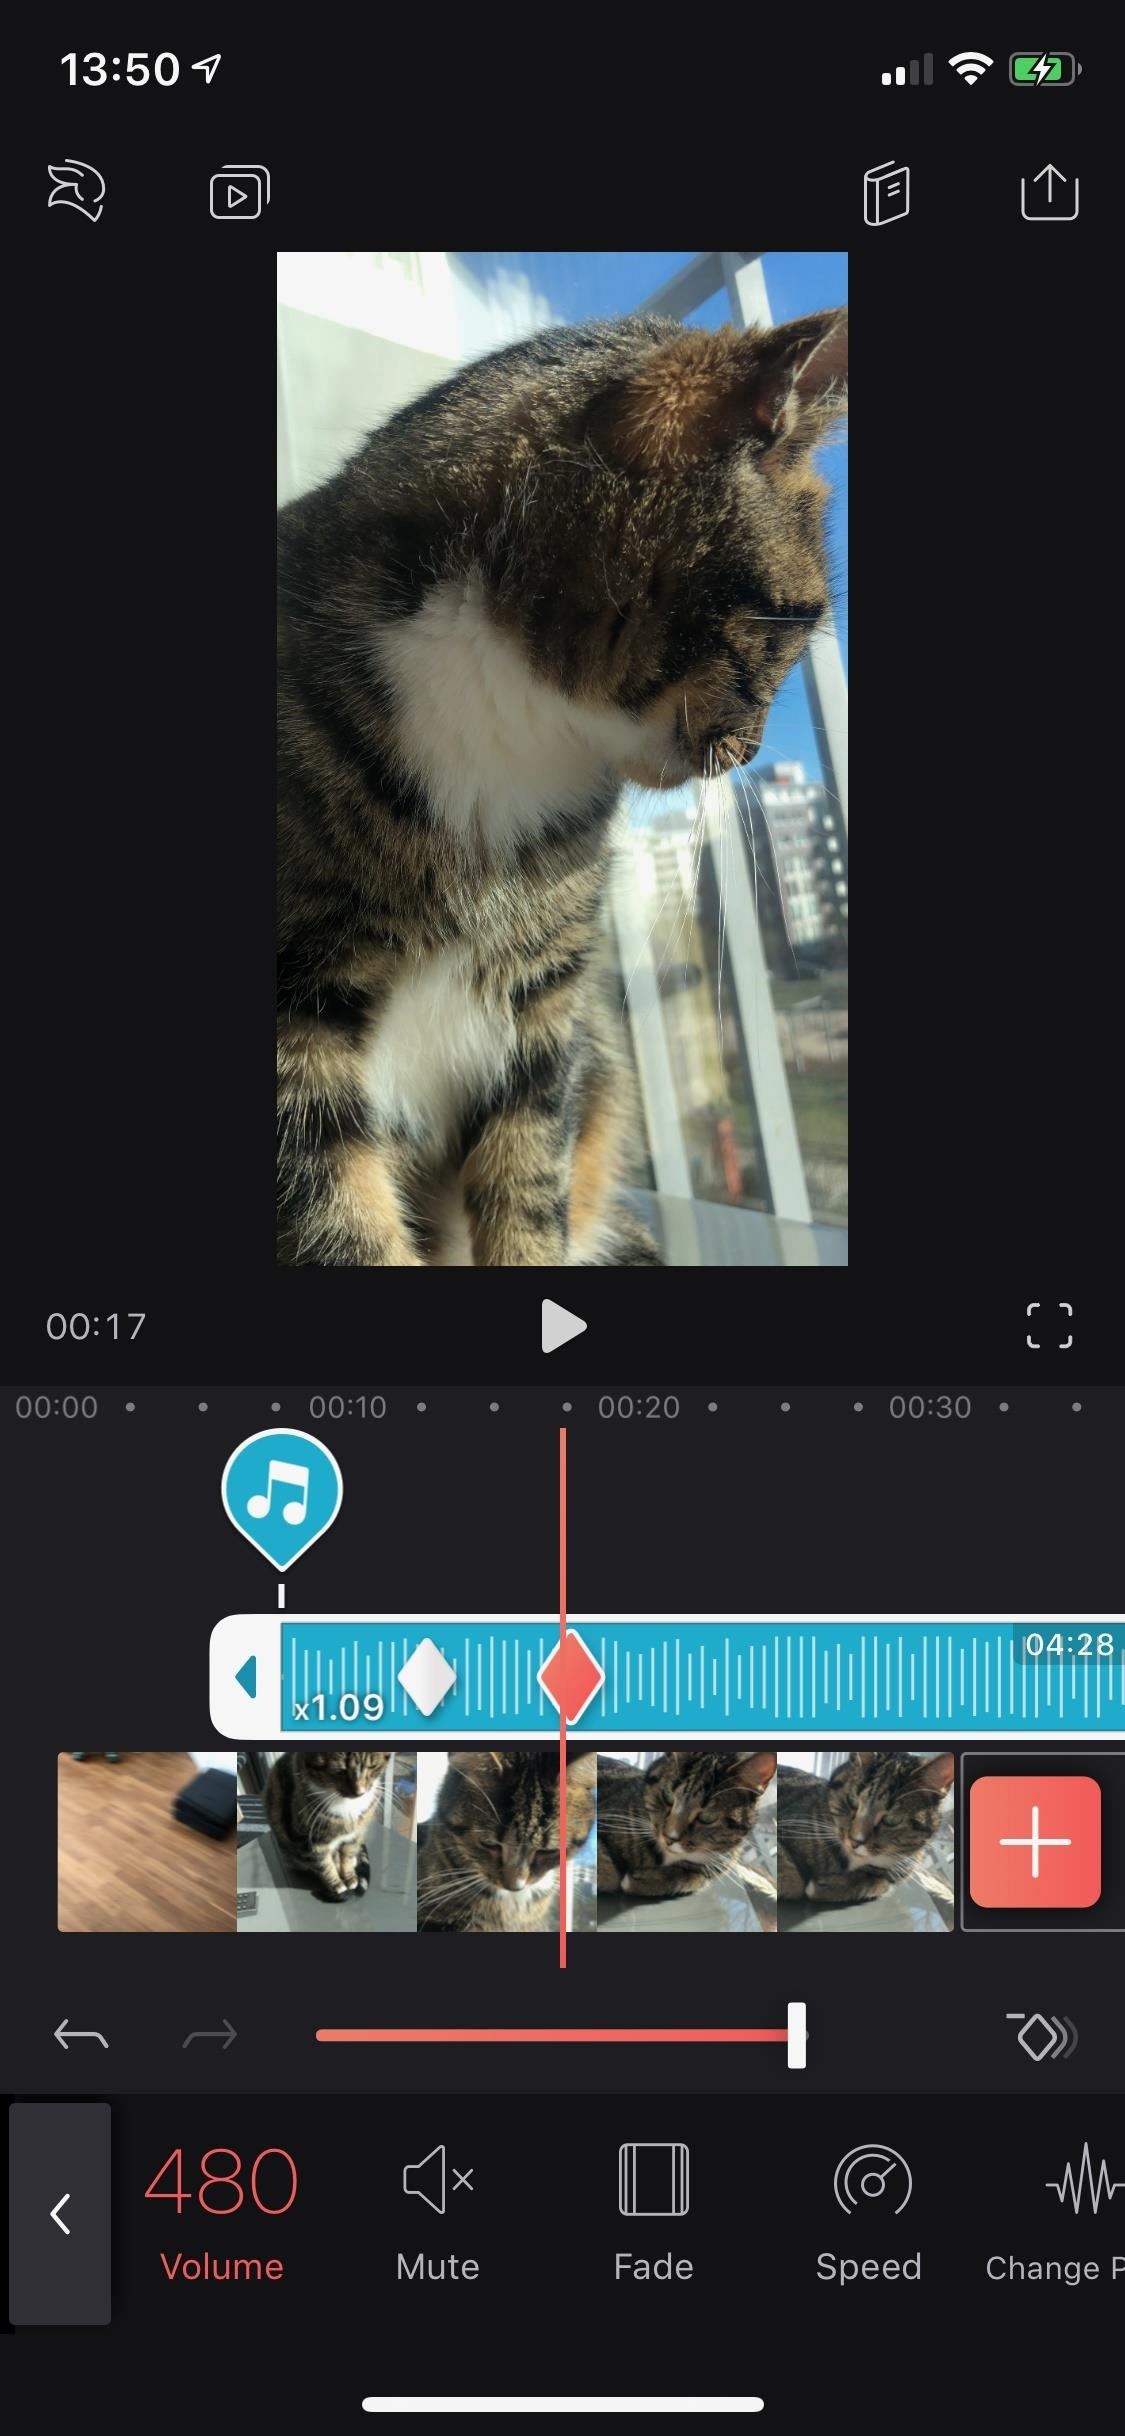
Step 4: Use Keyframes to Change Audio Edits Over TimeIf you want to change edits to the audio over time, you can take advantage of the keyframes feature. For example, if you're going to increase the volume of the audio over time slowly, you can set down a few keyframes (using the diamond icon with the plus sign) and increase the volume of the audio as you move throughout the timeline. If you want to learn more about keyframes, check out our in-depth guide.More Info: Use Keyframes to Animate Effects & Create Transitions in Videoleap This article was produced during Gadget Hacks' special coverage on smartphone-based video creator tips for filming and editing. Check out the whole Videography series.Don't Miss: Add, Customize & Animate Text Layers in Your Videos with Enlight Videoleap for iPhoneFollow Gadget Hacks on Pinterest, Reddit, Twitter, YouTube, and Flipboard Sign up for Gadget Hacks' daily newsletter or weekly Android and iOS updates Follow WonderHowTo on Facebook, Twitter, Pinterest, and Flipboard
Cover photo, screenshots, and GIFs by Nelson Aguilar/Gadget Hacks
Android 9.0 Pie moved the status bar clock from the right corner to the left to accommodate phones with notches, but there's one major downside for Samsung users: since no Galaxy phones have a notch, all this did was take away space for the notification icons that would otherwise start from the left
android - Controlling the Alarm icon in status bar - Stack
SUAOKI Led Camping Lantern Lights Rechargeable Battery (Powered by Solar Panel and USB Charging) Collapsible Flashlight for Outdoor Hiking Tent Garden (Emergency Charger for Phone, Water-Resistant) 4.1 out of 5 stars 1,080
Solar Battery Charger
AD
Onlybatteries.com
Report Ad
Universal solar battery chargers. Recharge aa,aaa,c,d and 9 volts
Not your average Android news — a diverse mix of advice, insight, and analysis with veteran Android journalist JR Raphael. News Analysis How to make your home screen look like KitKat -- without
How to configure Android L launcher on Nexus 5 or similar
How to Scan Your Samsung Galaxy S3 for Malware, Infected Apps
If you're looking to expand on your collection of digital tools, Maps Measure, from Android dev j4velin, created of Pedometer, turns your Android device into a distance and area measurement tool. Utility tool apps provide extremely powerful and useful lightweight replacements for your parents' heavy archaic tools—everything from flashlights
Measure Distance Google Maps Plus How To Measure Area
A brand new Android 4.4.4 KitKat firmware has been rolled out for the Galaxy Note 4 International variant. Check the instructions listed in this post in order to learn how to successfully install
How to Get the New KitKat-Style - Samsung Galaxy Note 3
How to Unlock VLC's Hidden Jigsaw Puzzle Mode The VLC media player just celebrated its 15th birthday in February 2016, marking a decade and a half of hassle-free video playback for hundreds of millions of users on virtually every major operating system.
How To Unlock VLC's Hidden Jigsaw Puzzle Mode
Although the Galaxy Note 9 is an amazing phone, many members of the Android community won't even look at it. This isn't just because of the Samsung Experience skin, but the large amount of bloatware that comes with this device. However, with a little work, you can remove all of it. With a computer
Galaxy S8 Bloatware List - What to Remove, Keep, Consider
Download your selected video. Click the downward-facing arrow below the video to do so. This will prompt the highest available quality version of the video (excluding 1080p) to begin downloading onto your computer.
How To Download an Embedded Video From Any Website
Tendigi's Nick Lee, who put Windows 95 on Apple Watch, has now up with a more useful hack: running Android on an iPhone. The hack requires both hardware and software customizations, so you won
Exclusive: Dual-Boot Android on Your iPhone - Gadget Hacks
Your customizable and curated collection of the best in trusted news plus coverage of sports, entertainment, money, weather, travel, health and lifestyle, combined with Outlook/Hotmail, Facebook
AOL.com - News, Sports, Weather, Entertainment, Local & Lifestyle
This is where this BMW technology comes into play and saves the day, allowing you to simply talk to your car for directions. We encourage you to watch the how-to video on this page to learn precisely how to use this type of navigation system available in many BMW models. If you have questions about voice-command technology or BMW's fancy
06 BMW X5: /nav., bluetooth, on board computer..Navigation…
Hey, This is exactly what helped. My browser flashed the message briefly on one video after installing this, but now the videos work! Thank you for plain english.
How to play all YouTube videos without Flash installed
0 comments:
Post a Comment